Sunday, July 31, 2011
CG art: Poseidon rising
At last, I'm back with a post! Just in time, before July expires -- we're a day ahead of you guys in the US and Canada, UK and Europe ... the international dateline and so forth. Huge apologies for not posting in days. I've been so busy, I haven't had time to think, much less post. A lot of it has been about artwork, but not art I'd be posting here. So --
Only one today, because this is your actual, genuine painting, not "just" a 3D render. A 3D render is where you hit "go," and the software does everything, and you come back in a few minutes and say, "Oh, isn't that pretty, let's call it done!" The difference is, this one was painted under, and on top of, the figure.
Start with a sky I photographed back in March 2008. Tweak the color, gamma, contrast ... add a sea-green strip across the bottom to represent the ocean. Then "fog up" the horizon with, uh, fog brushes. Then paint in the ocean with ocean brushes (a lovely set of brushes called Elements of Nature - Ocean Waves, which you can get from Renderosity for about $5 or so. Take a tip: don't use free brushes. It's nice to download things for free, and often free things can be great quality, but "free" brushes tend to come with an awful lot of strings attached, and when you're starting to sell your work, you're going to get tangled up in all that red tape).
So, with the background painted, ship it into DAZ Studio as the background. Import Michael 4 and pose him. Add skinmap (this is JS Alexandre, hairy chest, hairy forearms, beard line and all). Create a new face with the Morphs++ pack. Add a hairdo (this is Danyel by Neftis Salon). Add costume (that's the Euros overskirt with a kind of seasnake pattern, hue and transparency set be me -- they're not part of the model kit, but I can tell you how...).
Now, lights! Set up shadows ... raytrace. Come back in 15 minutes to see the results (just time for a cup of tea). Ship the render into Photoshop for the OVER-painting to start. What's painted over? The waves in the foreround; the splashes; all the water streaming off and exploding off him; the birds. This was done with Ron's Hydroexplosion, Ron's Splashes, and Ron's Birds -- all of which are brush sets you can get from DAZ ... maybe $10 or so per set, I think.
So, what went into this? A digital image of a pretty neat sky, taken in Noarlunga in 2008; three 3D models (guy, hair, skirt); and a heck of a lot of painting ... so much, in fact, I have to call this a painting, not a render. It also took a good hour to do this, maybe a tad longer, so -- just the one image today.
Um ... be back in August!
Jade, 31 July
Tuesday, July 26, 2011
DAZ Studio 3, Photoshop and Serif Page Plus shake hands
Best-laid plans went right out of the window today when a job went ballistic on me, in the most fundamental sense of the word! (The term comes down to us from the early days of rocketry. A missile that was under proper guidance was fine and dandy ... when the ground crew lost control of it, gravity took over and said missile began to dance to the tune of the "ballistics," that being the weird science of how bodies behave in motion, under gravity. There -- another bit of useless information for you.)
Long story short, I had a job blow up in my face, and by the time I fought out from under the rubble and wreckage I had 1. a splitting headache, and 2. about one hour to do artwork today, and I'd already committed to doing the cover art for Mel Keegan's White Rose of Night, so -- today it's essentially just one piece, which is actually a book cover.
Here's how it looks with the text objects pasted up:
This one was a challenge -- so many iconic things in the book which could have dominated the cover ... Crusader knights at the charge; a black magician weaving sorcery; castles and Saracens; the deserts of the Middle East. Hmmm. Iconic as those images are, not a one of them is easy to bring to the digital canvas, and in the end I decided to "go iconic."
The background is "derivative," as they call artwork that's sourced from something existing. It's a sketch from a nineteenth century engraving, which was under- over- and every which-way painted, before being used as a backdrop in DAZ Studio 3. The character was posed in front of it with lights and so on, and raytraced. The render was shipped back into Photoshop for more overpainting, with some "noise" added to the image when it was absolutely finished. This was then dropped into Serif for the text objects to be added; then it was exported out of Serif as the final composit image.
The longest part of the process was the raytracing ... all that hair! That there is a twenty minute render. Michael 4 is wearing a face and body designed by me; that's the Samson skinmap and the Spartacos hair set to golden blond. The forearm armor is from Powerage's Supreme Armor, and the loincloth is from The Wood God costume. (If you're sharp eyed, you'll notice you saw the same costume on the archangel in yesterday's post. It gets better: that's the same face and body as the archangel! What I did was, change the hair from the Yannis dreadlocks to the Spartacos hair, and wouldn't you know it, archangel becomes Saxon knight, circa 1190.)
White Rose is equal parts historical, fantasy and erotic romance. In fact, it's the most sizzling-hot thing Mel Keegan ever wrote, and I often wonder what was on MK's mind when he produced this one. I actually asked, the other day, and was answered with blank looks and, "You have got to be kidding me, right? That was 18 years ago, I have no bloody idea what I was thinking at the time!" A...ha. Well, whatever inspired the book must have been hot stuff, because the result is a huge technicolor canvas which, uh, sizzles.
Just got an email from MK, who's thrilled to bits with the art...
Back soon with, hopefully, a bit more coherence!
Jade, July 26
***Posted by MK because the internet is AWOL. Intermittent crap.
Monday, July 25, 2011
The archangel and the vampire. Say, what now?
As promised ... Michael 4 wearing the Icarus Wings -- and not much else! Actually, this is a whole new character, and I rather like it. I wanted to create a face that looked like it belonged with the wings -- an archangel, perhaps. Alien, with the potential to be very dangerous, and at the same time delicate and sensitive. It's no mean feat, when you get right down to it!
The skinmap is Samson, but there, everything else changes. The face and body morph were custom designed about an hour ago. The hair is the Yannis Rasta dreads set to blond. The costume is the loin cloth from The Wood God (new texture and displacement mapping) and the shins and forearm pieces from Powerage's Supreme Armor (with all the textures changes, once again). Then, the Icarus Wings -- new textures and displacement mapping. The prop in the background is DM's new one, The Clock, and that's just a backdrop photograph, though it's been heavily enhanced over the original sunset shot...
Want more? Try this:
I went back to the Nocturne project which had been thoroughly stuffed up by the fact DAZ had been telling me it was saving, while at the same time not saving my backups! Has anyone every had the program do this?? I've never seen that bug -- also, it'd be a bit late to go yapping to the company about it, because I still haven't upgraded to DAZ Studio 4! Am still using 3.2, because time hadn't permitted me the luxury of getting the new one, so telling them about bugs in an obsolete version would be a bit silly.
Note to self: get the new version download!
And here's the Nocturne cover all painted up and finished:
Nice. I'm happy with this. It freshens up the cover without losing the original version, which you see here repainted and used as he backdrop. Then the deliciously "tortured" Michael Flynn character was posed in front of it with fascinating lighting, and rendered (raytraced), before the render was shipped back into Photoshop for more overpainting. Reduced to 150 pixels high, it looks great, so I'm very happy with this...
Thanks to all for bearing with me. About four of you are waiting on emails from me! I was sick again over the weekend (understatement), and I'm working very hard on getting a monster stack of documents converted to the epub format. It sounds easy on the face of it, but it takes more time than you'd think. By the time I'm done, I'll have invested about 50 hours in the conversions, and when you remember that I had to winkle the time out of the working week(s) -- well, no wonder it took a few weeks to get it all done. Am just about caught up with myself now, though, so if you're waiting for personal emails from me, I'll be there soon! Thanks to all for your forbearance!
Jade, 25 July
***Posted by MK because the internet is AWOL. Intermittent crap.
Saturday, July 23, 2011
And it said to me, "Error while rendering." Ouch!!
I guess today proves that necessity is at least the maiden aunt of invention, and that interesting things can come out of the most frustrating circumstances...
Picture, if you will: I'm working along, creating all the elements for the new cover for Nocturne. Working in DAZ with two characters, about two dozen lights with complex settings. I save my work regularly. And then, with about three steps to go before the project is complete, wham! DAZ Studio 3 puts up this innocent little message, "Error while rendering." Program crashes to desktop. So you growl and go back to the saved ones ... or where the saved ones ought to be. Try this one on for size: DAZ was not saving. It was only telling me it was saving.
Ouch! So I wound up with two out of four of the pieces that were supposed to go together to make up the Nocturne art I'd had in mind, both saved as exports along the way; and after the crash I lost not only the poses (which are dead easy to recreate and not much of an issue), but about half an hour's worth of industrial strength fiddling with the lights.
Well, I supposed I could have done the whole thing over, but the truth is, I was way too disgruntled to tackle it, and decided to see what I could do with the pieces that survived instead. Hmmmm ... what I ended up with was a painting, and a damn' nice one. Very, very different from the project I envisioned when I started, but still a very nice painting.
Now, I'm not saying I'll go with this piece of artwork for the actual cover of Nocturne, maybe because the book is the textual equivalent of "Ben Hur Meets Avatar, with Gay Vampires" and it actually deserves to have an amazing technicolor cover! But it's definitely worth a look -- worth uploading.
The other piece -- the male nude with the full moon -- is the cover for Dangerous Moonlight. As the English say, that book has had more covers than I've had hot lunches! This one is a synthesis of them all, and I'm very, very pleased with it. This is definitely going to be on the epub version which goes into circulation in a few days. Nice!
The image of the moon is interesting: it's a picture captured with a long, long lens over the roof of the backyard shed, about five years ago!
And here's what the job looks like with text objects pasted up:
And sure, I'll go back to the Nocturne cover and do it over tomorrow. Luckily, the vision of the "proper" cover is still hovering in my imagination, and I'll beat it into shape tomorrow!
Jade, 23 July
***Posted by MK because the internet is AWOL. Intermittent crap.
Friday, July 22, 2011
The steampunk clock, the wings, and ... stuff
Just one image today ... because it's actually three images combined into one...
The sky was generated in Bryce 7 Pro and then overpainted in Photoshop, and this gave us the background. The foreground is a test-drive of two new models I got last week -- DM's new "The Clock," which is a giant steampunk, uh, clock, and also the Icarus Wings from Poisen, which are not new, but were on sale a while ago.
The whole image was rendered in DAZ3D, and then shipped back into Photoshop to be painted in subtle ways ... no big splats and weals of color or tone, but a lot of work in the shadows, burning in colors, that kind of thing. But quite enough painting was done on it after the render for it to constitute a whole new image.
That's Victoria 4.2, wearing the Uranus hair, the Andromeda costume and the Age of Armor boots; I changed out all the textures for blues from the TMP Designs textures, to match the wings.
Does the piece have a theme? Ummm ... I don't know. Does it?! It could be something really deep and meaningful, like "Time is the enemy," or it could be a frame from a "shoot the zombies" game. I'm inclined to think the latter, because I can't help remembering Paul Bettany in Legion. (That movie contrived to be a lot of fun, actually ... weird enough to be a challenge, but with just enough substance to deliver the goods, whereas I was disappointed with Wanted. Now, there was a movie I thought was loaded was potential -- based on the Top Cow comic and starring Angelina Jolie and James McAvoy. I'd seen the trailer at the movies, and hired the DVD thinking, "how could you go wrong this this?" Oh, the director found ways! It turned into a pure bloodbath, and the script? It was originally 22pp pages long, and when told to make it longer, the writer filled 78pp with profanity. Hmmm. "Could have been a lot better" is being kind. And boy, when I wander OT, I sure wander OT, don't I?!)
These wings will look great on Michael 4, too. Hmmm. Come back tomorrow...
Jade, 22 July
Thursday, July 21, 2011
Comic art and Photoshop effects
With work piled up to high to get into a serious art project today -- only a spare hour to be scrounged -- I decided to play in Photoshop on my tea break. For a while now, I've wanted to play with its merge modes, and especially with its ability to work various merge modes across various layers to create artistic effects. This is not something I ever spent much time on, in Micrografx -- not because the tools aren't there in the old software (they are) but because I had no use for this kind of art before.
But with comic and games art becoming so vastly popular today, I've been taking more notice of this area. Today's comics are digitally generated (they also cost a tonne of money! Have you notice the price of comics lately? Phew!) and the art is amazing, even on the small mags. On the big books, the full-on graphic novels like Slaine The Horned God, by Pat Mills, the work is astonishing.
Speaking of Slaine, you have GOT to see this ... see what fans are doing on the desktop these days:
...that's not a major motion picture from Peter Jackson. That's a bunch of fans in Spain spending a year or more bringing the comic book to life as a trailer for a movie that doesn't exist. I know every panel and every word in the three 100pp Slaine books, and this -- is -- it. Am gobsmaked by this -- check out the details here: www.miguelmesas.com Oomph. Would realy love to see this as a movie...
Anyway --!
Sorry for wandering off topic, but mentioning Slaine jogged my memory. It's amazing what fans are doing on the desktop -- and I predict that in the years ahead, some of the best comics and graphic novels are going to be born on the desktop and distributed over the Internet. I've got rather a hankering to be involved in it, as it unfolds, so I thought to myself today, "Hmm, if I only have an hour going spare, let's go play in Photoshop and see what happens.
This sort of thing turns out to be very easy, and the results you can generate are almost limitless -- you might need to see these two at LARGE size to see the effects properly, because they're from quite large images, and the more they're compressed size-wise, the less that arty attributes show through:
Here's a VERY quick cookbook method for how to do this:
Finish your render in DAZ etc., and save as an image. Open this in Photoshop and then select FILTERS > Find edges. Then convert the result to grayscale. Then go ENHANCE > Brightness and Contrast. Crank the contrast to 100%; darken a little if you lose too many fine lines. Then, LAYER > New Layer. Paste the original render into the new layer, and drag this under the line sketch. Now, with the line sketch on top, play with the Merge Modes and opacities till you see something you like. A good place to start is "Overlay" and 100%. When you're happy with the result, flatten the image to a single layer. Now, you can play with the lighting and color to your heart's content till you have something you really like ... save it. When you know your way around Photoshop, the process should take about five minutes, not counting doing the original render, obviously. I did ten in under an hour, and am uploading eight.
Interesting, no?
Jade, 21 July
Wednesday, July 20, 2011
CG art: The Magician's Pet
CG art and 3D render shake hands here. It's about half and half render and digital painting ... and I must say, I'm enjoying Photoshop more and more. Am getting used to it incrementally (BIG increments, that is), and at last am growing accustomed to the way it does things --
Halfway through this piece, I gave myself a kick and said, "Learn something new, why don't you?" So I stopped painting on the canvas of the original render, and painted in layers from then on. To you guys who've been using Photoshop for yonks, this is No Big Deal. But I always found GIMP's way of handling layers to be less than friendly, and of course when I wanted to do anything at all I ran home to my old favorite, Micrografx. Wellll ...
This time, I'm going to give myself a pat on the back, because I didn't do anything at all in the old programs. Gave this to myself as an assignment, and did the whole thing in Photoshop!
So what's going on in this painting? That's DAZ's Michael 4 wearing the JM Alexandre skinmap and the Akasta hair set to dark brown, and the Euros overskirt with texture and opacity maps by self. The props are a wild and woolly assortment of props from DM and ADS, most notably The Mage's Study, Fantasy Visions etc. -- you can get them all from Renderosity. Carpet is actually the plain, boring old rug from the Apartment 39 prop set, with a texture and displacement map set my me to make it interesting! It turns from a flat carpet into a battered, beat up old leather carpet. The floor and wall are planes wearing various textures ... marble, tiles and what have you.
Then the fun begins. First, the lights and shadows, which you can play with to get them juuuuust right for the final render in DAZ. Save this, and import it into Photoshop and start, uh, painting! Smoke, candle glows, drips down walls, gleams on things, deep shadows ... yup, all painted. And by the time you're done, when you go back to the original render you're bemused by how plain it is! Much of the painting was done with a terrific brush set I just got -- Mystikel's "Dirt" brushes, which is a huge set of cracks, grunge, splatter and muck brushes, from Renderosity for $8. Money well spent there! I also used Ron's Smoke, and Fog, and Bokeh Lights.
Last thing I did, just before uploading this, was to apply a 3% "uniform noise" filter to the whole shebang. What this does is take a tiny little bit of the tack sharpness off the render, which for some weird reason makes it look richer. Don't ask me why; it just does. Mind you, to see this effect you'll have to view the piece at large size. I uploaded it at 1000 pixels wide, so you can do just that.
So, just one image today, because it's more of a painting than a 3D project, and the only downside to this is, it takes a lot more time to paint a picture than it does to click "render" and then buzz off to the next job and let the render engine do its thing in the background!
Nice, though, innit? I call this one The Magician's Pet. He could be a student learning the magician's art, or he could be a captive, upon whom the spells are practised. He's lost count of the times he's been turned into a newt...
Jade, 20 July
Monday, July 18, 2011
Mister Mystery ... or, the CG He-Man gets a smidge of artistic treatment
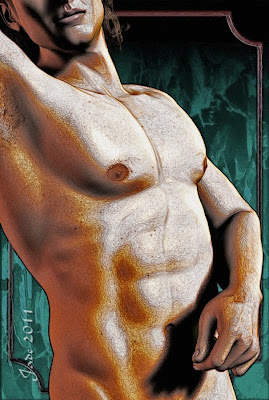
Mister Mystery? Well, put it like this: here was a physique in search of a face, until I'd given up on it, gone away in a huff, made tea, come back and decided to take another go at him! The physique worked brilliantly, first time, but the face looked like ... a thug. Seriously. Everything I did with him made him look more like a mass murderer, so I'd more than halfway decided to set one light and stand him in the shadows, make the most of the fantastic physique and just not even get into the subject of his face --! In the end, I wound up with something very different and pretty effective. You know, he reminds me of someone. Now, who is it?
The skinmap is JM Chase, with the tattoo option turned on. The hair is the Akasta Hair set to a kind of dark blond. The denims are the pants from the Cold Life costume set. The physique and face ... all mine, like the background abstract, which was paited in Photoshop, like all the arty-overpainting effects. These renders were actually raytraced, and they use ONE light. Just one.
Sorry for being brief again. Just not feeling up to verbosity just get, though I think it's possible I might be starting to show the hint of a suggestion of getting better...!
Back soon with a tad bit more coherence...
Jade, 19 July
Book covers ... challenge accepted!
Book covers again, but in fact if you take the font objects off them, the works themselves are very nice pieces!
And what do they look like, when the text objects are overlaid? Take a squiz:
People often overlook the importance of the text objects, but the fact is, they can be almost artistic in themselves. There's so much you can do with fonts and font effects.
Looking at these pieces makes me go back to a discussion I read online a long time ago. It went along these lines: "If the guy, or guys, have their clothes on and are not actually in a clinch, how do you know it's a gay or m/m story?" There's no easy answer to that one, unless the image is also loaded with "gay signals" ... you know, like the blue kerchief in the right hip pocket, nudge nudge, wink, wink. Which tends to be more separatist than inclusive these days, yes? Or is it just me?
Anyway, we're making up all the epub versions of ebooks from waaaay across the years, and it's a great opportunity to indulge in suites of new art, and to touch up some images which were done eons ago.
Sorry for being brief. Must go and lie down for a while, and try to get warm. It's midwinter and coooooold, even when you're not sick. When you're sick to boot, it's a bit dire!
Jade, 18 July
Sunday, July 17, 2011
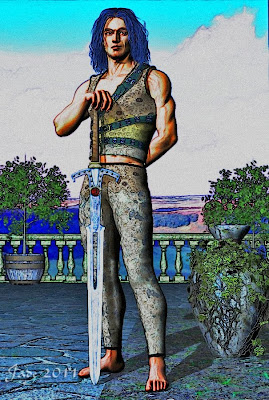
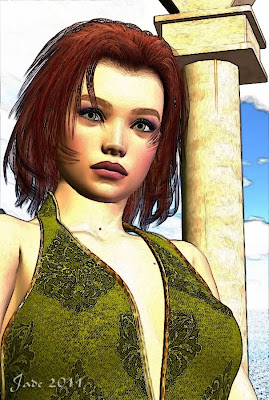
Elven Glam: testing skinmaps and transparencies. Nice results!
There's honestly not much (read: nothing) to write about today ... have been sick again, and am about to get worse, so I'll let the images speak for me. Cross fingers, I'll be feeling better in a couple of days, and will be able to write more here. Thanks for bearing with me!
Jade, 17 July
***Posted by MK because the internet is AWOL. Intermittent crap.
Friday, July 15, 2011
Conan, barbarian babe, seductive hunk -- and compudoodles. Neat.
(All uploaded at large size -- click to see BIG, so you can see the details...)
Just doodles today ... but clever doodles, combing a bunch of Photoshop effects and something I just discovered. I won't say "something new," because I imagine it's been out for eons, but I stumbled over it the over day, following an ad from from of the Photoshop brush sites. Have you heard of LiveBrush? Take a squizz:
LiveBrush is the ultimate compudoodle program. You basically load up brushes with all kinds of effects and ... well, doodle in glowing colors. These are some very basic patterns created while I was just finding the tools and figuring out how to configure the brushes and so forth.
The program does let you import an image, so you can paint on an old existing picture. This is what I did with the Conan shot (top render in today's post). The original barbarian and horse is an okay image, but it's a bit "stock." Ordinary. So I shipped it into LiveBrush and, well, doodled on it. Exported it again ... shipped it into Photoshop, also shipped in the original image. Played with the merge modes between the layers ... found something that looks grand. Flattened all layers and they played with the textures to go one step further and create process artwork out of it.
Interesting? I thought so. I went on and did another one -- the Barbarian Babe. Same process ... LiveBrush, then into Photoshop, merging two versions of the image, and then adding texture effects. Hmmm. That's not bad.
I didn't use the LiveBrush effects on this:
This is just the DAZ render whacked into Photoshop and merged with a kind of art paper texture, and then there's some kind of filter effect whacked over it ... creates a really classical, fifteenth century kind of look, which I like.
LiveBrush is highly recommended -- get the "pro" one, which is only $10 and loaded with your brush styles etc., and enjoy. Right now, I'm trying to make it import and export existing images without resizing them, but when it comes to designing whole new patterns and textures, it's dead easy and a lot of fun. And I'm sure the answer to the resizing question, concerning existing images, is in there somewhere. The program is loaded with features, and huge fun for ten bucks. The interface is very intuitive and if your computer is reasonably fast, it works extremely well.
Next, I need to get a whole raft of Photoshop brushes loaded up ... I bought them months ago (from DAZ), put them away and forgot about them! How dim is that? Shows you how busy I've been lately...
Jade, July 15
Wednesday, July 13, 2011
The elven warrior on the misty riverbank -- with the boat
CG art is so much fun. If there's any reason why any of us keeps on doing it, it's because it's enormous fun. If we get paid for doing it, so much the better -- and I feel very privileged for being paid to do something I'd do as a hobby even if I was never paid a bean.
Here, I'm playing with a lot of new and newish stuff. You've been looking at this costume, in bits and pieces, for the last couple of days. Here it is on a new character, and I want to recommend this one. It's a skinmap from Renderosity called Jackson, and it's a beaut. The head morph is also very, very handsome -- it's going to be one of the few third party head morphs I'll be delighted to use "right out of the box."
The hair is the Neftis Casual Slick Back, which I got last month -- brand new on release, too. And the background -- well, you recognize the background! I cut a piece out of yesterday's misty riverbank with elven boat and blurred it down a little.
More interesting is where it started. About six months ago I did a Bryce landscape specifically to play with a set of new Bryce textures I'd acquired. I posted this eons ago, and then yesterday, when I needed some hills and mountains in the background of the riverbank, I went back to the old render and tweaked it, color-wise, to make it look like it was fading into the distance:
Now, in yesterday's art the boat and near riverbank were the foreground. Today, they've turned into the background. The character, the sword, and some more plants and little trees, have become the foreground. The entire backdrop "layer" is pasted in as a flat image, which made today's pictures render fast.
The Jackson skinmap is superb -- there are no problems with it whatsoever, nothing to work around, nothing to fix. It comes with a variety of beard and eye options. The pointed ears? Wellll, I added those myself, when I realised I wanted to do something deliciously exotic. Who says elves have to be European?! So he's also wearing the Elven Prince circlet and armband.
Working up the Euros chainmail shirt to look very good in extreme closeup meant setting a deep displacement map to ruck the model up into 3D shape, but otherwise the costume is a mix-and-match of textures available in the retail kit.
Once again, the plants are an assortment of herbage. There's a little spruce tree from Rhodi Design, and the sage grasses from the H3D Lost Path set. Very nice to work with -- and these don't tax your computer the way some of the other plants and shrubs do.
The swords -- that's Merlin's Katana, and the Fae Weaponry Greatsword, which I bought well over a year ago. In fact, if you're ever surfing around in the first 100 posts on this blog, I'm sure you'll see it there!
I'd like to pose this character in some really exotic nudes, so watch out for a post on the other blog -- soon.
Jade, July 13
Tuesday, July 12, 2011
The elven boat on the misty riverbank
As promised -- the elven boat on the misty riverbank! Actually, this is a strangely hybrid piece of art. The background is an image I did in Bryce 7 about six months ago. The foreground is all done in DAZ Studio 3, and the far riverbank and birds were painted in Photoshop...
But you're asking yourself, how much of the atmospheric effects were painted on with Photoshop brushes, right? Answer: nada. Check this out:
Now, it's true that DAZ Studio 3 ... the free version, which I still use, because my computer, beefed up though it is, will probably do the proverbial face-plant if I try to run the full-on version ... doesn't allow for atmospheric effects, right?
True ... and also not all that true. You don't get effects which are done for you by the program, but you can sure as heck add atmospheric layers yourself. You do this by adding a primitive, a plane, at right angles to the ground, and making it blue or gray or mauve, and putting an opacity map on it. Ta da! Atmospherics ... suddenly the riverbank is misty.
The foreground and the far river bank are land masses that were made in Bryce (eons ago) and exported as OBJs, and then imported into DAZ, scaled and set in place. Add displacement mapping, and then start importing plants. I used the ferns from DM's Elven Shed, plus a couple of DM's trees from Fantasy Visions, and a lot of Merlin's trees, from the, uh, Merlin's Trees set. Also one of Rhodi's spruce trees...
The elven boat is a lovely OBJ I got a few weeks ago. It doesn't install into DAZ; you just import it, TGA textures and all. Very, very nice.
Then -- the water. This is done with two primitive planes. The bottom one (being the river bottom) has a sandstone texture added. The top one, being the surface of the water, has a water texture added (a photo of the sea I took from the end of the jetty a few years ago), plus a displacement map to ruck the surface, plus an opacity map so you can aaaaaalmost see through the water. Add gloss to make it glitter and reflectivity. Done!
Add a set of lights, with shadows... and render. It takes a bit more pushing and pulling to get it all into place, and then -- ship the final render into Photoshop to have the opposite riverbank painted, and the birds. Done!
I'm actually very pleased with the way this turned out. Makes me think, I need to get back into Bryce -- which I haven't opened for ages. Confession: I'm a bit stumped when it comes to organizing the lighting in Bryce, and since renders take so long (hours, plural) before you know whether something worked, it's not as easy to get it "nutted out," as the British say, as you might hope. (Yes, Virginia, I downloaded the 1,300pp manual. Oomph. Sometime when I have the occasional year to spend on a project, I'll get through it!) I would also love to get into Cararra. I have Cararra 5 Pro, which I realize is not about two years out of date, but it's waaaay beyond anything I know, so it's a good place to start. There are also some fantastic landscape generators out there. If you're curious, just go to Google, switch to "Images," and search on "Terragen." See what I mean?! Serious "wow factor" there.
Back tomorrow, guys! I have a few things to do before the telecast of the Tour de France starts, and about 20 minutes to get 'em done in.
Jade, 12 July
***Posted by MK because the internet is AWOL. Intermittent crap.
Monday, July 11, 2011
Michael 4 struts his stuff in the new costume
The title tells all ... and you gotta like this! The Euros costume is very nice indeed -- I do like the textures which ship along with it, in particular the fact that you can mix and match every little bit of it, without even kicking in any texture of your own. The morphs on the overskirt allow for the illusion of real movement -- you get the impression that he's really moving, speed and power, through a kata. You know what a kata is. It's ...weellllll, it's hard to describe, if you don't know what it is, so it's over to Jackie Chan to explain in deeds rather than words:
Edit: video removed ... it's dead now, something about the account linked to it being terminated. Hey ho. That's YouTube for you!
That's the opening credits of Snake and Crane: The Arts of Shaolin, which was made waaaay back when. Jackie was a mere child. But now you know what "kata" means ... kind of practising your martial arts without a partner. Yeah, I know, these vintage Hong Kong punch-up movies are far from Great Cinema, but if you like martial arts, as I do, and you can see past the two-dimensional acting and slapstick drama (!) they're also a heck of a lot of fun in their own way. It also helps if you have a big soft spot for Jackie Chan!
(You want off-topic? We can do off-topic here!)
Anyway --! full marks to the Euros costume. The backdrop is one of Doctor Mike's photos of the Esk Valley, taken a couple of years ago when he was over there at an archaeology conference, which makes sense, him being an archaeologist and all. The hair is Spartakos, which you can get via Renderosity. The set is a huge mixture of props fro DM's Instances, and B9999's concrete fence/post kit. The sword is DM's Kerrick's sword, from the Kerrick's Throne set.
The skinmap Michael 4 is wearing is actually JM Falcon, but I've turned OFF all the raised veins, leaving the skin bronze and smooth. Incidentally, you can always do this, if you find a skinmap too veiny. Go into the surfaces tab, look at the bump or displacement values, and just zero them out. Done.
Next, I'm going to play with some props I got the other day ... elven boats. I thought I'd do them on the bank of a misty river, which will also give me an excuse to play in Photoshop. I'm liking Photoshop a great deal, as I get more familiar with it. There's just one or two things that I wish (ooooh, I wish!) they would do differently. Then again, I imagine most users say the same thing -- we all have out little pet quirks.
Jade, 11 July
***Posted by MK because the internet is AWOL. Intermittent crap.
Sunday, July 10, 2011
New fantasy costume for M4 ... very nice!
Sunday. Raining. Looking at the drizzle streaming down the window glass. Taking a break from work ... still not finished the job! Celestial gentlemen with long white beards, sitting on clouds, might have the option of resting on the seventh day, but if they were down here they'd have to get their sleeves rolled up and get stuck in. So while taking a break, I grabbed the opportunity to play with one of the items I bought a little while ago -- here, you're seeing part of it.
It's the Euros costume for M4, and it's actually a set of trousers, overskirt and shirt, but since I'm chronically short of time I decided to play with it one piece at a time. Skirt first. It comes with a very nice kind of chainmail texture, plus several other lovely textures ... and I added an opacity map to one of them, to make it over into a kind of loosely hand-woven fabric which wouldn't leave a heck of a lot of the imagination!
Tomorrow, I'll have a look at the shirt and the trousers which go under the overskirt, and play with textures and morphs. Incidentally, the morphs on the Euros overskirt are very good. The only one that beat me was the kneeling one -- couldn't get it to wrap under the leg. I imagine the morphs to do this are actually there, but you'd need a little bit more time than I have today! So I finished that one with a little bit of digital painting --
Which gave me another excuse to play in Photoshop Elements 9 ... hmmm. Well, sure, you can do this bit of airbrushing in PSE9, but the tools are so cumbersome, the process is so long -- again, I ran out of time. Confession: I ran home to Micrografx and did the job in the 37 seconds I actually had left. My kingdom for the time to play -- seriously, just to play with art and software and so on. One day.
Jade, 10 July