Saturday, October 31, 2009
Halloween rocks: get thee behind me, pumkin face!
I thought, for this render, why not combine the beauty shot with the Halloween art?! Where is it written that gorgeous bare-butt guys cannot be menaced by Orks and Uruks out of Isengard?
Picture this: Arwen discovers Aragorn snores and gives Legloas a black eye for not telling her before the big event.
Picture this: Aragorn is off on diplomatic missions so often, Arwen and Legolas go cruising together in the fleshpots of ... wherever they have fleshpots in Middle Earth. They never showed us any in the movies, but you knooooow they have them. Somewhere.
Anyway ... once again, both the figures in the above started life as clones -- DAZ's Michael 4. One was given the high-rez skin map; the other got the smooth "undead" skin map. I gave the goblin long pointed ears, an emaciated bod, wrinkled hands, and the human luxurious blond locks. Then the fun began.
Getting the lights just right is one of the big pleasures of DAZ 3D work, because every time you change the position or color of a light, or add one, or remove one, you get a different picture. The hardest part of it can be deciding when it's "just right," and therefore finished. You can also continue to fiddle with every aspect of the characters, from the position of their fingers on up.
Then, a pumpkin head for a background (just a stock shot; nothing special); render and ship out into Serif to have the overlays added.(Incidentally, it's 1000 pixels wide, and you can click on it for the large size. The font is Trollkings ... no idea where it came from. It's packed along with Serif X3, which you can get for fifty bucks, I think, since X4 came out.)
Jade, 1 November 2009
Friday, October 30, 2009
Happy 3D Halloween, to all Downunder!
Happy Halloween, folks!
I had loads of fun about a week ago, playing with a new DAZ 3D model ... specifically, it's one of the Halloween packs, which was going for about five bucks in special. What interested me in it at the time was that it offered a whole new "skin map" which fit Michael 4 -- "smoothie," with eyebrows so blond that they barely show at all.
Now, here's where it getting really, really interesting. All three of the characters you see in the above two images ... are tweaks on the same model! They're ALL done with Michael 4, and they're ALL done with the same skin map! See what I've been talking about for the last few days ... when you get into the "surfaces" there's so much you can do. And it's a whole lot of fun.
I'm going to finish out this post with a beauty shot, because I want to contrast the "smoothie" skin map with the high-rez map I normally use...
You can get loads of different skin maps from the DAZ catalog ... I've hardly even scratched the surface yet. And I need to be a bit conservative because I also need to upgrade my video card. You *do* need a medium-high quality video card to run this software easily and get great results. Mine is only about 90% of the way there to what you need, but the fantastic news is that it's only a fifty-dollar upgrade, and these days that's chickenfeed.
In case anyone is interested, the beauty shot above was done with Michael 4, face designed by me; hair by Neftis Studio, color designed by me; background green vortex swirled into a Micrographx frame with the airbrush tool, and a swirl effect applied by Irfanview, which resized the image to 600x900, before it was shipped into DAZ as the background for the model. Then the whole thing was rendered and shipped into Serif to be feathered and matted on a marble background, signed, and exported as a finished image. How long did it take? About 15-20 minutes. And yes, I'm still gobsmacked at how fast you can do this stuff ... because I'm still used to spending hours and days on a painting...!
Happy Halloween!
Jade, 31 October
Thursday, October 29, 2009
Change the color of your 3D day...
Today I'm still playing with the surfaces toolbox in DAZ ... changing the color of everything. The jacket in the above render is the exact same jacket as you see in yesterday's pics. Black is the default (with charcoal pads on the shoulders), but when you star to lighten out the colors you find that the jacket has loads of detail ... panels and zippers everywhere. For this one, I changed the colors to teal and bronze, and gave the jacket a semi-gloss surface...
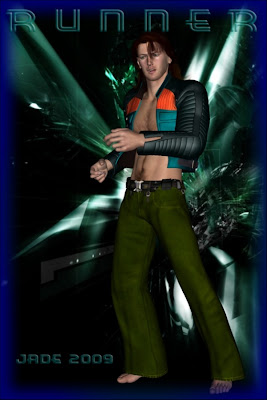
I also left off any shirt and footwear. I call this picture "runner," because my imagination sees a scene in which this young beauty had to get out and run so fast, all he had time to grab was the jacket, before someone's agents were right behind him...
The surfaces toolbox is where you can make huge differences to any model at all. You can take the same jacket and go from suede to rubber, black to white, and any color or shade between. Takes a bit of figuring out, but it's a whole lot of fun trying!
As always, this render was done in DAZ and then shipped into Serif to be matted and signed. I like Serif the best for doing any work involving text, but as for matting, feathers, inks and what have you, you can also use Micrographx and get absolutely fantastic results. In particular, Micrographx has a set of "inks" for overlays that absolutely rival Photoshop ... and it's a twenty dollar program. Gotta like that.
Tomorrow is Halloween (at least on this side of the dateline) and I haven't forgotten. I have some nice dark, shiver-inspiring pics for the occasion...!
Before I leave you for today, I just could NOT resist doing the render you see below. You better blame Boris for this one ... it's a "take" on a painting of his from sometime back in the 80s, a piece called "Boots," as I recall. Only it featured a haff-nekkid girl in a leather jacket and boots. The boots are a bit much, imho -- they nudge the painting over some line and turn art into raunch. Now, I know that "gay raunch," or "3D gayrotica" or whatever you want to call it, would whack a large pair of biker boots onto the model, but puleeez! It's a beauty shot ... it's ART ... I swore up and down that I wouldn't be posting 3D raunch (gay or otherwise!) here, and I'm going to hold to that. So I took out the boots -- it's the jacket that inspired this shot -- the same jacket you see in Runner (above) and in the gunfighter images in yesterday's post. So -- blame Boris, and here's Red:
Wednesday, October 28, 2009
Got new toys today!
(Click on the above -- it's 1000 pixels wide, so you can really see it)
Promo for a new movie, is it? Whoa. You have got to like this -- and the price was right! DAZ has a daily "Fast Grab" selection, where you can get humongous savings on a selection of their 3D models ... the trick being, to catch them in time, because they only stay "up" for a matter of hours before they go right back to full price. The model above is -- still! -- the Michael 4. But this morning I lucked out with a new hairstyle for $11 and the whole "outfit" you see above, complete with the gun, for about $13!
Now, what you do with the whole ensemble is up to you...
...and I gotta tell you, I am loving this. The whole ensemble (jacket, pants, boots, gloves, shirt, belt, holster, gun) is mix-and-matchable with anything else that will "fit to" the M4. And as soon as you get into your "surfaces" you can change the color of anything and everything. The shirt, for instance, started life red and matte ... I prefer teal spandex! (Click on the above, it's 1200 pixels high, so you can really see it, too.)
And after that, well, you just ... uh, play. The possibilities are limitless. Nice, innit?! (This one looks like a character from a Mel Keegan novel. The thing is, years ago I did a painting I called The Jungle Book, and it inspired MK to write the novel. So we can only hope here. This character is like a cross between Michael Flatley and the Sundance Kid. Potential?!
Jade 28 October
Tuesday, October 27, 2009
DAZ render settings: an embarrassment of riches!
Anyway, this was the third render of the same subject, and it was an exercise in variety ... here's the medium shot:
And I rendered a closeup, too:
The model ... Michael 4, as usual, wearing a face designed my me, and the GQ Event hair in dark brown. The one and only drawback to Michael 4 is that the "base" is still so new, there's not an ocean of add-ons and accessories for him. Give 'em time: I imagine a hundred designers are right now working on clothing and props. I wish someone would do a nice shirt series -- business shirt, Hawaiian shirt, that kind of range. I have a teeshirt, a tank, an overshirt and a leather jacket, plus a pair of jeans, shorts, speedoes. What I'd really like to see on this model is leisure wear.
And like I said, give 'em a chance. It takes a fair amount of time to design 3D models. I guess I'm just impatient. I understand the models are made in Hexagon, which is something I don't have any experience with ... I will soon, though. A working version of it is packed on the CD-ROM accompanying the DAZ manual, which ought to be in the mail right now...
Don't CinemaScope images just kick you in the imagination? Your brain starts working, trying to fill in the rest of the story! Me like.
Jade, 28 October
Monday, October 26, 2009
Experiments in Cinemascope
(Click on the above to see it at full size ... you'll be surprised!)
The Cinemascope setting is to be found in the drop-down menu under Render > Render settings > Presets. They have every preset in the world on the menu. The CinemaScope one is 600 x 225, expressed in pixels.
Which means you can set up your backdrop to the last pixel, and then work with a pre-designed character. This is too easy. The shot above was done using a 1200x 450 crop from a shot of Lake Alexandrina, over the rooftops of the "shacks" at Milang a couple of years ago. It's quite en evocative shot to start with. Then, add yet another permutation on the Michael 4 model, and get the whole thing posed ... and render it.
(This Michael 4 is wearing a face designed by me, plus a blond version of one of the hair styles ... the Billy Hawke hair, I think ... plus the leather jacket and rollneck sweater.)
The shot says a lot. It's dawn, he's making his way into a small town, and he's looking for someone or something. Could easily be a movie frame. I'm very pleased with this effect ... will be doing more in this format. You can get tired of being "stuck" in the 2:3 ratio for book covers. The artist hiding inside starts to rattle its chains, wanting to get out.
Jade, 27 October
Sunday, October 25, 2009
Yaoi ... in 3D. Thank you, DAZ!
Anyway --!
Spent fifteen minutes over hot chocolate last night, looking at other artists' work, and was impressed, as usual, with the Yaoi art. It gets a bit raunchy for inclusion on an open blog like this, and I'm not about to emulate that aspect of it (well, not here, anyway!), but I wanted to see what could be done to achieve something with the look of a comic, and a Yaoi comic at that, but still be in believable 3D, rather than the attenuated "big eye" style of manga which ... well, if I tell the truth, it doesn't do much for me.
I used the Saxon Hero plate for the background -- swapped left to right, with its colors reduced to 16, and then swapped out (all done in Irfanview). Click on the pic above, see it in 800 pixels high -- see what a difference it makes! Then I took the Platinum model, gave him a sorrowful look (looks like he has boyfriend trouble), and big, big blue eyes with looooong curly lashes. I went through about 40 shades of yellow to find the right hair color (when you learn how to use "surfaces" in DAZ properly, it's not hard to control every strand of hair).
The tweaked old plate was imported as the background; the image was rendered in DAZ and then shipped into Serif to have its overlays, uh, laid over.
I must look deeper into the Yaoi-look style. This is going to be fun!
Incidentally, if you were interested in the DAZ instructional tome, you can find it on their site. I've just ordered this ... so allow 3-4 weeks for it to be delivered down here to Australia, and then I'll review the book -- also the CD ROM which is enclosed.
In the meantime, click here and then search on "Figures, Characters and Avatars: The Official Guide to Using DAZ Studio," and you'll go straight to it. Here's the kicker: there isn't another book on the market on DAZ ... which is amazing.
I might write one ... in the fullness of time, when I've got the whole thing figured out myself! Like I said above, I still have a hell of a lot to learn. The thing is, though, it's a lot of fun. It doesn't feel like learning.
After looking at the cover of the manual, you're asking yourself, does Jade ever paint females?! Not often. Why not? Because there's tens of thousands of images out there of gorgeous females and fantasy females and downright impossible-looking females. Images of gorgeous guys, fantasy guys, are in short supply by comparison. Besides which, I enjoy painting beautiful men a whole lot more. And this is my blog, so ... [sticks out tongue and makes raspberry sound]
Jade, 26 October.
Saturday, October 24, 2009
Working with two guys: go ahead, complicate your life!
And you can do that if you want to. But the challenge is to have two characters in the shot and have the interact with each other. Have them talking or fighting or having lunch, or any other communal activity you can think of. (Yes, including that. 3D can and does get raunchy. And no, I won't be doing any of that in this blog, because it's a public blog. Which is not the same thing at all as saying that 3D raunch, digital sensuality, can't be done, and isn't being done, uh, just about everywhere.) Anyway--
Having your characters interact isn't quite as easy as you might suppose. In this post, I offer two takes on the same characters. One's expounding on something, the other's amused. "Hamlet, is it? Don't give up the day job, mate."
The first thing is to design the two characters ... and when you remember that they start life as bald twins, this in itself takes some genuine creativity! Then, pose them -- again, a challenge, because the "stock poses" you can buy are fine and dandy, but they don't interact so well. So, even if you start of with a stock pose, you'll soon be using the posing and animating tools to move the characters around. (You also need to get into the facial expressions, and it's important that they have different hair ... or your characters will wind up looking like clones.)
The good news is, the tools are almost intuitive. Takes a little while, but soon you see how it works, and it's a load of fun. The first thing you'll discover is the "bones" animation, where you can click on a character's limb or head or belly, and move the mouse to move the figure. Big thrill, the first time you do this!
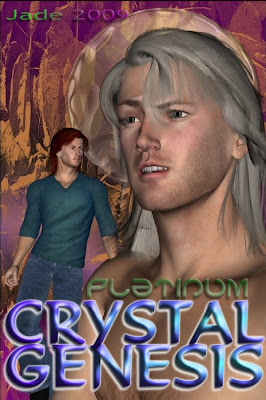
(Oh -- I was asked, what the heck is Crystal Genesis. It's a Mel Keegan project that will be making its debut in 2010 or 2011, work-loads depending. You might know that I do all the covers for the MK books. I've actually read the version of Crystal Genesis that came out about 15 years ago (embryonic, with a different title), and it's a mind-blower.)
Jade, 25 October
Friday, October 23, 2009
Home for Christmas
So, what constitutes a gay Christmas card anyway? This is a good question, on my mind right now because I'm actually designing a set of same. So ... is the above card a gay Christmas card? And if not, why not? Contrast this with the next one:
Is it a gay Christmas card because the guy's standing out there in the snow, at night, without a shirt on, much less a sweater? Like, it's gay if he takes his coat off, but hetero if he keeps his coat on? By that token, snow bunnies ... those bikini-clad chicks romping in the snow on skis, when you knooooow they're freezing and the director is standing just out-of-frame with a duvet, and a heat lamp, and a big mug of hot chocolate with a double Black Douglas ... well, those chicks have taken their coats (and most everything else) off, so they're automatically gay gals. Right? Wrong?
Okay, so if they're not gay gals because they've taken off their jackets (and all else), why can't the guy in the top picture be gay, with his jacket on? And why can't the guy in the bottom be a male snow bunny, flashing his pecs and six-pack (and whatever else might have been subjected to the elements on this hypothetical night shoot in the Arctic) for the ladies present?
It's too complicated for me, guys. I just create the images. Speaking of which, thank gods these were done in 3D, and no one asked the delicious coppertop to strip naked for the benefit of a Christmas card shoot! The things we ask models to do --!! Talk about suffering for their art.
Oddly enough, 3D models never complain.
Incidentally, the last time you saw the beautiful bronzed bod above, I'd pasted a beach into the background ... and the Fabian Cancellara lookalike (wasn't intentional, I swear it ... just happened in the facial design) was the cover model for a Jayne deMarco novella. For this "shoot," I turned him around, made him a redhead and put a smile on his face instead of a worried look. Thank you, DAZ!
Jade, 24 October
Thursday, October 22, 2009
Abstract beauty
In fact, it's six layers deep. I did the figure in DAZ Studio 3; I created the background in Serif, using a colored rectangle, 600x800 (which is the dimensions I wanted the artwork to be when rendered. Then I laid a cutout of the moon over the rectangle and put a fade and feather on it -- locked both together and exported them as an image. The image was imported into DAZ as the background behind the figure, then the whole lot was rendered together ... which gave you an incredibly plain image. Blah. Total blah.
So the image came back into Serif and had not one but two overlays. One was a purple swirl with a heavy, solid transparency (meaning, the overlay added to the picture without obscuring it). The second was a plain rectangle with a sort of water-surface texture added to it, and a lot of transparency (meaning, the water surface added texture to the image, without obscuring it).
Done yet? Well, maybe, but I still wasn't too happy. It looked "flat" to me. So I shipped it out to Irfanview -- which is my all-time favorite prog for tweaking colors, resizing, changing saturation, gamma and contrast. There is NO better tool, and that includes Photoshop, guys. I turned the contrast way up, which has the effect if deepening (saturating) the colors, and at the same time making the texture more pronounced.
Then I shipped the piece back into Serif to be matted onto an orange background with a ton of "feather" ... and signed. Export as image: done.
Sounds like a hell of a lot of work, I know, but seriously, it's just a ten-minute fiddle, while you take a break from ditchwater-dull work and have a cuppa. (I do artwork to give my brain a rest from bread-and-butter work; and I like painting and drawing beautiful men. Now, how are youo going to call that weird?!)
Incidentally, if you need the best image tweaking prog around, and can't afford to buy, give Irfanview a shot. It's my absolute favorite, and it's free: http://www.irfanview.com/ ...!
Jade, 23 October
Wednesday, October 21, 2009
Saxon Hero
I've been asked what's, uh, hanging around beyond the bottom of the frame ... and I cannot tell a lie. Shall we say, the model is fully functional. It's yet another "take" on the Michael 4 -- in fact it's the exact same design I used for this one ... this is another great example of how malleable the scenes are. After I got the model tweaked and designed, I saved it to disk. A month or so later, I opened the old file ... turned the model around, changed the lighting angle and colors, put a new expression on his face, and suddenly it's a whole new shot.
If you're interested, see this:
This is what they call the "base." The model actually comes in bald, and missing a guy's essential equipment. The more masculine odds and ends have to be downloaded and installed separately (good gods, what a culture we live in; Michelangelo would have curled his lip at us), and then you have to decide what hairstyle you want, and buy that separately, and import it to the "scene," and "install" it to the character. Actually, the "base" models are sometimes free ... they make their money on the hair, clothes and "props." Then, you design the face and body to the last degree of angle on his nose and the roundness of his eyballs. You do this using the Morphs++ pack (also bought separately). Then you can learn how to control the "surfaces" to change the color of everything at whim.
Here's the page for the Michael 4 model, if you want to see more:
http://www.daz3d.com/i/3d-models/free-3d-models/michael-4-base?item=7877&cat=382&_m=d
All credit to DAZ. It's amazing. You can do virtually anything with these models...
And yes, I do mean anything. Uh huh. Right. It takes a couple of months to learn what you're doing and be able to create really good art, but it's a whole lot of fun.
Jade, 22 October
Monday, October 19, 2009
Nice lad, but a bit of a vamp...
Sunday, October 18, 2009
Do you hear the Twilight Zone theme...?
On Halloween, I'll show you the rest of this picture! As it stands, it actually quite a nice piece of art -- once again, a shuffle back and forth between DAZ for the 3D work and Serif for everything else -- framing, feathers, fades, transparencies, color casts. Serif makes it so easy ... you can do this stuff in your sleep.
It's a new "skin" on an old model, incidentally -- it's still the Michael 4, but I lucked out and got a "smoothie" skin for another app entirely, which just happens to fit on the M4 ... you just have to be a bit careful how you configure the details, but ... nice!
Friday, October 16, 2009
Making Faces
Also ... making faces meaning, making NEW faces. I just designed the platinum blond in the above poster. Ooooooh...! See more:
(You can click on these thumbnails and get larger renditions)
Here is the face in repose; no expression yet. You can fiddle to your heart's content at this stage, and basically make any face you can imagine. I should think (and here's a project!) you could sit down and model Brad Pitt. It would be interesting to take a crack at that! I might just have a go at that, if I can only find the time.
Anyway, this is the phase before the model "comes to life" with expression, humor, the sparkle in the eye, and what not...
And here he is starting to come alive. A good thing to do in this phase is to swing the 3D model around and take a look at him from all angles, make sure he looks good from all sides -- also, that expressions look the way they're supposed to.
And now you can start to get adventurous. This was the point where I put a second figure in the background -- the redhead from "Urban Hero" but without the sunnies. (You don't actually take the sunnies out of the shot; you click an icon and they disappear ... they're actually still there.)
And this was also the point where I began to pout myself, because it rendered ... weirdly.
The second character "rendered" as dead-black areas rather than a proper treatment. To did get it to render by lowering the quality settings, but I was somewhat astonished to run out of RAM with 6G tucked into the chassis and added on as "ram boost" or whatever the call it. Hmm. Makes note to self: find out how much RAM chips cost these days.
Jade, 17 October
Once in a blue moon
It was done in six layers, and rather than fiddle too much, I actually did a little painting on it, halfway through. You could fiddle it in the software, but I was tired, and I don't mind painting, so --! Anyway: layer one: a digital shot of the moon, taken from the backyard. I put a pale blue "cast" through the image which was absolutely b&w. Next: an Alaskan mountainside (one of Mel Keegan's 1997 pictures, scanned in at 1200 and enhanced a bit). Next, use the "magic wand" to take out the blue sky, and plunk the mountain range over the moon's dead-black background. Lock all together and export as 200dpi image at 1200w x 1800h. All the above was done in Micrographx PP7 ... Meanwhile, design a delicious young man in DAZ, then import the backdrop and render the scene. Reimport it into Micrographx to add the border. Ship it into Serif X3 to add the signature, and export the whole shebang at 200dpi. Beautiful.
Now, some people will say, why don't you just get Photoshop and do the whole thing (except for the 3D work, in the one program. And in answer, I'll ask another question. How much did you pay for Photoshop?! Micrographx Picture Publisher 7 cost me $16.95. Serif X3, I got in a sale for $49. Irfanview is a free download. Seriously, guys, you could take a trip to Tahiti on the savings, and the end result is identical. My recommendation would have to be, "Learn what your Windows clipboard is for," and don't be afraid to shuffle the image back and forth between four or five near-free programs. The image loses nothing by being tossed back and forth.
Same sort of process to do this one:
...except that I laid a texture under the image, put a feather on the edges of the main picture, and then gave it something like a 50% transparency, to give it a dreamy quality. Really makes it look like a painting, when in fact it's a 3D render processed through Serif X3, and took about ten minutes flat!
Wednesday, October 14, 2009
It was all a daydream. Right?
...and then you woke up and realized it had all been a dream. On the other hand, it could have been real, and the Powers just slipped you back through the fabric of space-time to the exact same place where you were before it all began. You know for sure, you won't forget this guy...
Tuesday, October 13, 2009
Urban Hero
Incidentally, the hair color switch was NOT done using a "material" or "texture" sold by the company that designed the hair. If you know what you're doing, you can change the hair color yourself. You need to know a good deal about "surfaces" to do this. Do the terms "specular" and "diffuse" and "ambient" mean anything to you?! Get your teeth into DAZ -- really sink them in and start chomping! -- and they soon will.
Anyway, the character is a fairly simple pose; what makes the shot really work is the chiseled face (my design), the generic weirdness of the abstract background, and the fade effect...
Now, the background was created in Serif X3 ... it's about 10 layers of fades and transparencies, and one 3D object which was, again, created from 10 layers of effects before being locked into the background as part of it. The image was then exported at 200dpi, imported into DAZ as the background, rendered along with this terrific incarnation of the Michael 4 model, and then shipped back into Serif X3 to have the fade added, before it was exported for the last time at 300dpi as the finished piece.
Here's the same character with the clothing objects turned OFF, and the hair still set on blond ... stretched out on a hearthrug, watching the fire -- at least, he will be, when I've engineered the rug and the hearth! This is the basic model ... you add the rest of the elements later, and when I finish the piece, I'll upload it finished:
It's handy being able to click an icon and turn on and off the clothes, shades, boots, even the hair style. You can get some, uh, wild and wonderful effects!
And if you'd like to see where I am one year later, here's a slideshow of October 2010 artwork:
Please so browse around and watch the artist's progress! I was pondering whether to take down these early posts where the art is so comparatively simple, and I actually woke up to the word "comparatively." At the time -- it wasn't simple at all. I had figure everything out, and the purpose of these early posts was to record my journey from the start to the culmination. So instead of taking down the simpler art I decided to gussy up the early posts with slideshows and, soon, videos, and perhaps encourage folks who are just starting out to stick with it, never say die, and ... enjoy the process.
Jade, 14 October 2009
Monday, October 12, 2009
The Ghosts of Autumn
Picture this: short summer night, two in the morning, it's hot ... out on a hillside, not necessarily looking for trouble, but Trouble comes lookin' for you. Thar's vampires in tham thar hills. This one's not much more than a photo montage, though effective. I'd like to do more with it -- show you what's on the receiving end of that intent gaze, for instance. Hmmm. He's another "take" on the Michael 4 model from DAZ; the background is a color-skewed cityscape. It's the blue point light on the model that makes it work.
Jade, 13 October
Sunday, October 11, 2009
The Winds of Chance: new cover!!
Saturday, October 10, 2009
A little romance at Christmas
Give me a reason why not! here's one of 'em. I'll do three or four, publish them (to Zazzle, no less), and put the links on the blog here.
This one was a challenge. You have a real background, two digital models, and firelight. O...kay. Now, DAZ's Michael 4 is a fantastic model, but when you import two of him into the same scene, they come in as bald twins wearing spandex boxers. Your mission, should you decide to accept it (and you better had ... this is where it all starts!) is to make them look very different, and get them posed realistically -- together, no less; and then take a very limited wardrobe of clothing that's available for Michael 4 and make that look different ; then set up three or four lights to simulate the lighting conditions in the photographic background.
So, here you have two Michaels re-re-redesigned; firelight was simulated using an orange light, a yellow light and a white light, and the result is ... really nice. I call this little piece, "'Twas the Night Before Christmas."
Please do check out my portfolio:
3D art imitates both life and traditional art
Anyway, never let anyone tell you that 3D art can't be real art. It all depends on how you approach the setup for the scene, and how it's executed, and what post production work you want to do on it. You can get VERY artistic. To wit, the piece above. I did it for a book cover, so it's in that 2:3 ratio (books are usually 6x9) again. The book is about a vacation romance on a Greek island etc., so I wanted something with a Mediterranean "feel." I had a series of stock shots I captured in the Barossa a couple of years ago: perfect.
Then ... the model. And if you've looked at any (or all!) of my previous posts, you'll know by now that the model is actually the easy part. You import the Michael 4 ... you choose a hairstyle ... you choose a hair color (and/or fiddle with the "surfaces" yourself; it takes time, but I often to this to get just the effect I want). Then, use your x,y and z controls to turn him around and the bones animation controls to pose him. Then you fiddle with the lights, and before you know it fantastic shots are just jumping out of the screen.
This one was also color graded in post production, to "green up" the quality of the light. The result is a beauty. Hats off to DAZ Studio 3. I'm impressed. And their new model -- Michael 4 -- is the most amazing raw material I think I've seen yet. Kudos, guys.
And now -- NEWS!!
My portfolio just went online. Find it here: http://www.dream-craft.com/jade/
There's more than 60 pieces online there, and I'll be expanding it as time goes by!
Jade, 10 October
Friday, October 9, 2009
The Dark and the Light of it
Here he is again, with the head re-set, eyes closed, and lit by not only the one spotlight and one white point light which were set up to achieve the top image, but here he is with the white point light shifted to green, and...
...an orange point light added of to the other side. Playing with lights, the possibilities are endless. I still need to think of a background that would suit this. I think I see this guy as a gypsy, so a camp, maybe firelight, maybe the moon over the trees ...?
Tuesday, October 6, 2009
Studies in Darkness ... and lighting!
We also made a great discovery t'other day: turns out, 3D Studio Max (which Dave uses), shares one export filter in common with DAZ's import filters. So now, we can create a model in Max, and ship it into DAZ. You have no idea how cool that is.
And this morning's work was a treat: I put together the wraparound paperback cover for Ground Zero -- based on the ebook cover:
Click on the above to see the whole thing at 1000 pixels wide. (Incidentally, the book is doing fantastic business -- it's somewhere around the 50 mark on the Amazon Kindle techno thrillers category list.)
The ebook cover was similar but ... different. It obviously doesn't make a shred of sense to have a back cover on an ebook! So I did a bounding box on the "front" and so firth. Paperback covers are a tad bit different, and you have a bit more latitude. If I'd had a lot of time, I'd have done a "widescreen" painting to wraparound the whole cover, but as it was, being thoroughly strapped for time, I did a gradient fill and overlaid the text in white. All that work was done in serif X3, while the artwork had already been done in DAZ.
The DAZ work was a profile shot overlaid against a background which I'd montaged from a nighttime cityscape (it's actually Sydney, not Adelaide) and an astronomy image of the Pleiades. The background montage was done in Micrographx, shipped out to Irfanview to be tweaked and resized, then imported into DAZ as the background. The model, who had been pre-designed (by me) was then merged into the shot and lit, using two spotlights, one a green so pale it was almost white, the other blue. The shot was then rendered and shipped back into Serif X3 to have its logos and graphics added. Mel Keegan was thrilled.
Jade - October 7
Monday, October 5, 2009
Feeling Blue
The Harbendane cover is digital art -- meaning, it was painted inside the computer, 100%. On the other hand, no part of it was ever 3D. Whereas, Feeling Blue (top picture this post) was completely 3D and no part of him was painted. The sky is a shot taken in the backyard (!) and the model is ... well, you're back to faithful old Michael, from DAZ -- though I admit, I'd done a lot of work on him by the time I rendered this.
I get asked a lot, what paint program I use to do your actual painting (ie., airbrushing, merging, blending, virtual finger painting, inks and masks and so on). The only program I use for this work is Micrographx Picture Publisher 7. It costs about $15, it has every tool you can imagine and a lot you can't, and (miracle or miracles) the interface is so easy, so simple, it's almost turnkey. Start it up and PAINT, rather than spending two months learning how to use 9,999 things you don't have a use for. Micrographx is -- at least for me -- The Best. It also leaves the cash in your pocket.
Jade, October 6