Showing posts with label Mel Keegan. Show all posts

Sunday, June 9, 2019

Ronin, Xeno, and a lot more!


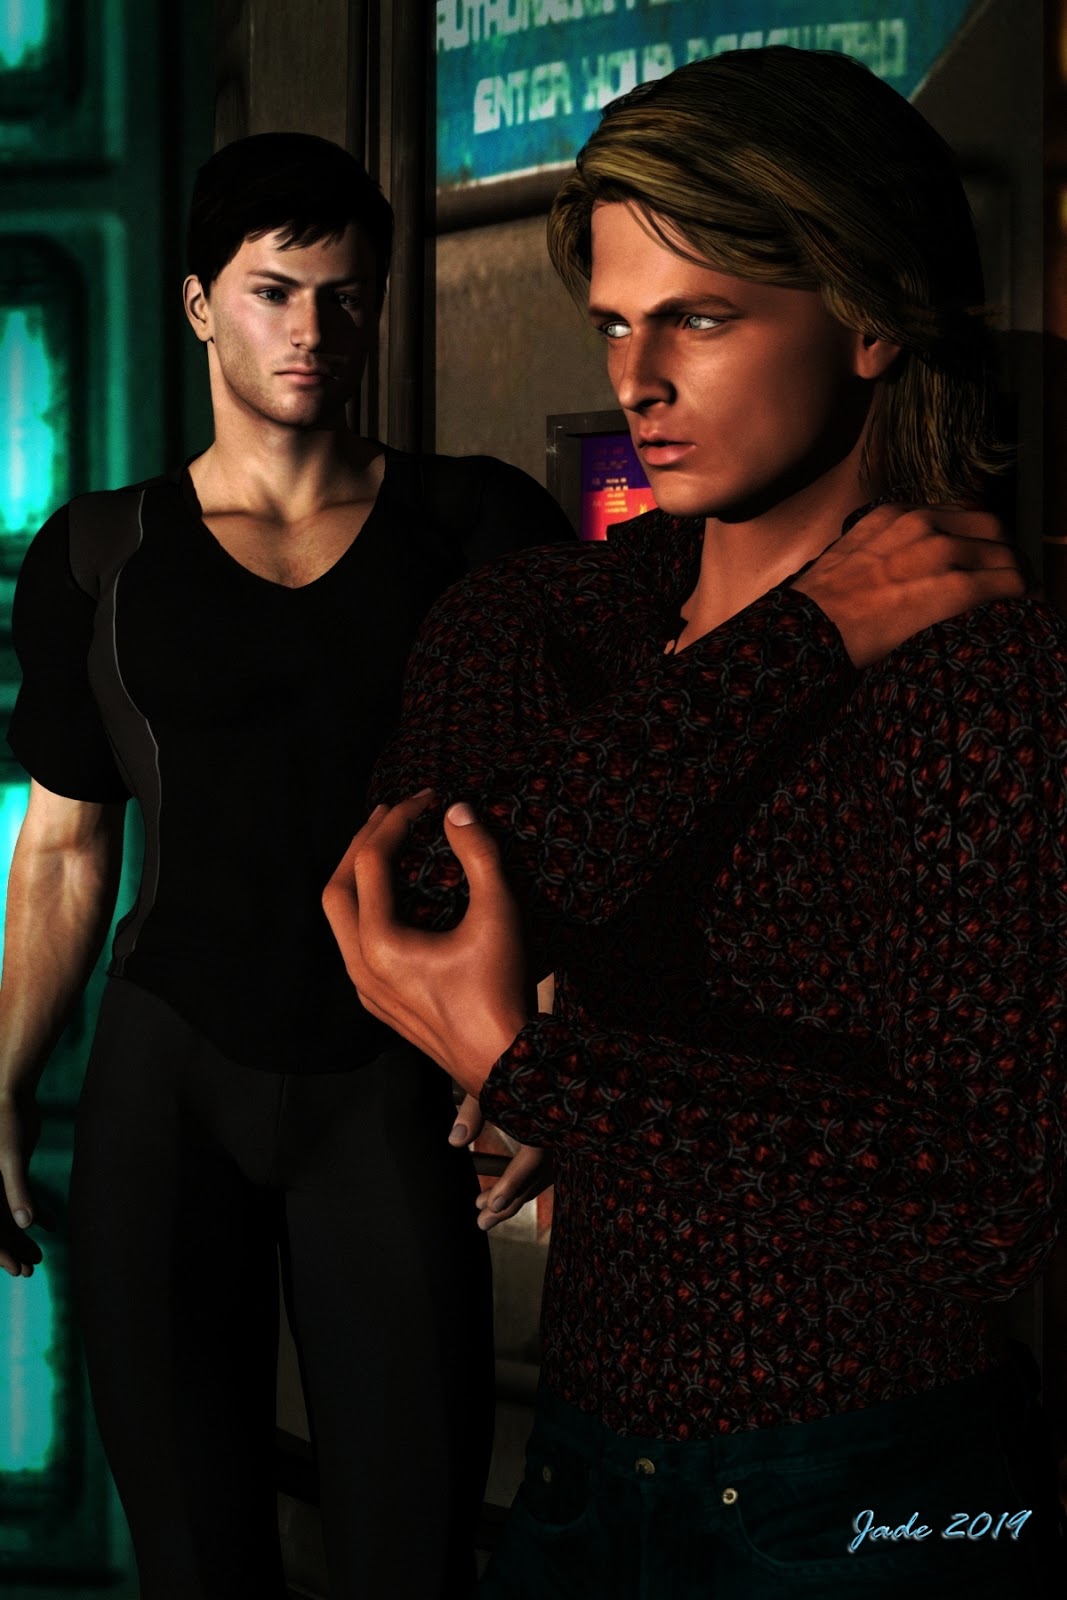
Been busy ... fiddling with IRay, trying to get it to play nice. Sorta halfway there, although we're not seeing the glorious skin tones that are definitely possible:


Right now, what I can squeeze out of IRay using Michael 4 is like ... "raytacing on steroids." These are seriously nice renders. They're not photographic by any means, but very nice renders. Have been reading on forums and tutorials, and (most old hands at this say) it comes down to needing to buy all the maps and shaders in the world to get those glorious skin tones. And here's the stumbling block: there are no shaders available for Michael 4. They only entered the repertoire with Genesis. The old figure is pretty much abandoned as per specialist shaders, which means that coaxing photographic results out of IRay with Michael 4 is probably not possible. I can maybe improve on this a bit, but to get astonishing results, we'll need to look elsewhere.

Try this for size, for a start:


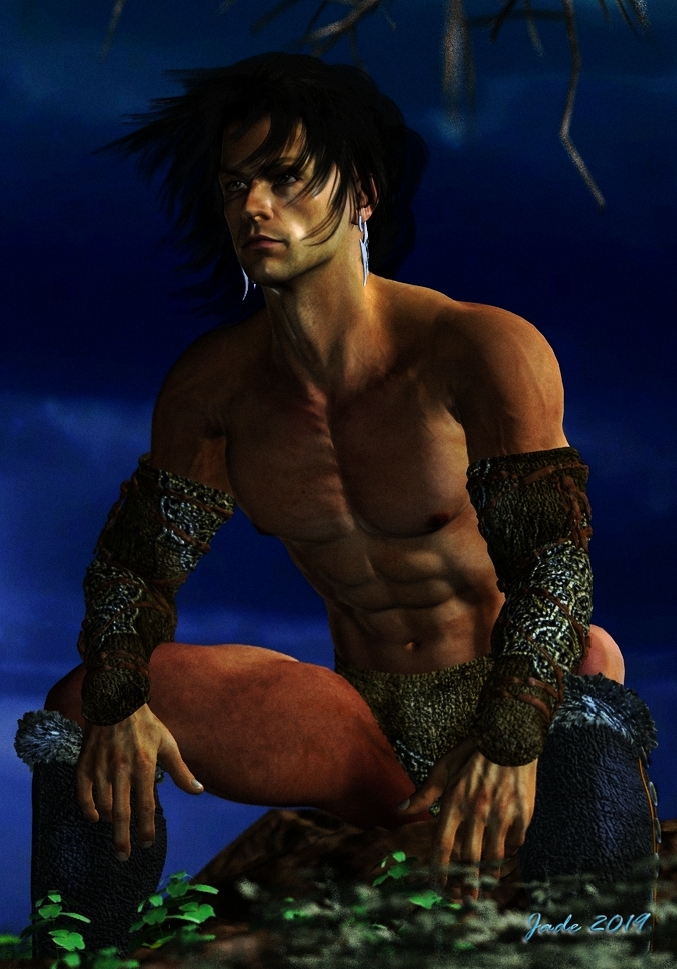
I did this in 2015, in Reality/LuxRender. In Reality, it's just a few clicks to configure it, and you can re-re-readjust the lighting on the fly during the render. This was done with Reality 2.0. The current version is 4.3; and I got this result in about two hours flat, including posting the model:


To my eyes, this looks better than the IRay render of the same character (same skin map, same lights, same everything). The Lux Render is actually tickling the line of being photographic ... and the software is 100x easier to use than IRay. Soooo...

Just waiting to get the bugs ironed out. Waiting for tech support, but they only write/reply once per week, and this is taking forever. *Sigh* Anyway, at least I've learned the Studio 4 interface backwards and sideways while trying to coax a decent render into being!

And in the course of mucking about, I found some extremely rudimentary morphs that allow you to at least make Genesis look like an adult rather than Peter Pan:


It still looks like a cartoon of a human, but at least it's not an adolescent body form now. What really is creepy is, if you "hide" the costume so as to see the torso, there isn't a detail on the skinmap. No freckles or hair chest, sure, I can see the sense of that. But the Genesis doll has no nipples, which looks ... creepy. You can put body builder muscles on this guy, and he has no nipples. You don't realize how odd it looks till you see it. I guess mammals are as mammals do! 😮 Alas, to do much more with Genesis, you have to chuck a lot of money at characters, toupees and costumes. Right now, I don't have the cash, it's as simple as that! You'll have to bear with me while things chug along as fast as they can. Blame the dentist, LOL.

Also -- something very exciting is happening:


Yes!!!! There is a new Mel Keegan book on the way! This is fabulous news, and it's been a thrill designing the cover. I did most of it in Bryce 7 Pro, working with an old image from years ago, which was re-edited to take out the ocean, move the mountains and so on, so that the background started life like this, kinda like a Chris Foss book cover from the days of yore:


...before it went into Serif to have the byline added, then into DAZ Studio 3 to have the character rendered, then into Photoshop to be painted, then back into Serif to have the title overlaid. There might be some nips and tucks or tweaks to be done to it later -- I have all the files, it can be adjusted at whim -- but the author is delighted with this design. And so am I!

That's all from me for today. More soon ... still experimenting at full throttle!

Monday, May 20, 2019

Red dwarf homeworld, Terragen atmospheres, gorgeous gay heroes and Photoshop brushes. Yes!!


Yep ... Jarrat and Stone ... and this picture is chock full of experiments. You might not believe it, but even now, after how many thousands of images, almost every picture I render and/or paint is still an experiment! I'll yack a bit more about that in a second, but for those of you who can't open the image at bigger scale (small phones, for a start), here's a closer look at our heroes:


(Credit where it's due: all kudos to Mel Keegan for creating Jarrat and Stone and the NARC universe, without which these gorgeous gay SF heroes would not exist, on these pages or anywhere else.)

Okay --


One thing I do love is "old fashioned SF" where writers like Poul Anderson (my absolute favorite of the Old Brigade ... he created Nicholas van Rijn and David Falkayn, for a start!) would not only spin great yarns but also build alien environments designed on solid science. Keegan is on my mind again lately, not merely because I'm up to Scorpio this time through (!), but also because he's writing again (!!!😁!!!), and he describes the current project as "At last, a 'Golden Age' romp without the 'warts' ... gay heroes and up-to-date tech." It's going to be great. Seriously. And what Mel is doing here really is as if someone like Poul Anderson or maybe Brian Stableford just decided to write a full-on gay adventure/love story on a fabulous alien world. Yeah ... wow. Which got my own imagination to working, and I found myself daydreaming about a fertile planet circling a red dwarf star (meaning a smaller and dimmer and cooler star than our own sun). So --

Into Bryce 7 Pro, and let's model it. The sun is small and dim and cool, so a warm, fertile world has to orbit close to it, right? So the angular size of it in the sky is somewhat larger than our sun appears; this planet sits in the "sweet spot" where the world is just warm enough to be fertile ... the cool sun looks yellow, not white, when you look right at it, and the red end of the spectrum puts a bloody wash over the sky and everything else. Makes for a very nice picture, too.

All of which got me interested in atmosphere, so --


Terragen sky: late afternoon, and ...


...right on sunset; and...


After sunset, when the sky is bronze and dimming rapidly, and the world is becoming dark, you expect the stars in a few more minutes. Nice.

(Does anyone else find Terragen a bit overwhelming? There is so much to learn that, frankly, I've decided on the old KISS rule: Keep It Simple, Stupid. AKA, one thing at a time. I've learned about all I can for now about "heightfield terrains," and "proceedural terrains" continue to baffle me a bit. Atmospheres are the next thing I need to master, then I'll come back to proceedurals, and, when the computer is rebuilt (soon!) I'll see about working with populations: adding forests and so forth. Ack. Soooo much to learn here. But it's fun. It's good for your brain, especially at my age. Put it this way: I ain't gettin' any younger. 😒

Now, going back to the experiments in today's main render! As I began, the picture is full of them, and they work! For a start --


Look at the forearm on the left, and the hands on the right. This is a combo of bump mapping and painted highlights, using a blend mode (thank you, Photoshop), plus a touch of "aging," using the special morph in the Morphs ++ package. That's ... not bad at all. The hint of veins makes this so much more realistic, yet it's subtle. Your eye expects to see this; it doesn't hit you in the face, but it makes the figure that much more "real." Well worth the extra minute or two it takes to switch out the bump maps and do a few test renders to get the settings just right. Then, this, below, was the big experiment...


...and I don't know why I didn't do this a long time ago. It's the hair. Jarrat wears the Mon Chevalier hair from Neftis (via the DAZ marketplace; you can still get it, but it's a bit more expensive than it used to be, from memory). The one thing about this toupee that always annoyed me was that, "fresh out of the box," as it's applied, it looks awfully fake, as if it's ... plastic. Eventually (rolls eyes) I thought, "I wonder what would happen if I overdrive the bump mapping on the hair???" Uh huh. Duh. A bit of overdriven bump mapping, and the hair "pops" into an effect that's far, far more realistic than the results I've been getting across the years. I could kick myself, honestly. 😝

Then, the last thing I did differently on this is...


...I hand-painted Stoney's hair. There's nothing much you can do with the GQ Event Hair when it's set to a shade near to black (as Stone's hair is described in the books). You can't see detail in it, ever. But the shape of it is always 100% identical, in every single render ... which is not really realistic. Nobody's hair stays the same for ten consecutive minutes. So this one is hand-painted, to give Stoney a slightly more tousled look for once!

The brush I'm using for the hair is a (free) download from a very, very talented artist and brush creator at DeviantArt. I want to give a plug to "para-vine," and say thank you, thank you for this brush set, which has been terrific. (For clarification: no, I don't know para-vine personally, but I'd like to shake him by the hand and say thanks for these brushes. Wow.)

That's all from me for today. Back soon -- hopefully tomorrow, because on Wednesday the computer goes into the shop and you won't see new art for a few days while it's upgraded. Whoooo!

Thursday, May 2, 2019

The Raven out of armor ... SF, fantasy, a landscape, the works.


Rainy weather at last ... and I'm home alone, got the place to myself allll evening. 😶 Sooo... more art than usual, lately! Nothing to do but mess about in DAZ Studio, Bryce, Photoshop, and -- well, here you are: The Raven off duty, out of armor! Now, there's a sight for sore eyes. The set is MOg Ruith, from the DAZ store. I haven't worked with it much. It's a bear to light! Also...


That's just about the best I'm going to squeeze out of the old software, as per realistic landscapes without getting into Terragen and adding "populations" of trees and plants ... that comes later, after the computer rebuild, okay? Okay. The hardware I have now won't do it, and the dentist had dibs on my money. All of it. Rats. 😒

The big tree in the background is also the most complex tree I've ever conjured --

For the artists among you, it's an amalgam of FOUR trees, and I used #2 from this pack, from Renderosity -- inexpensive, at US$10 for about six trees. If you have any 3D tree model where you can get hold of the trunk/branches and the foliage, separately, you can load four trees on the same coordinates; then make the trunks and branches of two of them transparent (!), and fiddle the x,y,z values of all four of them to create a dense, complex tree -- far more realistic than one tree alone. This is also a gajillion percent better than any Bryce tree I ever managed to create in the tree workshop in Bryce 7 Pro. This is just a raytrace ... it is, however, a two hour raytrace. You gotta be patient with this. I don't do it so often because ... I'm not that patient!

Also ... a change of pace now. Let's have some science fiction to offset the fantasy and landscape work:


Although, for the life of me, I can't get Bryce 7 Pro to create a realistic earth-like image, it's terrific for alien planets! I did this in about 45 minutes, and gave the somewhat flat render a tweak in good old (free) Irfanview for good measure. And --


This, in DAZ Studio, finished off in Photoshop to add the snow, headlight glare and lens flare. The biggest problem with this one was getting the city to light up properly! That's one of the Dystopia city blocks ... it lights up automatically in Bryce, damnit, as soon as "the sun goes down," but this is just a DAZ raytrace ... didn't want to wrestle with Bryce anymore today. But in the end I did get the city to light up, and it's not bad at all. Looks like Jarrat and Stone are on their way out somewhere ... possibly on Aurora, the city of Thule -- the city from Aphelion, if you remember. The old ground city, not the domes ones in the sky --


-- you remember those! What's rather cool is that I actually built those cities from scratch, in Bryce, for the Aphelion cover art project! That whole thing was done in the one shot, sky, mountains and all, with just a bit of "zap" added in, in Photoshop. (All due credit to Mel Keegan for the inspiration!)

Okay ... time for din-dins, and a movie. And since I have the place to myself, I get to choose!

Thursday, April 25, 2019

Beefcake, as promised!


As promised, a fresh look at Blue Raven 6 himself, Gil Cronin. That's James Cargill Cronin, to those who know this stuff, nudge, wink! (Credit where it's due: major thanks to Mel Keegan, without whom Gil would no more exist than would Joe Ramos, Jarrat and Stone, and the rest of them.)

This is a terrific character to render, because the camera loves him ... and you can get the fastest raytraces on record, because since he shaves his head you don't have to wait forty-five minutes while the computer does several trillion calculations to render hair. That's the basic, original high-rez Michael 4 skinmap on a face and body of my own design, with some additions: the hairy chest and forearms are hand-painted in Photoshop ... like the diamond stud earrings that are Cronin's signature:


I always liked this character, right back to the first book. Did I say 'beefcake?" Want more? Well --

I've been sorting through the old archives and rebalancing some of the images from yesteryear, and some of them are coming up very nicely indeed. This, in LuxRender:


This one, above, has also been resized: worth seeing this at large size: it's 1800 pixels wide now, and looks a treat on the larger monitors. That looks like the SAV Atlas skinmap he's wearing. It does render up beautifully. I call that character, and image, "Fugitive." Also...


This one is almost a reimagining of a 2011 image: enlarged, rebalanced, blue-shifted, lots of little things done to it, making the old raytrace infinitely more interesting. The truth is, you can get a lot out of raytracing if you know what you're doing. The shots of Gil Cronin are also raytraces ... it's becoming a lost, or forgotten art, in this day and age of LuxRender, IRay, SuperFly, Octane and what have you. That's too bad, actually, because ... Hmm. Well, I put this to you:
NOT an ad. A screen capture... do NOT click!

That's a capture off the actual flag-carrier advertisement for the new Victoria figure, the Genesis  8 female, and it would have been rendered in IRay or, less likely, SuperFly (Poser's answer to LuxRender). Hmm. I'm actually not all that impressed. This is the new Genesis figure, and she doesn't look one whit more realistic than a hell of a lot of the stuff I'm doing with the ancient pre-Genesis, generation 4 figure, and old school raytracing. Like, for instance --


And that is why I'm not going into hock to rebuilt the computer, and racing out to get Genesis 8 and IRay, plus a few grand's worth of "assets," meaning skinmaps and costumes. To be absolutely honest, the only thing about the Michael 4 character that bugs me royally is the way the joints bend. Knees and elbows do NOT bend realistically. If you're highly observational, you might have noticed that these days I tend to keep the arms a lot straighter, or if they're bent, I put a shirt or jacket on him. M4's elbows often don't look quite right when you bend them. And yes, I will get into Genesis and all the rest eventually ... but first, my dentist has a Porche he wants me to finish paying off for him. Ack. Got to get your priorities straight, right? Right.

More soon. I feel in the mood for a fantasy barbarian! Let's see what we can do tomorrow ... after I get home from the optometrist: having my eyes checked and 3D scanned. Dang, is it that time of the year already?

Saturday, April 20, 2019

Dartagnon ... and fighters on approach to a star-carrier. Neat!


Dartagnon, anyone?! Rummaging through old project files, I found this guy hiding away, and couldn't resist playing with the character and the concept. And yes, am able to infuse so much more skill into the treatment, it's well worth doing. The magnified detail and image integrity is everywhere, and perhaps nowhere more striking than in this detail shot:


For years, I grumbled that Michael 4's hands were the things that often "let down" a render: they were plastic, juvenile, child's hands, didn't look like a man's hard-worked hands. Uh, well, not really. You can actually squeeze this out of the old model (and an ordinary raytrace), though you do have to know what you're doing.

(For those who're trying: I used the Aged Morph, in Morphs++ for Michael 4, to bring up the bones and knuckles; then you apply a "venous map" to the limbs and adjust it till it's juuust right. Now, it's very difficult to even find a venous map for M4. Few characters (skinmaps) have a decent displacement or bump map packed along with the texture set, and if you want to buy a stand-alone venous map for M4, via DAZ marketplace, it's not cheap. The one I'm using was packed with the Native American skinmap ... now, what was it called? JM Falcon. It's highly recommended. First, it's a gorgeous skinmap ... I use it for the Joe Ramos character, at right below:


...left, above, is Gil Cronin. You're looking at Blue Raven 6 and Blue Raven 7 ... and I would dearly love to get back to these guys --

Also, the Falcon venous map is very good and can be applied as a bump map on top of virtually any other M4 skinmap, to great effect. The venous detail continues into the hands, and renders very nicely. So there you go: secrets revealed.)

Yeah, yeah, okay, I've caught the NARC bug again. No excuses. Blame Mel Keegan, it's all his fault. Am reading Death'd Head again for the twentieth time, and can't resist setting up images like this --


These were designed to look like frames from a movie: cinemascope. That would be Jarrat and Stone coming back aboard the Athena, in the VM 104 Corsairs ... ahem! Actually, it's J Hoagland's Dragonfly fighter plane (from the Renderosity marketplace), posed inside of the Starcarrier set (from the DAZ store??? I don't actually remember), with backdrops in Photoshop. In fact, Gil and Joe are standing in another part of the same set -- it's vast. One of my favorites.

So sorry to be absent again this month: blame it on iffy health. I just haven't been feeling well. I have LOADS of projects in my mind, but my body has to catch up with my brain. Being disabled is a major bummer. But with any luck, I'll be feeling better now, so ... art is on its way! Beefcake. Does one need a reason?!

Lastly, I was just tinkering with textures, mapping, lights and shadows...


That's actually not bad at all. Not spectacular, nor as immediately arresting as the aforementioned beefcake (!) but ... not bad as a new experiment based on an old, old one I did soooo long ago. If anyone has been following this blog long enough, you might notice that it's running up to its tenth birthday, and close to 1,000 posts, and over 900,000 hits. That is just ... amazing. Where did time go?!

Monday, April 15, 2019

SF Heroes, a vampire, a butterfly and a mystery


Having just finished the last NARC trilogy, I find myself having terrible Jarrat and Stone withdrawal symptoms, so I've cycled right back to the beginning and am four chapters into Death's Head ... for about the twentieth time. Sorry. Can't help it. Blame Mel Keegan, it's all his fault. I could live in this universe. In fact, I think of it as my second home, keep running back there when Real Life gets so boring, shooting yourself starts to sound like a reasonable alternative. So --

Another Jarrat and Stone render, using every bit of skill and resource I have today. Must go back and re-do a lot of the 2011 shots. They were such good ideas, but these days I can do them sooo much better. Ack. Just for fun --

The 8x10 movie still version of this, as if NARC is a major motion picture series (golly, I wish it were) ...

Going back through the old, old files, I find myself fascinated by this character:


He's actually appeared in two guises: he was a vampire originally, and then he guest-starred in the unfinished (sorry!) Abraxas story, as Leon's cousin. Happy happy, joy joy, I just stumbled over the project files, so I can reopen them and return to this character. Let's make him a vampire again, and have some fun with this. How about ... Amadeus's arch nemesis, or rival?!

(On the subject of Abraxas: you may not believe this, but I have intended to get back to it, finish it out, every single day since it was suspended. It got away from me when Stuff Happened: in 2012 we had to move house from one massive place to another ... I "did my back" during that move, and it never came good. Going on seven years later, I still have spinal degeneration, it's one of the things contributing to my current disability. Then, Mom entered the very last phase of her life, and made her exit in 2017 after a couple of years that were ... beyond description. She lived the most amazing life, but the last few of her years almost put me in the ground. Eight months before she passed on, I began to suffer pancreatitis, and it took two surgeries to get through that (late 2017), then most of 2018 to recover. Then, it was disability, the inability to even walk ... and you know how depressed you can get about that?? Uh huh. Since I last wrote a chapter of Abraxas, you name it, it's happened to me. Now, so long has gone by, I'm not sure I could get back into it and actually write it; but what I can do is "tell you the story," the short version of What Happened Then. Let me get to this, and get it done, and illustrate it with some lovely art. Then we'll call Abraxas complete, one way and another.)

Searching through the old project folders, I also found this:


A terrific abstract piece done (!) in Bryce 7 Pro. The only thing is, I have no idea, none whatsoever, of how it was done. The only lucky thing is that I found the project file ... I can open it, reverse engineer it, work out what the [deleted expletive] I did to get this effect!

However, I do know what I did to produce this:


That was wrangled in Photoshop, when I was tinkering around with all their filters and effects, still learning my way around the program. I'm pretty sure I never uploaded it, and it's actually rather charming, so ... here it is.

More soon, but not tomorrow: we're taking the day and heading south into the Fleurieu for a "grand tour" of the coasts and lunch at Sails, at Clayton Bay, to celebrate Mike's birthday. This will be fun.

Friday, April 12, 2019

Iconic. No other word for it. Jarrat and Stone.


Am just finishing the final NARC trilogy, and -- what a shock -- find myself falling for Jarrat and Stone (again) like a load of bricks. So I opened some of the old, old project files. Ooooh, boy, those renders could be so much better. The skills and hardware available now make it possible to do justice to those characters which was impossible in 2010, when I was doing the original work.

I just discovered that most of the stuff I did way back when was before I got the powerful desktop: I couldn't even raytrace! So you simply could not have the kind of treatment that's doable now. This kind of image integrity, below, was not going to happen:


It's not just about the ability to raytrace, it's also about the skill in wrangling lights. Fact: you can squeeze a heck of a lot more out of the old, old render engine with clever lights than you'll get out of SuperFly or IRay with bad, or wrong, or boring, lights. Soooo ... I'll be re-rendering my way through a whole lot of the old NARC images, and this is going to be huge fun.

I did another angle on this scene ... couldn't decide which I like better, so I'll leave it to you to decide:


This one, above, gives you a sense of that fact that Stone is a big boy. They're standing in part of the Vanguard set -- another one of those few models that has an interior as well as an exterior. It looks great from outside, too --


I rendered that way back in 2010! If you see if at larder size, you'll recognize the cockpit from the inside (also, that's Jarrat flying it...)

There are some awesome SF models out there, if you have very, very deep pockets. Take this one, for instance:


This could have flown right out of a movie, but you can have the OBJ to suit DAZ, right there on the desktop ... for US$169, which is waaay over A$200. Too rich for my blood, but if you're interested, here's the link to check it out. It's a (new??) site called High End 3D, and it's expensive!

I'm on the mailing list to get the newsletters regarding new Poser releases, too. Poser Pro 11 is out, and the promos are circulating. Hmm. I wish I could say I was hugely impressed, but in fact, I'm actually not. The showcase image that's being used as the flag carrier is this:


Sure, it's a nice, clean render, but it looks ... fake. Plastic. Or something. Hmm. I'm not so dazzled that I'm about to rush out and drop about $2,500 on hardware and software to bridge the gap between what I'm doing with the old stuff, and what you see there. If it's more subtle skin tones you're looking for, consider this:


That's comparable, and doesn't have the "plastic" look of the Poser picture. It's just a raytrace in the old 3DLite engine, but I've messed about with the saturation, gamma and contrast in Irfanview to give a more subtle, less vibrant image than the pictures I acftually prefer. As I said, hmm. Let me think about this some more.

In the meantime, I'll leave you with the 2019-quality rendering of Stoney -- and take a look at the detail on the back of the hand. Uh huh.


More of everything soon!