Thursday, January 17, 2019

Something old, something new, something surprising!

CG character design ... just a raytrace; Photoshop finishing.
Old fashioned DAZ Studio 3.
Not LuxRender: just a raytrace
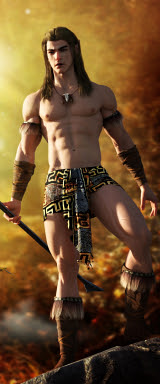
If you have a long, long memory -- or a good eye! -- you'll recognize this character. I designed him in 2010 and couldn't resist him ... gave him a name: Leon. Lately, I've been going back through the early renders and thinking, "Dang, if only I'd been doing this stuff now, with the greater skills I have now." And then I thought, "Hang on, why not revisit the old characters and see how they render up when you really, REALLY know how to drive this software, instead of it taking you for a ride.

Here's a new render of the old subject:

Best deep dhadow map you can get. Interesting, no?
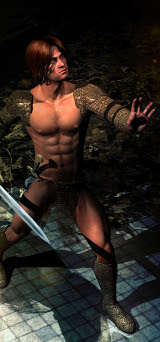
And to be perfectly fair, in the new render I used the old deep shadow map technique. Uh huh, this isn't even a raytrace. Just every trick in the book pulled with surfaces, lights, DOF, what have you. Compare the 2010 raytrace:


Flat as the proverbial tack. It's not a bad picture, but it's ... FLAT. Yet I swear on a stack of copies of Lord of the Rings, this, below, is "just" a deep shadow map render:


Also been playing in Bryce 7 Pro ... remembering a lot of stuff I've forgotten in the forty or so months since I've touched it -- but there is a LOT more to remember. Ain't quite got the hang of it back yet, but we're getting there (again):


And just for fun -- since the terrain I'm working with here is very, very unrealistic -- I took the first of these two try-outs and processed it through as a old b&w snapshot:


Now, that's ... interesting! Kind of has a King Kong feel about it. Anybody out there seen the original RKO Radio picture? Mmm, that. Next assignment to self: Remember how to make realistic terrains!!! I used to know how ... I just have to jog my own memory. Trying.

Tuesday, January 15, 2019

CG characters and landscapes ... in a heatwave.


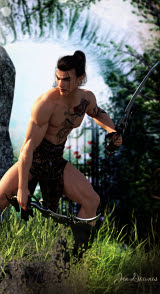
The hottest city on planet Earth. Think about it. What can you do in this kind of heat? I mean, aside from reading a book and getting s headache! But I did manage to get some art done. Above: call him Elric, or Aelric: "Angel with a Sword," an avenger, and far from human. Face and body designed by me, obviously ... all the bells and whistles, no tricks left unpulled. I like the character -- we'll come back to him.

And there's more:


Bryce landscapes. Back to Bryce for the first time in soooo long! It's high time I taught myself how to really, really drive Bryce 7 Pro. So, let's start here. I sorta kinda remember about half of it, but I have to admit that a lot of it always baffled me, and then I've forgotten a lot more! So when it came to doing this one:


...yes, I know, a lot of people would have done it in Bryce, but I couldn't get my head to go there. It's TOO HOT. So I ran right back to DAZ Studio 3 and did it there instead. Had it done in a tenth of the time of even  trying to do it in Bryce, but I'm promising myself that I will master Bryce!

 Must log out now. It's just so hot, I'm melting. So are the computers. So ... like the man said in the movie, I'll be back!

Friday, January 4, 2019

Working with texture, color and light

Displacement map, bump map, reflection, refraction and gloss
values all set on ... well, everything.
Displacement, bump mapping and reflection are striking in this one...
DOF is turned off to make to make textures visible. 


In the last few days, I find myself fascinated by the textures of things, by the quality of light, the way distance -- actually, the density of particles in the atmosphere, but that strips the romance right out of it, doesn't it? -- strips detail, resolution and color from a vista.

So, working in CG, I find myself playing endlessly with the balance between displacement map values, bump mapping, reflection, refraction, the strength, color and direction of lights, the "drop off" of light over distance. (I learned the theory of all this via the 3D Studio Max Bible, incidentally, years and years ago. No, I never used "Max." It was out of my price bracket,  not to mention that my hardware wouldn't run it! But you could get the third-party manual for a song on eBay or something, and although 90% of the book was devoted to hand-holding exercises, teaching students how to drive the interface, the last 10% of the 700pp large-format book was invested in the theory of texture, light and ... all. So you had 70pp of in-depth, high-density information, the whole theory of the CG art form. This was all I needed. Actually, I always considered it a bit of a waste, printing a massive book teaching students how to drive an interface, because in a year's time the company will bring out the next version of the software ... they'll change the interface so radically, little you learned from a by-the-numbers book will do you a shred of good. On the other hand, master the theory ...! So, uh, I did. And it's infinitely applicable to DAZ, Poser, Bryce, whatever you can afford.)

Fascinated by light, texture and what have you, I couldn't resist painting in Photoshop too:

Digital watercolor: summer hills

Color gradients: none of this is in the source photo.
In fact the photo is a waste of storage space...

Digital watercolor: Near Yankalilla

Color and texture: again, none of this is in the source photo.
Lighting conditions on the day were ghastly. So ... painting!
As often happens, the very day that you're in the right place to get a perfectly framed photo, the sky is dull, but not dull enough to be dramatic. Just enough to make a digital camera record a picture that's so drab, it's just about black and white, so flat and boring, your mouse is hovering over the DELETE button. I tend to delete loads of pictures, and in the past the source photos for digital paintings like these would have been ditched... 

But I always loved the vibrancy and texture of watercolors, and lately -- bored out of my gourd (being disabled for a couple of years has impacted heavily on me) -- I've begun to play with things I never had time to consider before. Now, if I had to work on art board, with brushes and paint, this would never happen ... have you seen the price of art materials these days?! The boards are about $30 each. And since I haven't done this in around thirty years, I'll make a dozen messes before I get back to paintings I'm proud of. Uh -- not this year. Maybe later, if/when I ever find my way back to the cash, AND the pain in my hands and spine subsides to a level where I can actually do the work. In the meantime --

Yes, I work digitally. Everything happens in the computer. These paintings frequently start life as truly garbage snapshots ... full of foreground litter and background microwave relay towers! They're reduced to line sketches, then worked up to digital paintings in a process taking several hours each, and involving loads of, uh, painting, as well as many, many digital processes. But the whole job takes a fraction the time of a real, physical painting, and of course it costs nothing... 

Both those things are important when you don't have a lot of cash, and you're carrying a bundle of physical problems as well as the major disability that'll keep you comprehensively crippled for another year. It's all about the pleasure of being creative and winding up with a lovely picture; not this daft, ongoing game of "My materials are the best in the world, what are you using?" Dang, I hate that. It's like the "My car's faster than your car" game. Ack.

More soon.  

Monday, December 31, 2018

New Year's Day ... The Magician (CG character development on steroids)


Happy New Year! Yes ... I couldn't resist signing off on something "2019" so ... remember The Conjurer character from last week? The one where I resurrected an old render, combined it with an Amberlight image I did last year, then plunked the result into Serif and worked it up as a show poster? Yes, that's the one. Soooo, I thought --

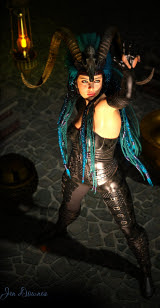
The conjurer is obviously a performer (hence the show poster). Let's organize a performance. The hardest thing was deciding what the act would be, and how to stage it. This is the old Dinokonda, with massively overdriven textures and a lot of painting. Also, the raytrace was put into Photoshop for loads of painting: you might be surprised, even shocked, at how flat, dull and boring the raytraces are. Didn't used to notice it, years ago, but lately, with the vast advances in CG work, especially on the desktop at hobbyist level, you do notice it. So ... Photoshop to the rescue, I guess. Gauss it, add grain, crush the shadows, burn the highlights a bit. The result is far superior.

Have also been playing with displacement mapping, as applied to hands:


That's not too bad, actually, but there's a limit to how far you can push a standard displacement map. I'm actually thinking of going back to basics and actually painting a displacement map that puts the veins in a human hand where they ought to be. Sure, you can buy displacement maps from the DAZ store, but they work out at over A$35! If I'm as smart as I think I am, I ought to be able to paint this myself. Worth the experiment, at least.

(Also, there's a limit to how close to the Michael 4 model you can bring the camera. This hand, here, was rendered at about 1000 pixels wide, and the you can actually see the polygons in the curved surfaces, this close up. There just aren't enough polygons in the old model for it to hold together. I painted them out and resized the image smaller, to get this quality.)

Very happy with these renders. Have definitely managed to get rid of the plastic-doll appearance that plagues the old renders. The trick of Gaussian blur and film grain seems to work every time. That's a relief! Am thinking of going back into numerous of the old project files, the really memorable subjects and redoing them. Get clever with the rework. 😃