Showing posts with label Cowboys. Show all posts

Thursday, March 7, 2019

A cowboy fantasy, a truly glorious digital sunset, a kerfuffle with lights, and ... trees!


Just a (cowboy) fantasy ... a test-bed, in fact, to set up and hammer the problems out of a lighting set that's bothered me since something like 2012. You've been doing this stuff for almost twelve years, you think you know lights backwards and sideways, right? You think nothing is going to catch you unawares? That, my darling possums, is an excellent definition of hubris. Ack. Then this happens:


😵😳😱 WTF?!!! At first glance, it looks like the mesh collapsed, or buckled, but nope. Delete all lights and take another look. The mesh is fine. What you have there is two lights having a fight (ah, the joys of biased rendering...) and making it look like the mesh collapsed.

So now we re-re-re-relight what should have been a simple scene: an exercise, like a musician playing scales and arpeggios for practice. Yep, I learned a lot. This image was only intended as a test stage to work the bugs out of a lighting set, but it turned itself into a two hour marathon. Simple as it is, it almost beat me (I did have a smashing headache at the time, and I was full of pills: that could have had something to do with it). But, never say quit, right? Right.

Then I noticed something...


Is anybody out there old enough that if I said, "Johnny Madrid" you'd know (or care) what I was talking about?! Honest to gods, this just happened, and it's only a trick of the light. If the character turns around, the illusion will vanish. But just right there ... Johnny Madrid by accident.

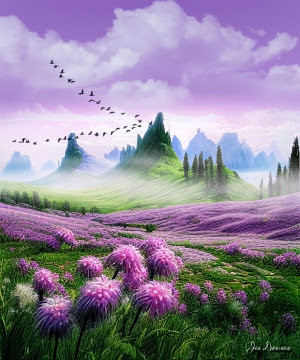
Played in Terragen some more, and came up with some lovely stuff, one in particular:


That one looks superb at large size: I uploaded it at 1600 wide (no, I'm only using the free version at the moment, so the biggest I ever render is 1200, but Photoshop and Irfanview do a nice enough job of enlarging the images. I will be doing the subscription version of Terragen eventually -- but not on this skinny little laptop. It's struggling, and will burn itself out if I run it much more, or much harder!
Also...


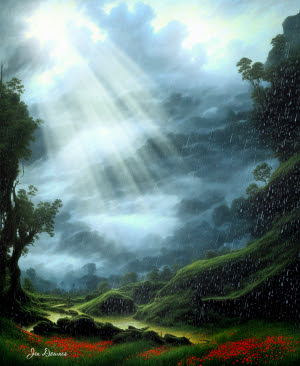
Above: exact same landscape, water and clouds, different time of day. Am starting to play with clouds right now: I want to be able to do big, dense, dark thunderheads, then have the sun come peeking around them. I think I see how it's done. Will play some more tomorrow. Also...


All the other landscapes were done with the old heightfield terrain, which you can only drive so far. For this one, above, I switched to an alpine fractal ... something or other, which has these really neat erosion patterns built right into the mesh:


I love the erosion patterns in the rock faces ... and the beauty of it is, Terragen does this stuff automatically. You just have to add in the "shaders" for snow, vegetation, rock color, what not...

In fact, the last thing these landscapes are crying out for, now, is ... trees. And I know where to go to get them. There's a company called Xfrog which seems to have modeled every bit of herbage on the planet, and they are very, very nice models. Such as this:


They work out at about A$65 per tree, if you just buy a single tree, or A$130 for a "library," where you're buying 20 trees for a particular geographical zone -- for example, they've covered Europe in three packs. I mean, I am drooling, seriously:


I haven't taken it to this level yet. for two reasons. One, they're not cheap. It makes no sense to spend $65 for one tree, when you can get 20 trees for $130, so you know ahead of time, you're up for $130. Which is actually out of my price bracket at the moment, if I tell the truth. Second, I need to know before I spend money what adding plants will do to the render times of my Terragen scenes -- because longer renders mean a lot more work for the computer, and this really is a skinny little laptop! If I burn it out, asking it to do the implausible, I'll need to buy a new one ... uh, no. So, the plan is to get hold of the free samples and take them for a spin first. Then make the decision.

And I know I'm only delaying out of sheer cowardice! I could do it tomorrow. I might. Or ... I might go play in LuxRender, which I haven't done in years, but I do need to do, because I have a book cover to render up for a client in the fairly near future, and it's going to depend on Lux, because it has to give the impression of being a photo, which (with the best will in the world) raytraces don't.

Back soon with more!

Thursday, December 1, 2011

Riding Shotgun!


Yes ... book cover art. Umm ... gay book cover art, in fact. I've been busy prepping a new work which is launching this coming weekend (meaning, tomorrow, downunder -- the dateline thing). One of the things I really like about working with writers is that they can whisper to me who was the inspiration for their characters, and this gives me half a chance of coming up with something that's at least in the ballpark when I design the cover.

I remember, about fourteen years ago, a new edition of Mel Keegan's Fortunes of War came out, and the reprint publisher put on a cover in which one of the two rather punkish looking young men had an eyepatch. The story came to me at second or third hand, that at least some readers were waiting, right through the story, for the scene when the hero, Dermot Channon, lost his eye! Never happened, people. Nope. That cover had nada to do with the book.

Since then, it's been pretty important to me to at least try to get into the ballpark. Sometimes a writer whispers to me, "Well, actually, I was thinking about Brad Pitt when I wrote this..." Or it'll be, "It was Tom Selleck on my mind when I was doing this story..."

Hey, where is it written that movie stars shall not be used by writers as inspiration? And even if it was written, that's a rule I would love to see them try to enforce!

Right now, you might be wondering what the heck this book is, so --


There you go. It's a good read, if you like your romance hot enough to scorch your wee little fingers as you hang onto your Kindle or your Nook for dear life!

This one was done in three layers: the sky, clouds, moon, wolf and general backgrounding into the bottom of the shot were all done in one piece, and most of it was hand-painted. The wolf was borrowed from a photo, and extensively (and I mean extensively!) worked. This was then imported into DAZ Studio as a backdrop, and the characters were designed, dressed, posed, and stood in front of it. Raytraced ... shipped back out into Photoshop to be overpainted and enhanced. Then the whole composition was shipped into Serif to have the text objects added. Done!

Next job: finish painting the covers for the NARC series. These five books are hanging over my head like a flock of albatrosses -- I've been trying to get them rejacketed and reformated for six months! Been busy. (Now, there's an understatement!)

Jade, 2 December

Sunday, November 6, 2011

Hellgate: Flashpoint ... check this out!


UPDATE: November 18, and HELLGATE:Flashpoint is out! If you've been waiting for this (your Mel Keegan fix, or your Hellgate fix), here's where you want to be:

http://www.dream-craft.com/melkeegan/flashpoint_dc.html


In fact, I didn't fall off the face of the Earth ... it's just been the month from hell, highlighted by a death in the family, after which the rest of October and the first week of November passed by like a blur. Work piled up, and I was sick myself, but there's nothing new in that ... long story short: it's been rough. But I'm back, not only working properly again, but also doing artwork.

As you can see, we're packaging HELLGATE #5: Flashpoint at this time. I just finished the cover art -- and if you're sharp-eyed you'll see that there's still a line of question marks where the ISBN ought to be. We're still waiting for the package of ISBNs we bought to become available. In the next 24 hours, they should activate, and we can go ahead with the new Mel Keegan novel as well as this one, which is a gay American historical (for which, read "Western," if you prefer) ...

You can see, I have been busy after all ... just not posting! I hope to remedy this in the days to come. There's still a great stack of 3D toys I bought back around a month ago, which haven't even been unpacked yet -- things just went haywire.

So, what's the deal with HELLGATE: Flashpoint? It's the fifth of the HELLGATE novels, leaving one book to go to finish out the series. This book is long. It's huge. It's the size of two of the ordinary-length HELLGATE books, at 250,000 words. Why? A year or so ago, Mel Keegan made the decision to take the fifth and sixth of the originally-planned seven books, and roll them into one. This actually saves readers a nice bit of money -- six books to buy, instead of five. Also, the two books would have been noticeably shorter than the usual HELLGATE volume, so, rather than have two skinny issues right in the middle, it looked like a much better idea to have a whopping great "thick" in there! Therefore, HELLGATE is now six books, not seven ... and here you have #5, plus what used to be "#6 of 7," both under the one cover and on one title. One more to go, early in 2012 -- the title is Event Horizon -- and HELLGATE is done! MK promises that the next NARC book is already being plotted, and with the slightest bit of luck, that one should be along in 2012 as well.

Jade, 7 November

Wednesday, February 24, 2010

Native American ... beauty and fantasy


Still on the Western theme ... the Native American side of the fence ... pretending to have a fantastic vacation in Colorado and meet this really cool guy who's actually shooting a movie about three yards out of the frame to the left --!

Seriously: the backdrop is a tiny swatch out of a wallpaper image of Colorado ... and I didn't soften it by much to make it look realistic for these conditions. Why not? Well (I slap my photographer's hat on here!) look at the daylight. It's brilliant. To get a well-balanced shot here, you'd be shooting at f/22, if your camera "stops down" that far --

There's a generation of digital photographers going, "Huh? Say what?" But this is the photographic theory behind great shots. The modern camera is closer to a computer than a camera, and it's doing the work for you, but here's what it's doing: it's closing your lens to stop most of the light getting to the virtual film, so the photo doesn't "burn out." Now, f/2 is a BIG aperture, and f/22 is a tiny aperture. Small holes let less light through, right?

But there's one other thing that tiny apertures do! Here's the rule: there smaller the aperture, the more depth of field you get. Meaning, everything from about five feet from the lens to infinity will be in focus. (Penny drops! Loud ringing sound! here's a Eureka moment.)

So in these lighting conditions, don't soften the backdrop image. When you get your model(s) set for the shot, throw loads and loads of light onto them to brighten them up to match the backdrop.

This shot needed six distant lights and our point lights to get enough light onto it to look realistic enough to match the glorious Colorado backdrop. The rest of the shot is:

Michael 4
Midnight Prince hair set to raven black
Falcon skin map with some of the warpaint turned on
Falcon face heavily modified by me (it's Joe Ramos from NARC!)
Loincloth from the Wood God set
Moccasins from the Wood God set
All costume set to "brown"
Millennium Horse
CWRW Pro texture: appaloosa
MAT-Mor Mane Pack to design the long, curl mane
Western Horse tack -- saddle and bridle
Textures on the tack ... lose the saddle blanket.

With everything imported, then you have loads of fun getting the poses right. It ain't easy -- and the toughest part of it is getting the reins to lie right. Yeeouch, that's a job!

Lastly ... the lights. Light maketh the picture. Trust me, the first time you render a shot like these without any lights, you'll see the difference!

Jade, 25 February

***Posted by MK, because I have no viable connection to the www today. 

Tuesday, February 23, 2010

Props for a 3D goldrush ... figure model and all!

Western 3D props! Seriously -- a realy fantastic set of odds and ends that put a huge kick into many historical scenes you're setting. "Western" is a time-frame as well as a location ... bet your bottom dollar, the bits and pieces would have looked the same in England, Europe or Australia in 1870, so they mix and match beautifully...

Now, you might have noticed that it is Impossible to sell, demonstrate or display anything in this universe (or at least on this planet) without having a near-naked babe draped over it. I was looking at fancy paper stocks yesterday. Paper! And sure enough there had to be a young female in what was supposed to be provocative costume partially obscuring the product (actually it just looked like her corsets were so tight they were cutting off the circulation to her brain ... or maybe it was the height of her heels making her dizzy). So, in the interests of fair play --

You there, sonny Jim. Yes, you in the blue jeans, pretending to be a male model. Yes, you! If you want to be a model, let's take the idea for a spin!

Being a nice lad, he didn't seem to mind. Maybe he reckons sexist advertising is a right royal pain, and he'd be right. But if it's going to be done at all, it oughtta go both ways... equal opportunity eye candy, nudge, wink.

Yes, well, thank you, dear. Now, git out of the picture and let's see the props. Go! You and your scarlet undies can go get a coffee while the props speak for themselves now you've grabbed everyone's attention for us.

And they really are a heck of a nice set of props. There's about 20 items in the set, including a tripod for the campfire, a coffee pot, a branding iron, several bags, crate, box, chest, trunk, pail, and so on.

The whole kit looks like someone's struck gold in them thar hills, and won't be seen again till they show up swanning around on a Mississippi river casino boat, like James Coburn in Maverick! Best of all, this great set of props cost the princely sum of $9.99, and it wasn't even a sale.

Jade's verdict: highly recommended, 5 out of 5, great quality, great value.

Also, I couldn't resist using these renders as an exercise in shadows and light too ... have you noticed the shadow cast by the lantern? Is that nice, or what?! Yeeees, I managed to turn on shadows without Studio crashing to the desktop. (The sound you hear is a sigh of relief.)

***Posted by MK, because I have no viable connection to the www today. 


Saturday, February 6, 2010

DAZ Studio 3 art: experiments in Raytracing


Raytracing ... what in the world is it, what's it all about? In the six months since I started doing this art, I've wanted to run the experiment and see the difference (if any) between the "deep shadow map" that I've been using to generate the shadows on countless hundreds of renders, and the Raytraced shadows. Raytracing is a software rendering "engine" that literally tracks every single ray of light you've got shining on your models, and figures out where they'll all land ... and then calculates in the color and strength of the lights ... and figures out how they'll react when you're bouncing them off surfaces.

No wonder it takes about 10 minutes to render a single image! By contrast, the same image using the Deep Shadow Map system would render in about one minute or less. That system uses at least one "pass" for each light, so if you've set 10 lights, that's 10 rendering passes before you get to the render; and you can also get into the advanced rendering settings and configure it for more than one pass per light.

O...kay. So the big difference is first about time. Don't set your render to Raytrace unless you really are going out for coffee. But then, what's the quality like, when the work is all done?

Well, compare these: ( You really need to look at the at large size, so go ahead, click on them -- they were uploaded at 800 pixels wide, so you can see the detail) ...

This one, above, has the Raytraced shadows. This one, below, has Deep Shadow Map:


And the place where you can really see the difference is in the fine shadows ... for ex., where the shadows of his hair cross his face, and around his left hand on the reins:

2024 Edit: not a lot of resolution on this ... but you have to start somewhere, right? If you're going through the earliest posts on this blog, remember that before about 2012-ish, everything falls into the "first steps" or "baby steps" category. I've actually left the old posts up because it's quite possible that beginners in CG art might find them useful.


The difference is amazing -- look at the palomino's tail, also. In fact, there's so much more detail in the Raytraced shadow image that it turns out to be a mixed blessing ... because it shows up bunch of stuff that gets hidden by the lack of detail! (A bit like getting new glasses and noticing your wrinkles and gray hair for the first time. Did I just show my age?)

The only place, to my eye, where this "detail" pic gives away the fact it's 3D is how the fabric folds (or doesn't) around that left elbow. You can fix this, if you have another hour or two to invest in the project. Alas, I don't, so ... it's 3D Art, not photographic realism. What the heck, it's beautiful anyway!

Anyway, if you look closely at the two renders, the Rayrtraced one is so close the photographic levels of realism, that when something is obviously "done digitally," it really sticks out. Now ... you can fix every single little problem in 3D digitals, so your final Raytraced render would end up being so perfect, you could pass it for a photo and nobody would blink. BUT. It takes a lot of work. Instead of getting a new render every day (or a series of them) from me, for instance, you'd wind up with one a week! To fix all the "bugs" you have to fine-tune to a depth you don't see this side of Avatar ... and sometimes this means using Deformers to physically change the model that was delivered by the designer. (Deformers as very distinct from Morphs. You use Morphs all the time; Deformers are very cool, and very complicated.)

So it comes down to ... do you have time for Raytraced renders? Do you have time to spend adjusting the digital details to make them Raytrace-proof? Do you prefer to sweat blood on one perfect image, or get 20 images at 95% perfect, in the same?!

All good questions, and not for me to answer. I think I'll use Raytracing mostly when I do very complex portraits, where it would be so great to see the shadows cast by every eyelash ... that's art! Ars gratia artis, as MGM used to say. (Art for art's sake.)

I want to answer a question in today's post, also. I was asked, "How exactly do you take a photo and turn it into a painting, the way you did with Stampede Trail the other day?"

Fair enough -- good question! It's also dead simple. The only trick is "knowing when to stop" with the process, and that's the same in all kinds of art. Painters who work in oils and watercolors know exactly what I mean. Keep going and going and going, and the painting ends up looking like a flat, boring, muddy mess. Same thing with digital painting ... it's just faster to get the project done. (You can also make HUGE messes even faster ... you'll get intimately acquainted with the UNDO key!)

Here's how you do it:

Start with an image. I used a photo from a 1998 Alaska vacation trip. The location is Stampede Trail, which is not that far from Fairbanks:


The photo is old ... meaning it's a PHOTO, not a digital image. So by the time you see it here it's already been scanned and enhanced. Also resized. But it's still a photo, and we want to wind up with something that looks painted, like this -- and you can't see the effect in this small version!! You need to open them both and compare them at full size to see the effect, so I've uploaded them at full-size here so you can see what I'm talking about...


It's a beautiful effect. So, how's it done? Now, I can't talk you through the process in Photoshop*, because I don't use Photoshop, which I consider to be ridiculously expensive at $1,800. But I can talk you through it in Irfanview, which is free. And the process should be similar or the same in Paintshop, or whatever you're using.

  • Open the image you want to turn into a picture.
  • Open your effects browser...
  • Apply the MEDIAN FILTER in increments, over and over, until the photo has almost (not quite!) turned to colored mush...
  • Sharpen the image in small increments, over and over, till you see the painted effect.
  • Stop when the effect is "good enough" or what you want or need.

* 2024 Edit: I would eventually switch to Photoshop in around 2014, when I had to buy a new computer, and my trust old 32 bit software ... quit. In later years, I've become rather proficient in Photoshop, and if you're looking at anything from about 2019 onwards, I'm always delighted to talk through how things are done in PS -- there's some landscape tutorials in 2024, for example. 

Too much median filter and you won't get the picture back -- it'll turn to mush. Too much sharpening on the way back, and you'll go past the point of having a nice painting, and will "overcook" it and wind up with pixelly rubbish. Deliberately make both the mistakes a few times, and see what happens! You learn better, faster, by seeing the mess and knowing what to avoid. And what the heck, it's digital ... it ain't costing you anything!

Join me tomorrow for a partnership of assassins, a young dancer and a master warrior who're on the same job: regicide in the public interest!

Jade, 7 February

***Posted by MK, because I have no viable connection to the www today. 

Wednesday, January 27, 2010

Creating characters: the classic Western meets DAZ 3D!

Back in the Old West today ... 3D style! And I couldn't resist playing "mix and match" with the 3D models I picked up in the sale a few days ago. The Remendado skin map is a fantastic add-on to Michael 4 -- then, add the Mon Chevalier hair ... it really sets off the older face. I'm one of those souls who actually (gosh! wow! golly!) likes guys with a few years on their shoulders. One of the things I like best is looking at a face and figuring out what events have made him into the guy he is...

Now, if you compare today's version of the character with yesterday, there's HUGE differences. Okay, sure, he's wearing the rose tattoos, and sure, I made him blond today. But check out the physique, people. There you go: Morphs++ in action. I tweaked the "muscle builder" slider, then the "definition" slider. Then, "smooth" just a big because too many sinews were showing; and then I opened up specifically the arms and shoulders and pumped the triceps and biceps...


The poor man has quite a workout. He didn't seem to mind. I also couldn't decide between the above two renders, so I'm uploading both -- you decide! And while you're there, check out the six-pack abs! That's the Old Tucson saloon in the background ... just a pic off the web that was heavily worked on before being used here.


Then, having cleaned up the town like any roaming, lordless samurai, all he wants now is a square meal ... and a crack at the best looking unattached young beauty in town ... and if the twinkle in that eye is anything to go by, I don't think gender's going to matter much!

Back tomorrow with something more lucid ... not too much prose today. Half the group here has come down with a stomach virus, and we're actually trying not to heave most of the time. No idea where we picked it up, but it's hit three out of four of us here ... the good news is, you can't can't it over the Internet. Not that kind of virus!

Jade, 28 January


***Posted by MK: my connection is intermittent, too slow for this. Seriously, guys, I've got dialup speeds. How are you expected to do anything these days, at 1990 dialup speeds?!!!

Sunday, January 24, 2010

Western Heroes ... the 3D way

And now for something completely different: Western heroes ... cowboys. In 3D. Yes. You know, I grew up in the golden age of the TV westerns. Everything from Maverick to Lancer to Alias Smith & Jones, by way of Cheyenne, Laredo and The High Chapperal, not to mention The Virginian and Bronco Lane! And I know I lost a lot of you on paragraph one! Bonanza wasn't the only western. I just wish they'd whack more of them onto DVD. I know they've done Maverick in the States, but you can't get it in Aus. (You can't get Highlander either, not even Season 1. Rats.)

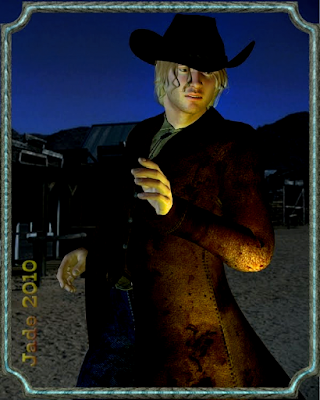
The young cutie you see above is just the basic Michael 4 dressed in the Cowboy costume with the Tex textures added, and a couple of quickie backdrops imported. I have to say that the M4 Cowboy set is damned hard work. Seriously. This is not a model set I'd recommend until you get some experience under your belt, for several reasons. Getting the "fits" is not easy, and you need to know about morphs and how to actually get hold of a sleeve and turn it off ... and then you need to know the DAZ Studio 3 folder hierarchy inside out, or you might never find the Tex textures at all. They're in the wrong place. I went hunting to find them, and then wrote down the path so I stand half a chance of finding them again!

(If you've installed them and can't find them, try looking here:

Studio 3 > People > Michael 4 > Clothing > HMG Tex

... and that is NOT where they're supposed to install, going by the Read Me page.)

Anyway ... after one heck of a hunt, I found the textures. Next challenge: getting the hat to fit over a hairstyle. This also is not a task for someone who'd new to DAZ. You can do it, but it involves both stretching the hat and using the hair morphs to flatten out the style.

The style I'm using here is the Midnight Prince hairdo, set to golden blond, which gives Michael 4 a real "down home" look ... a nice lad, maybe 20 years old ... a peach ripe for plucking.

If you can wrestle your way around the hat, though, it's a very nice model; and the "duster" coat will also mix-and-match with other sets. Like, leathers and a katana, for the Highlander look. Also, "cowboy aviators" leap to mind. Add this hat to a character in jeans and leather jacket, and add a pair of sun glasses. Remember Tommy Lee Jones in Space Cowboys?


If you can FIND the damn' Tex textures, they do apply beautifully, though you don't see much till you put some lights on them and render them. To get this effect, I used a blue distant light turned down low to look like late twilight, and then a green point light low to his left and a cream point light off his left shoulder, to bring out the texture applied to the coat, and also bring his face up clearly.

A great thing about the hat is that you can tip to forward or back on his head; you can also change the size of it. Using it in combo with the Midnight Prince hair is a real challenge, though. It just doesn't want to fit over. You have hair showing through the hat. The Midnight Prince hair has loads of morphs and fits, but I haven't (yet) found a way to get around the problem by using the controls...

The answer is to use DAZ's own Deformers ... and that, guys, is a whole 'nother subject!

Jade, 25 January

***Posted by MK: my connection is intermittent, too slow for this. Seriously, guys, I've got dialup speeds. How are you expected to do anything these days, at 1990 dialup speeds?!!!