Showing posts with label LuxRender. Show all posts

Saturday, August 10, 2024

Watching old artwork "pop!" in Photoshop. Nice!


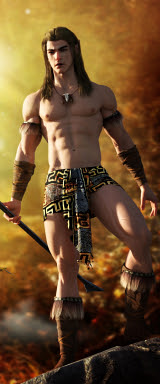
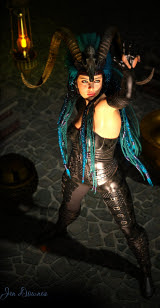
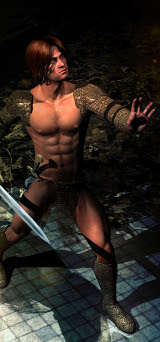
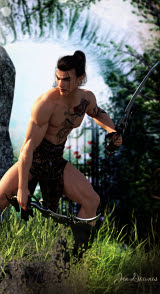
The Barbarian was rendered original in Lux (which doesn't even exist anymore); the drowned city, the house by the sea, and the spacecraft were done in Bryce 7 Pro (!); Mr. Lace Shirt and the grieving warrior are raytraces. I've just spent a fascinating hour or so, running them through Photoshop. Nice! It's amazing to see the old work "pop" when it's given the proper treatment, which is why I keep posting selections of the old stuff. Second Life. The truth is, 12 and 14 years ago, I didn't do justice to the old renders. Many of them -- ten years old and more now -- are still delicious images even today. 


Having said all that, my fingers are itching to start Studio again, and get back into rendering. I haven't done this in waaaay over two years, and I'm trusting to "muscle memory" to get me going again, because I'm racking my brains for the details, and, um, it's been so long, I'm hazy, lol.


I did need to generate some book covers a few weeks ago, and I had intended to do a lot of the work in DAZ and Iray, but the way things worked out, time-wise, I ended up doing the whole thing in Photoshop. The author was delighted with the result, and now it's over to the publisher to decide which of these (if any) will jacket the book when it's published in a year or two...


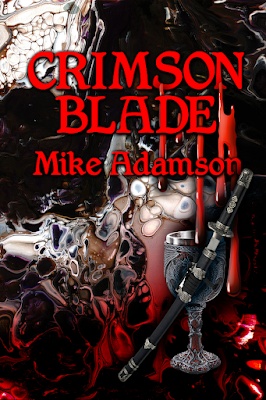


See? I can still do this, lol, I haven't forgotten how! I just have gone somewhat hazy on the finer points of working with Iray, and figuring out how to get Studio to raytrace ... because I really, really, want to PAINT. Here's the thing of it: start out with a raytrace, and you can paint to your heart's content and end up with something beautiful. Start with an Iray render, and you really can't: it's like painting over a photo, and when you add digital painting to a photo, it looks soooo fake. You don't get "hybrid art," you get a bit of a mess, actually. So ... I want to paint, which means I need to be raytracing.


Luckily, the raytrace texture sets have been supplied for the props I've bought in the last six or so years, with the exception of the Iray shaders, which are (duh) Iray specific. But the thing is, I used to make my own texture sets (call them shaders) for the raytrace engine, and it was a lot of fun. So -- yes. It's just a question of getting the time away from a blizzard of work. I'm working on it.

More soon. I have some news, which I'm not yet at liberty to share, but it should be fine to share it next week. Hope to be back here sooner than that, because I'm aching to get back to art.

Monday, November 4, 2019

Sports car in Iray ... and luck with a great skinmap for M4 in Iray, too!


Iray ... a quick Bryce 7 Pro sky used as a backdrop ... sports car ... Michael 8 ... nice! This is far from the first car I've rendered, but it is the first time I've done a car in Iray, and -- I like it. I didn't even have to switch out the materials: the original materials as supplied with the model rendered just fine. It's called the f612 Italian Sports Car, from the DAZ marketplace -- I bough it about eight or nine years ago, and it's still available. Here you go:

Catalog image. See this.
It's low-poly enough that even my old system was able to render the car and set in an hour, and when I added the Michael 8 figure, plus hair (Shavonne) and costume (Cool Style) and a shader on the shirt, and a chrome shader on the wheel rims, I went to 90 minutes. The car still only $12.95. and -- thumbs up on this.

I can't remember the fantasy novel I'm trying to think of right now, but the name of Lackey comes to mind, and part of the blurb was, 'There are elves out there, and they drive too fast.' It was some urban fantasy, tall elves in our world. So you have got to know what I'm thinking right now. Ahem! Stay tuned.

Also -- at last! -- a little luck in the hunt for Michael 4 skinmaps that don't look 'dead' in Iray:


That's the Jagger skinmap, which you usually see on Kevin Jarrat (in the NARC renders ... one of my all-time favorite characters -- him and his other half, Stoney, nudge, wink, and cheers to Mel Keegan as the creator of same). You also see this skinmap on the Vampire Amadeus ... so I really, seriously, put it to the test in Iray the other day. I slapped it onto an old character of mine, 'The Conjurer,' and gave it an hour in Iray. Thank gods, here's a third skinmap that looks terrific in Iray. The other two are Ferendir and Atlas; virtually everything else I've tested to date will render, obviously, but the results is disappointing, especially when you're trying to render the old Generation 4 figures half the time, because Genesis 8 is so high-poly, your computer is having a hernia, LOL! Sooo...

Here's the old Conjurer character in Iray, wearing Jagger. very nice result ... I used the "hairy" and "bearded" options, which is different from Jarrat and Amadeus, who're smoothies. I like this, so now I have a pale (Ferendir), a swarthy (Atlas) and a medium (Jagger) skinmap for Michael 4, all Iray-friendly. This, we can work with.

One thing that bemuses me, though, is the way one face morph can change utterly as it's processed in a different render engine. Here, above you see my Conjurer (actually, he has a 'stage name' -- Cassandro; I guess in this render we're seeing him at home, not on-stage). That's the exact same face morph, I didn't do anything to it. But here's the same face, in LuxRender, back in 2012:


And here's the same face in 3Delight about ten months ago:


You may need to see "Snake Charmer" here at larger size to see the face clearly. I'm still shaking my head, that one face can come up looking so different as it passes back and forth between Iray, LuxRender and 3Delight. Go figure.

Anyway, we are now officially having fun, and Michael 4 has his oars back in the water, for Iray! It's taken me eight months to answer enough questions to know what I'm doing, and can do, with this computer; and we're now also officially on the count-down to The New Computer, in about a year from now. It'll either be my birthday pressie or Christmas, and since those dates are only 51 days apart, there's not a lot of difference. 😃 (Yes, I just had a birthday. Yesterday, in fact -- one of the reasons I didn't post yesterday: was out gallivanting.)

More soon!

Thursday, April 25, 2019

Beefcake, as promised!


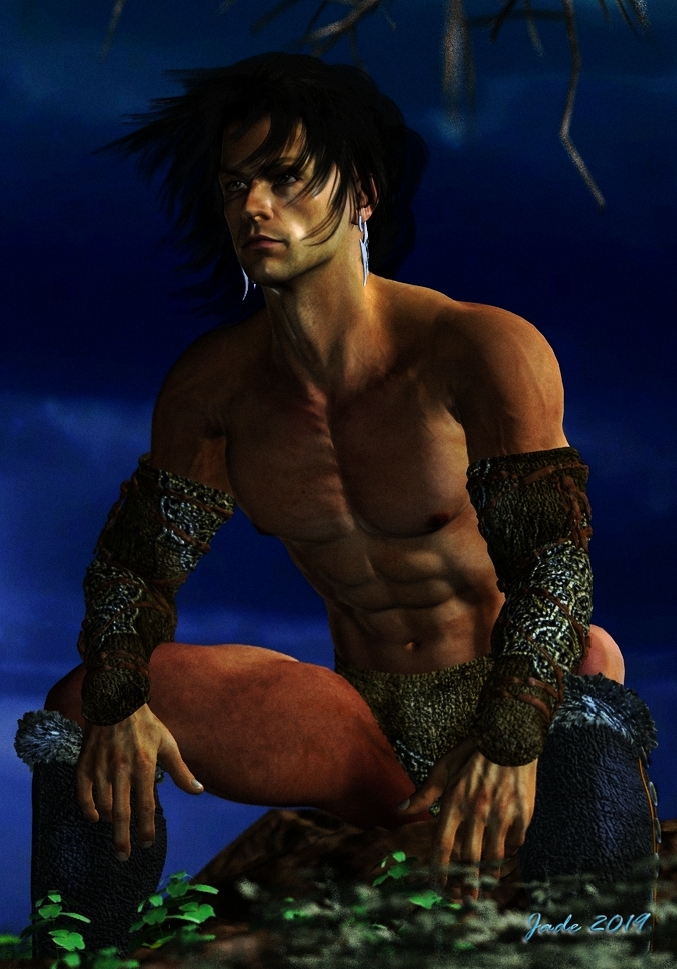
As promised, a fresh look at Blue Raven 6 himself, Gil Cronin. That's James Cargill Cronin, to those who know this stuff, nudge, wink! (Credit where it's due: major thanks to Mel Keegan, without whom Gil would no more exist than would Joe Ramos, Jarrat and Stone, and the rest of them.)

This is a terrific character to render, because the camera loves him ... and you can get the fastest raytraces on record, because since he shaves his head you don't have to wait forty-five minutes while the computer does several trillion calculations to render hair. That's the basic, original high-rez Michael 4 skinmap on a face and body of my own design, with some additions: the hairy chest and forearms are hand-painted in Photoshop ... like the diamond stud earrings that are Cronin's signature:


I always liked this character, right back to the first book. Did I say 'beefcake?" Want more? Well --

I've been sorting through the old archives and rebalancing some of the images from yesteryear, and some of them are coming up very nicely indeed. This, in LuxRender:


This one, above, has also been resized: worth seeing this at large size: it's 1800 pixels wide now, and looks a treat on the larger monitors. That looks like the SAV Atlas skinmap he's wearing. It does render up beautifully. I call that character, and image, "Fugitive." Also...


This one is almost a reimagining of a 2011 image: enlarged, rebalanced, blue-shifted, lots of little things done to it, making the old raytrace infinitely more interesting. The truth is, you can get a lot out of raytracing if you know what you're doing. The shots of Gil Cronin are also raytraces ... it's becoming a lost, or forgotten art, in this day and age of LuxRender, IRay, SuperFly, Octane and what have you. That's too bad, actually, because ... Hmm. Well, I put this to you:
NOT an ad. A screen capture... do NOT click!

That's a capture off the actual flag-carrier advertisement for the new Victoria figure, the Genesis  8 female, and it would have been rendered in IRay or, less likely, SuperFly (Poser's answer to LuxRender). Hmm. I'm actually not all that impressed. This is the new Genesis figure, and she doesn't look one whit more realistic than a hell of a lot of the stuff I'm doing with the ancient pre-Genesis, generation 4 figure, and old school raytracing. Like, for instance --


And that is why I'm not going into hock to rebuilt the computer, and racing out to get Genesis 8 and IRay, plus a few grand's worth of "assets," meaning skinmaps and costumes. To be absolutely honest, the only thing about the Michael 4 character that bugs me royally is the way the joints bend. Knees and elbows do NOT bend realistically. If you're highly observational, you might have noticed that these days I tend to keep the arms a lot straighter, or if they're bent, I put a shirt or jacket on him. M4's elbows often don't look quite right when you bend them. And yes, I will get into Genesis and all the rest eventually ... but first, my dentist has a Porche he wants me to finish paying off for him. Ack. Got to get your priorities straight, right? Right.

More soon. I feel in the mood for a fantasy barbarian! Let's see what we can do tomorrow ... after I get home from the optometrist: having my eyes checked and 3D scanned. Dang, is it that time of the year already?

Monday, April 22, 2019

And speaking of skinmaps and characters --


Last post, I was talking about the Falcon skinmap for Michael 4, which I use for the Joe Ramos character, and I found myself wondering ... I wonder what Joe looks like with that hair unbraided? So... there you go! In the books, he's described as half San Carlos Apache, one quarter Mexican and the rest Dublin Irish ("a big beauty, and he knows it"), and this, above, works for me! (All due credit to Mel Keegan, without whom Joe Ramos would not exist. Next time, we'll have another look at his partner, Blue Raven 6 himself, Gil Cronin.)

Thought you might like a closeup look at the skinmap (as well as the character. As I said, highly recommended, not merely because it has a lovely texture and color, but also because it has a terrific venous map which even renders up in LuxRender (a lot of bump and displacement maps either don't work at all in LuxRender, or they look terrible for reasons I never worked out). I used it here:


This one is worth looking at at larger size, to see the detail you can wrangle with this bump map. And yes, I know, I have GOT to go back into LuxRender. Soon. I've gone as far as you can in old fashioned raytracing, and yes, the results are sooo nice. But even so, there's a leap when you get into a proper "unbiased" render engine. Lux is the one I have (albeit an ooold version), and the way things are looking, it will be an even longer time before I can get my computer rebuilt to handle the new software, and IRay. (*sigh* It's all about dentists, how much they charge ... and I think I'm buying this guy a bloody Lexus.) So we'll muddle along with what we have, and see where we can go.

In fact, I'm taking some of the old existing renders and running them through Photoshop just to see what can be done to smarten them up with a little image restoration and enhancement, since the raytraces themselves are pretty good, and the ideas behind them were terrific...


It's actually quite surprising what you can do with five minutes and Photoshop Elements 9! These are great ideas. Right now, I'm trying to find the project files, and they're squirelled away somewhere on the old harddrives, eluding me. Would love to say, "Oh, let's re-render this!" But, not without the project files. I had an absolutely loony way of filing things, back in 2010-11, and actually didn't have the disk space to save everything. I find myself wondering which files got trashed to save space. 😨

Anyway ... more soon. Let's revisit Gil Cronin (hey, I promised beefcake), and then, all being well, I'm onto something new. Ideas buzzing in my head...

Saturday, April 13, 2019

The Exorcist, anyone...?


Just playing with shadows, colors, textures, depth of field ... this character and scenario just happened. And I thought, ooooh, that's an exorcist. Not the exorcist, but certainly an exorcist!

(Does anyone recall an old Harrison Ford movie, The Possessed ...? A TV movie made at virtually the same moment as Star Wars, so he looks exactly like Han Solo, in spectacles. Yeah, that one. James Farentino played the exorcist in that movie, which I always thought felt like the pilot for a show that was never made. Wish it had been. Google it. I think it's out on DVD ...)

Anyway, I was playing with a character from yonks ago: Roald. Remember this guy?


That one, above, was rendered in Lux, back in 2015 (yes, yes, I know, I need to get back into LuxRender. Soon, I promise). Today, I changed the hair ... but I wasn't intending to change the skinmap. Then ... for some reason, the skin textures were rendering so flat, so matte, the same skinmap that looked good before looked like mud today --

Confession: am nursing the headache from hell, and I just got sick and tired and messing with it, trying to squeeze something out of the specular values, so I quickly got to the point where I said, "Stuff it, switch to a different map." The effect is surprisingly good.

That's the SWAM Garry hair, and the Marco skinmap, added to my old character design ... and he comes up as someone quite new! Makes me wonder how this would render up in Lux. Some characters "pop" and come to life startlingly in the unbiased render engine, while others don't render so well at all. Everything in life is an experiment, even now. That's what makes it such fun.

Hopefully, more tomorrow ... there's some stuff I want to do in Bryce, if this headache would just STOP and let me get on with my life!

Monday, March 11, 2019

Vows of knighthood, and a wild horse


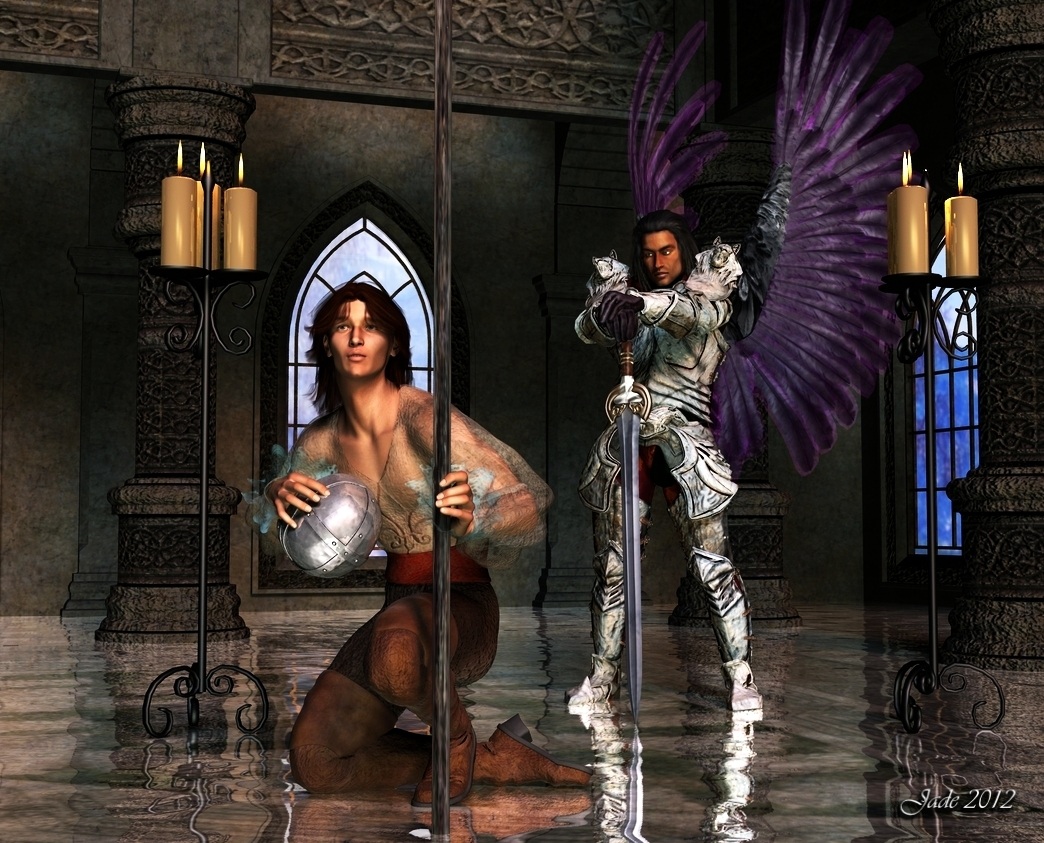
Just two pictures today ... because each raw render took over an hour, and then there was the painting, and -- well, try that with a splitting headache! I always loved the "Knighthood" fantasy, with the winged Guardian (aka Raven) and the squire ... and this is the third time I've reworked it. The old, old render (2012) is already a nice picture, and a very good idea, but it could be so much more. I staged it again for LuxRender, and it's one of those very few images that don't look as good in Lux as they do in the original raytrace! So, I thought -- what the heck, let's have another go at it and see what I can do now, in 2019. So --

Left: the raw raytrace, ready for painting (you'll need to see it at large size, of course), and right (duh), the painted version. The painted details are everywhere, on everything, including --


-- the young squire who's taking his vows and getting his weapons has freckles! The skinmap is very nice, but very flat. Everyone in the 3D 'verse seems to have utterly perfect skin. I couldn't resist getting in there and painting freckles while I was in Photoshop, doing the candle glows and smoke, and shadows and what have you. Neat!

In fact, there's a lot of painting on all the really good pictures you're seeing now. The horse shots are done very differently, as I was saying yesterday, and it's worth sharing this:


As you see, the horse (it's the Millennium Horse, from DAZ) is rendered without the mane and tail. Then those are added in, in Photoshop, using 2D digital magic from CWRW, and an awful lot of jiggery pokery from yours truly!

In order to get a black horse to light and render properly, the foreground wound up too bright, so I painted that down too, and we were good to go. If I do say so myself, that's a heck of a nice picture. I also find myself looking at the two shots -- the Raven with the young knight just taking his vows, and the wild horse ... are these images from the same story? Hmmm.

There's a new(ish) horse model on the 3D market too: the Hivewire Horse:


I look at this, and I drool. To say it's generations better than the old Millennium Horse it putting it mildly. US$29.95 for the model ... which needs DAZ Studio 4.9+. Uh huh. I am going to have to bite that bullet and get Studio 4 eventually. Mind you, I've been looking at the forums lately, and it turns out that after 4.6 (or is it 4.8??) this is virtually the same as having a Studio 5. It's not at all the same, apparently, as the absolute turkey I tried -- and loathed -- all those years ago. And since I do have an NVIDIA video card, I can use IRay. Nice when something works out. 😏

Anyway ... just the two pictures, because a LOT of work went into them, and I've been nursing this splitting headache all day. And the back. And the foot. And ... urg. I've said it before, and I'll say it again: being disabled sucks. On the positive side of it, I have all the time in the world to do art, though, so -- silver linings and all that.

Saturday, October 1, 2016

Buccaneer meets holiday hunk ... alas, two centuries apart!


A pirate hunk in 3D (thank you, DAZ Studio and Photoshop!), against the backdrop of an Elizabethan galley in the mist; and, staying with the Caribbean theme --


...another 3D hunk -- genuine poster boy for the Jamaican Tourist Association! Two more book covers today. Just a handful to go now, to get this assignment complete.

These are raytraces, not LuxRender projects, of course: it's a question of time. There just ain't enough hours in a day to scramble through so much work, if you want to put 4-8 hours into every final Lux render. Almost always, you need to do three or four (or more) test renders in Lux before you can set the piece to "go" and come back tomorrow. The results are gorgeous, but ... not this time.

However, I plan to come back to some of these pieces in a week or two, when I have the time, and see what LuxRender will make of them. I'll upload what I get, if it's rewarding enough to share around. (Not every project works in LuxRender. Very occasionally you do come up with a dud, where the raytrace is better. Shock, horror!) In the meantime, these are "superior" raytraces, in which all the technique available has been invested; so there's not a light year of difference between what you see here and the real unbiased renders...

In all seriousness, raytracing is becoming an abandoned art, with the wide availability of engines like Lux and SuperFly on the desktop. In a couple of years, it'll be forgotten -- and this is a pity, because if you know what you're doing you can get very good results. You also get very different results;  the best unbiased renders are eerily photographic, whereas even the best raytrace possible is still, well, art. And what's wrong with art, pray tell?!

Speaking of art, I'm also extremely pleased with the background images appearing with all of this 3D hunk work. In virtually every instance, these are full-on digital paintings (just a couple defy this rule).  I'm still in the learning curve with Photoshop. It's my pleasure, now, to tackle projects that would have scared me off a few years ago. So nice to be learning and developing, even now.

Saturday, September 17, 2016

The classic "muscly torso" -- art for its own sake. And for a book cover.


Playing in LuxRender and Photoshop today ... and it's actual work. Whoo! Doesn't get any better than that. As you can probably tell from the dimensions of the image (67:100), it's a book cover. What's more, it's a book cover in current design trends.

It's astonishing, when you look at a few hundred book cover (as they show up on the book club sites, Amazon, whatever) and you start seeing trends.  Not every cover on every book follows the trend; but a hell of a lot of them do, and the majority of books falling into the "big seller" range seem to adhere more or less to the set criteria. So -- what the hell?

So, what you have here is a heavily over-painted rainforest image (it's far more than 50% Photoshop painting, as it stands right now), and then the LuxRender of one of my Michael 4 designs; and then some more painting on top. The LuxRender layer is so photographic, I'm thrilled to bits with this. Can't wait to set something up tomorrow and see it go again! This is fun.

You have actually seen this Michael 4 character before. I designed him a couple of years ago, and you saw him back in January, 2015:


That one had hand-painted hair, he's what you could call "scruffy-adorable," and looked a few years younger. I actually prefer the model with a few years on him. In fact --

One of the projects I've promised myself I will get down to, soon, is ... Harrison Shapiro. You know Harrison Shapiro? The General who actually managed to catch the whole lot of them, from Rick Vaurien right through to Mark Sherratt, Curtis Marin, Neil Travers -- the whole lot. If you don't have the foggiest notion what I'm talking about ... hehehe, you don't know what you've been missing. But you can catch up. Anyway -- those of you who do know what Jade is babbling about today will know that Harrison Shapiro is a doll, one of a kind. I've modeled Travers and Marin, Mark, Mick Vidal, Barb Jazinsky, engineer Tully Ingersol, mercenary Sergei van Donne, the hitman, Ramon, and even the little twerp, Tonio Teniko. But I need to model Harrison Shapiro and his other half, Jon Kim, and also Robert Chandra Liang.)

This is fun. Have been looking some more at the Michael 6 model (Genesis 3), and they're up to Victoria 7 now ... and the first rumors are circulating regarding DAZ Studio 5. Ahem. The latest version of Studio is 4.9, which means Studio 5 can't be more than a year or so away. If I just hang on, I might be able to leapfrog right over Studio 4 altogether and re-enter at Studio 5. Also, recently something called Luxus has come out: a plugin for DAZ Studio which places the icon for LuxRender right there on your Render menu inside Studio. Hmmm. This is starting to get interesting.

Thursday, September 15, 2016

A delicious Michael 4 fantasy ... while LuxRender decides to be weird


A delicious fantasy ... two Michael 4's for the price of one, in a marvelously exotic setting: sunshine, blue skies and a fair sailing breeze. I'm quite certain there's a story that goes with this picture. Those two are planning something -- hatching some plot, or hashing out a voyage. One of these days, I'll get around to writing ... and in the meantime:

You've actually seen these characters before, though you might not be able to recall where. This one was the "Hyborian Age Pinup Boy", more blond and less redhead at the time. Today:


Look a little familiar? You might remember this incarnation of the same Michael 4:


In fact, he appeared several times, in variations on the theme of this render. See this post to catch up with all that: Pinup Boy of the Hyborian Age. (That post goes back sixteen months.) Neat!

And the second Michael 4 making a reappearance today --


...If  you're quick, you'll recognize the model I use on the header art right now! You last saw him as "The Forest God," in a post from February, 2013 (!) entitled Piper at the Gates of Dawn, with the ram's horns and all:


The set used today is Temple of the Shadows, from Renderosity. The sky is an image I shot from the hill above the house where we used to live about five years ago. I have one light configured, just a distant light called "sun" ... because this was supposed to be rendered in LuxRender. It would have been glorious, but Lux decided to go utterly haywire today. Something is causing it to leave behind whole sections of the skinmaps, so you get this weird effect:


...now, I know how to fix the "black eyes" problem, which one runs into all the time when taking DAZ Studio humans into LuxRender. But I blew off something like about two hours trying to figure out some way to fix the lack of any skinmap whatsoever on the brow, and at the end of that time I ended up saying words along the lines of "Stuff it, I'll raytrace this and call it good." Which is exactly what did happen.

Now, I know for a fact LuxRender will display this Michael 4 sknmap properly, because I've done it it before. I'll figure it out and rerender this piece, when I have some answers. But it could take a while, because I'm utterly stumped; so we won't fret over this. We'll just go on with other pictures and work on this one in spare time! So ... one light set, and depth of field turned ON; maybe twenty minutes to get the raytrace and then -- into Photoshop for a modicum of painting. Less than you might think, actually. The original render didn't need to much done to brighten it up here and there and fix the occasional glitch.

If you're curious, the hair on the left is the Yannis dreadlocks, and the shorter hair is either Akaste or Aether, which I believe come from the Renderosity marketplace. Both costumes are sufferent parts of the Wood God costume set, which came from the DAZ marketplace a looong time ago. Don't even know if the old models are still available but one hopes

In any event, I'm very pleased with the raytrace. That's a hell of a nice image. [Pats self on back] So we'll worry about the upmarket render later.

Take Two, in LuxRender -- really blurring the line between art and photo


As promised ... here's the LuxRender version of yesterday's Michael 4. And boy, did I have to jog my memory! I started up the Reality bridge and went utterly blank. Blanker than blank. Floundered around for about ten minutes, made some false starts, and then sort of halfway remembered where some of the controls are and what they do!

The two things I did forget: when you set up your lights for LuxRender, you use ONE distant light only, and name it "sun," so Lux knows what to do with it ... and if you want to turn on depth of field, so the background is realistically out of focus, you must select what you want in focus, in DAZ Studio, before invoking Reality. Then Lux automatically pulls focus on that object. In this case, it's focused on Michael 4's face so tightly that you notice the hand closest to the camera is fuzzy. Neat!

For objective comparison purposes, here's a resized crop chopped out of yesterday's raytrace:

Compare yesterday's raytrace...
But which is better? Raytrace or LuxRender? In fact, a case could be made for either one. I'll leave it to you to decide, because each has its merits. For example, the hands definitely look better in Lux, but which face you prefer is down to the individual.

And there's one more thing I often do these days: have a look at the render in good old b&w. You can often get a clear idea of the photographic values of a piece of digital art when you drop out the color:


I feel a visual fantasy coming on. Something good is percolating in the back of my mind, and if it wasn't 10:21 at night I'd be starting up a new project. But I'm propping the eyelids open here, so -- tomorrow. Yawn. I'm off to bed now...