Showing posts with label surfaces. Show all posts

Thursday, April 8, 2021

Let's hunt some Orc!


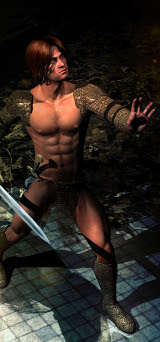
Okay, I had some time on my hands ... not because I'm actually at a loose end; I'm supposed to be editing and/or writing, and I couldn't get my head around either, so I decided to say "stuff it, do something creative instead of just spinning my wheels." So I did the second and third renders in this series: Nock the arrow and aim, and the next one on, Orcs on the Rampage! Here he is --

The story is, this band of marauding Orcs has been raiding through Elven territory all night, and they've left a path of devastation. In the dawn, the hunters go on the trails to get them -- hence, "Archer in the dawn" ... but here's the Uruk in the moonlight. Not bad, actually:

This is based on The Freak! A Generation 4 figure which the Iray Converter makes absolutely compatible with Iray. I used the Falcon M4 skinmap, for its weird warpaint, and used the Morphs++ to create a real Uruk face, teeth and all. The axe is an old, old prop; I did all the surfaces in the Surfaces Pane -- no shaders on this. And somewhere in the course of doing all this work on the old props, I do believe I've stumbled over how to get displacement working in Iray. Stay tuned ... am not 100% sure yet, but if I'm right, this is going to be great. So...

...so I've had a marvellous day rendering, with some terrific results and, I think, something major learned. If I can get displacement mapping going in Iray, that really is the last hurdle to be scrambled over. I'm liking this character a lot, too; and I must do more with the M4 costumes on G8, and also see how good they can be made to look in Iray. Hmmm. 


Thursday, September 5, 2019

Greek temple ... Genesis 8, M4 ... Iray throws a hissy --


As promised ... the ancient Greek temple set. Above, you see the result of about an hour's work to configure it for Iray with shaders, because the original textures, maps and materials from 2013 do not work in Iray. They look a treat in an old fashioned raytrace --


-- but those textures, maps and so forth go completely bonkers when you send something to Iray. Have a closer look at this version of the image, both in Iray and raytrace:


This is the Iray version, where the temple is build of various kinds of granites, with marble ornamentation. The OBJ imports cleanly into Studio 4.11, and I worked with the "Stone shaders" pack, which I believe might have come from Renderosity. It's pretty good, actually.


This is a detail shot from the raytrace, with Michael 4 standing in it. Keeper of the Temple.  Nice render, all in all ... but I have to say that the work of reskinning it with stone shaders was well worth the time invested.

Now, up to this point I'd been working with the low-poly set, and the low-poly figure (good old M4 himself). So last night I thought, what happens when you add a Genesis 8 figure to this? The experiment was too delicious to refuse, so, rather than doing another long shot, I drove the virtual camera in closer, for a good, close look at the set itself. I also kept the costume as simple as possible. What you have here:

Genesis 8
Dae face and body morphs
Michael 8 skinmap
Varun hair
Cool Style pants
Palladio set
Stone shaders
...and a lot of work to make the set viable in Iray


Here, have a closer look at the figure:


Welll, phooey. The Palladio set must be lower-poly ... and also, I admit, I added a low-poly tree, and a whole lot of shaders; and the Varun hair is probably very high poly. Harrumph. The picture rendered for about six or seven hours, then I spent another two hours painting out unresolved pixels -- or, fireflies, or sparkles, as they're also called. No way would this image finish rendering. Soooo...

Don't laugh. The next experiment (after I've had another cup of tea) is to render the background separately, then stand the figure against that as a backdrop, and do a second render. Sure, I realize, it'll still be five hours of render time -- but at the end of it the picture is done, there won't be swarms of fireflies to paint out. Hmm. Let me think about this. I'd also have to eye-match and hand-paint shadows. I can do that. Takes me back to 2009, the very early days, when I'd always have to hand-paint shadows, because the moment I turned them on, in Studio 3, my poor old computer crashed!

Speaking of backdrops, I used a Terragen render as the sky and horizon line for this -- an image I rendered about six months ago, I think:


I haven't don't a heck of a lot with Terragen in the last couple of months. Been too busy figuring out Studio 4.11 and Iray. I'd love to get back to Terragen, but the truth is, Iray commandeers the computer for so many hours, I run out of time. Duh.

My imagination is full of images, and my wishlists at DAZ and Renderosity are full to busting with about five grand's worth of products, LOL. It'll take years to get the lot, but -- what a hobby! It's all about having fun and and keeping the brain functional which, as we enter our Golden Years, is no mean feat. Ack.


Thursday, August 29, 2019

Old sets and new models -- neat results!


A new skinmap for Genesis 8: 'Matias' was on sale the other day, and since I didn't have an Asian map or morph for Genesis yet ... a small shopping spree This one renders up very nicely indeed ... and, interestingly, this guy is wearing a Genesis 2 pair of jeans, which fit well, and Genesis 2 shoes, which didn't fit at all. I think I've mentioned before that Genesis "whatever" costumes are a bit of a crap shoot on Genesis 8 ... but you can get lucky with them. So --


The next thing is, once you have a nice, high-poly figure to feed into your eons-old PC which doesn't have enough brains to give itself a headache ... whatchya going to do with the figure to end up with an interesting scene, rather than just another character study, where the figure is standing in front of a big, blurry background! I've done a lot of those, because that's what my hardware will handle; and since I've been having such a hard time with the old, low-poly content which does render easier (I haven't been able to save it to a project file in Studio 4.11), I haven't worked as much as I should have with the old sets. BUT --

Recent experiments are showing very promising results:


That's Michael 4, wearing the Adventuring leathers from Xurge 3D and the midnight prince hair, the Chase face and body morph and the Alexander skinmap ... rendered in Iray. And I know, it's not supposed to be possible to do this, much less to get good result, like...


So ... how? It's complicated, but not difficult, and it gives me a way to get around the desperate need to access my low-poly models from eons ago, while Studio 4.11 won't play nice, so that I can still get quicker renders. For comparison --

The Matias G8 figure, sitting in a low-poly set, was still a five hour render -- I left it cooking when I went to bed. But this fantasy piece with M4 in the same set took one hour.

Also, you have the additional bonus that using this work-around you can also get 3D assets which can't be installed into Studio 4, into Studio 4, so they can be still rendered in Iray. The trick of it is that you do need to have Studio 3 on and running! Assemble and pose everything in Studio 3, then export it to an OBJ, and have Studio 3's exporter "collect textures." Import the OBJ into Studio 4 ... it arrives as a piece of shiny white plastic. Now, you'll need to spend half an hour putting all the textures back onto it ... even then, every surface must be configured with three or four tweaks on every "UV zone" on the prop, or costume or whatever. Without these tweaks, the object comes up shining like a mirror. The tools are all there in the Surfaces pane. It took me a long time time to stumble over them, but you see for yourself, they're there!

Having rendered M4 and the set -- DM's The Gate -- in Iray, and liking the results, I thought, "Hmm, I wonder if I can get Genesis 8 to render properly if he's sitting in a low-poly set??? The last time I tried to have a Genesis 8 figure actually doing something rather than standing there like a catalog model ... well, after about about ten hours of rendering I wound up with picture full of grain. I realized there's a strict, and rather meager limit to what I can render on this older PC. But -- a low-poly set, now? Okay, let's give it a shot.

Result ... rather nice. And it rendered!!! Yay. So this opens up various vistas of opportunity, enough to keep my busy for the next sixteen months before I can afford to shell out about $2500 for a system that'll give me the freedom to play with Genesis and sets and shaders.

(Incidentally, if anyone wants detailed instructions about how to get old stuff, or third party stuff, into Studio 4.11 and configured for Iray, drop me a line. I don't want to bore the general visitor with that stuff, but if you need it, I'd be glad to do a special post.)

Wednesday, August 28, 2019

Xurge 3D costume in Iray ... wow! But -- how?!


Doing a small dance around the desk, because -- I found where DAZ have hidden the diffuse map controls. You'd never guess it in a zillion years, but I stumbled over it while looking for something else entirely, LOL And it's not without its problems, because when you plunk a diffuse map onto an OBJ, it's glossy as a mirror -- every surface has to be configured ten ways to get it to render properly. It takes quite a long time to get a good result out of it, but if you can just sweat through the process, you get this result, above ...

Now, that's the Xurge 3D Adventuring Leathers on Michael 4 ... but Xurge 3D costumes will not, no way, no how, install into Studio 4.x, and of course, if you want to render them in Iray, they have to be shipped into Studio 4 somehow. Why are we so dead keen to render this in Iray? Well, now:


Take a squizz at that, at full size, and your question will be answered! I have enormous problems rendering the high-poly figures. Genesis 8 + hair +costume, and my video card is so far maxed out, put a fancy shader on a costume and it chokes ... I paint for half an hour in Photoshop to finish the picture. Meanwhile, the lower-poly figures render up very nicely, and FAST ... Michael 4 renders in Iray in one hour. Yes, one hour ... not five.

The thing is, to get a lot of the existing M4 content in Iray, the only way is to export M4 with the hair and costume out of Studio 3 as an OBJ, then import it into Studio 4, apply all the materials and textures ... takes a looong time to get to the point of being ready to render. So --

You could use shaders to re-skin the costume on the OBJ --?? I looked into this, and the result is not quite what you were hoping for:


Sure, you're done in one tenth of the time, but, but, but ... there just isn't any substitute for the original diffuse maps, is there?! So, OBJ export/import is the way to go.

Not that the system doesn't come complete with its own suite of problems. Basically, you can't export any of your own characters (the exporter ignores the Morphs++ adaptions), so you're stuck with stock, off the peg characters ... also off the peg expressions and poses! Yep, the OBJ exporter also ignores all your posing! So you can't just do anything with M4 and his fantastic cossies, and send them to Iray. You're limited in what you can do. But even so --

Mix and match head/body morphs and skinmaps helps to create some very nice characters. This one, here, was done by mixing the morphs from the Chase character with the skinmap from the Alexander character... and (sorry guys) that skinmap is no longer in the DAZ store.

This is Chase, with its original skinmap:

catalog image from DAZ. Search on: Chase for M4
I never had much use for this face morph, because it didn't render up so nicely in the simple old 3Delight render engine, which was all I had at the time. But when I added the Alexander skinmap to it, it came to life. And I can't show you a catalog image, or give you a link for Alexander, because it's gone. Too bad, that, because it was a fantastic skinmap. Ah, well.

Anyway -- this is the basic plan: custom design an M4 figure (alas using all off the peg poses, morphs and what have you). Export to OBJ, import to Studio 4 ... apply the original maps (for reasons which became apparent above!) and plunk it into Iray for just one hour. Low poly figures and sets, see? Zoom! Render complete, with vast improvements over the raytrace. This will keep me happy till I get my new computer (Christmas 2020), and can send my old favorites to Reality again!

One last thing for today --

Happy New Camera. Uh, phone. 
Uh, well, whatever it is --


Yep ... new phone with a 16MB  camera, plus a bokeh lens. It's the UmiDigi A5 Pro. You wouldn't believe these were taken with a phone, but they are. Am pleasantly astonished ... and will be using the phone as a camera when Dave and I head back to the Grampians in a month's time!

Speaking of Dave: Happy Birthday to my One and Only today!! 💕😀

Wednesday, August 7, 2019

Just playing in Iray -- a new set and costume


Playing in Iray again. Bought a new set, and a new pair of jeans for G8 ... slowly starting to put together a bit of variety. I need a really good jacket, and I would love to get some fantasy costumes, but there's not much to choose from for G8. (Yet?) At least, not at the DAZ marketplace; and I spent some time searching Renderosity for G8 Male fantasy ... not much anywhere. It's weird, but all the really good costumes go back years! I guess I need to buy some G2 stuff, on sale, and see how it fits. Sometimes it seems to work, but not every time, so ... experiments! Anyway --


Quite happy with the lights, depth of field, what have you, on this. It's mostly lit with IBL lighting ... am using my own images at this time, and having pretty good results with them. This one, below, is another image "lit with an image" -- one of my own -- and it has just one other light added, to make it interesting, as if the hangar door is standing open to the morning sun:


That's actually pretty good, and well worth having a look at, at large size. Of course, being an old model, I can't save the scene in Studio 4.11, but it's easy enough to reload it, and I didn't use shaders on this, so I can get it back quickly.

Was going to mess about with Iray shaders on it, but the fact is, you'd lose all the surface detailing. No matter how great a shader renders, it actually isn't a substitute for a high-rez purpose-designed diffuse map. Must come back to this soon, maybe play with a shader on the glass. I would love to figure out how to combine, mix, or blend shader ... am fairly sure there's a way to do it (I know how to do it in Bryce 7 Pro, LOL), but I'm not there yet!

Sunday, June 23, 2019

Chasing photorealism ... how good is this?


You might remember the "screen test" of the new tweaked design for the vampire Amadeus, which was obviously raytraced five or six months ago. Starting to get some traction with IRay -- not 100% liking it, mind you, but it's what I have, so let's use it! I still can't make IRay 'honor' any bump or displacement map applied to a surface, but --


The problem of the eyes rendering flat white in IRay (and flat black in a raytrace) seems to have gone away by itself. You're waiting for me to tell you how brilliant I was, and how I fixed it. Wish I could, guys! But I closed the eyes to do the Daydreamer render a couple of days ago, and when I opened them again to give the job another shot ... the problem had gone away by itself. Uh ... right. That's a weird one. 😵

But the photorealism of the render of Amadeus is rather good! For comparison purposes, let me give you this:


You'll seed to see that at larger size to get the full impact, but ... very pleased with this.

What's continuing to bug me to death is that I cannot fathom how to get IRay to put a texture into a surface ... and after spending some time on various forums, I'm far from alone in this. People are tearing their hair out with the same problem, glad to say it ain't just me being dense! I'm racking my brains, trying to remember if I had this problem with Reality/LuxRender, and I don't think I did. So this, more than anything else, has 98% convinced me to get the Reality plugin. Also, I like the way you can re-re-reset the lights during the render in Reality; and I like the way you can pause and resume a render in Reality ... you can't do this in IRay. Lastly, IRay is a hog for system resources: once it's going, it owns the whole computer. Is it super fast? Yes and no. Yes, on simple scenes, where you just stand a character in front of the camera, like Amadeus here, and give it an hour. But for a big set, plus character, plus complex lights? Well --

I have something very complex and delicious cooking in the desktop right beside me. I'd wanted to upload it with this post, but three hours later it's still nowhere near done, so it's going to have to wait till tomorrow! It'll also take some painting in Photoshop to save it, because there are noooo textures on the wings. They look like shiny black plastic, and nothing I can do will make any texture appear in IRay! Photoshop will rescue it, but I gotta confess, I'm already very tired of this battle. The whole surfaces/materials/shaders issue in IRay is a major pain and a vast headache. If you want a glimpse, see this, and weep. Or roll your eyes. You think I'm going to be able to remember all that?! Maybe if I was doing this for a living, and/or was 17 years old with that kind of brain. Uh, Reality, I think. Very soon.

Anyway -- watch out for something delicious tomorrow, after it's cooked a lot longer, and after the surfaces have been rescued in Photoshop! It's a re-render of an old raytrace, and you won't believe how it's coming up! One thing I am so pleased about: the way the old figures render. Michael 4 looks brilliant.

Monday, June 17, 2019

Mister Versatility himself -- and a boat! Terragen, Iray, and more...


It's always tempting to see the 3D characters as actors, and if they're actors, they can walk out of one movie and right into another. Hmmm. So --


Yesterday's Conan is today's undercover cop, roughing it in some slum zone, busting the kind of people who sell firearms out of the trunk of a car. Neat! (Just a raytrace, set up to look like a flash photography shot. A closed set, and somene just popped a flash in the dimness. Very effective. Also, am very pleased with the bump mapping on those hands: they look realistically battered, as any adult's hands usually are! Garbage as set dressing is also interesting ... a wheelie bin, an abandoned chair and an old pallet! It was fun overdriving the bump and displacement maps on everything. Very pleased with the floor...)

Say, this is a still from a movie that hasn't been made -- which leads me back to remembering the b&w 8x10 movie stills we used to collect back in the days of yore:


It actually looks very good in monochrome. I might see what Iray can do with this tomorrow --

Speaking of which, I did feed yesterday's Conan into Iray, and came up with this:


The best thing about this render is that floor! IRay also did a great job on the Anubis statue and the ax blade ... but every bump and displacement map dropped out, and nothing, repeat nothing I could do, in this project, would get them back --


That's just the basic diffuse maps on everything; and adding whatever shaders were supplied along with DAZ Studio 4.10 didn't work or help ... and I do not intend to spend several hundred dollars on shaders, and work all day to get a single picture ... not when the shaders are free with Reality 4.0, and they're configures with a single click. Aarrggh. I blew a couple of hours on forums, following a Google search: "bump maps not working in IRay." Uh huh. So I'm not the only one to have this problem? And it turns out that overdriving the bump values is not the solution after all: I tried it on this guy, here, and it didn't work. Back to the drawing board. The forums, incidentally, were (to quote Jack Sparrow, enormously not helpful. Ten people made suggestions which didn't seem to work, then the thread petered out ... in 2016. Every single time, the bottom line with IRay seems to come back to buying shaders, which may or may not even exist (they don't for Michael 4), and if they do, they cost a packet! Ack.

Mind you, this is a fairly good render; it's not quite photographic, because (duh) no shaders are available for M4, and even if they were, I don't have them. But this picture is still trying very hard to be a photograph, which made me wonder...


Yep, a movie still from a film that doesn't actually exist! Nice one.

Also -- soooo pleased with this picture, in Terragen:

Elven Boat at sunset, in Terragen

In that past, I've rendered this boat prop a couple of times in Bryce 7 Pro, and never been very thrilled with the results. It just looked ... flat. Here's the best I was every able to squeeze out of the Bryce engine, with this model and its maps:

Same model, in Bryce 7 Pro. Hmm. 
You'll see what I mean if you take a look, full-size: flat as the proverbial bikkie. Bryce images so often look like tabletop dioramas. So imagine my pleasant surprise when the Elven Boat prop began to render in Terragen, and I saw this coming up...


...whoa! Check out the texture in the wood, and the reflections of the lantern in the water. Now, that is impressive. This is the first time I've rendered something man-made in Terragen, and only the second time I've rendered an OBJ. The other one was a tree, a few days ago. This could get exciting! 😀

Anyway, that's been my day, art-wise. And so to bed, before I go to sleep here and my face hits the keyboard. More soon!

Tuesday, May 14, 2019

Glam, a battleground, Terragen skies, and fall colors


An autumnal mood ... and a bit of Michael 4 glam. I was in the mood for glam, snarfle. The first picture tells half a story. I call it "Relics" ... Oh, a battle was fought here -- Orcs and Dwarves, perhaps; and here's one of the scouts from the borders of the Shire, come to find out what became of friends who never returned home. Hmmm. That's not bad. The second picture ... well, I wanted to play with color casting. That is, throwing a bucket-fill into the top layer of the Photoshop post-render work, and then blending it to see how the color cast changed the mood and tone of the image. Well now! There's no reason the experiment couldn't be run with a bit of beefcake, is there?!

If you're interested -- the artists among you might be -- the location was set up first with a background landscape; here's what you could call the background plate:


That's the location without any depth of field set, though it is lit -- just one light. The terrain is was made in Bryce and exported as an OBJ, then imported into DAZ Studio, and the textures added. I did a diffuse (surface) map -- basically, a fairly small picture of leaf litter on the ground, tiled into an enormous 3000 x 3000 pixel image -- plus a displacement map (made from the diffuse map ... you drop it into monochrome, yank the contrast sky high and sharpen it a lot. This technique is pretty darned effective. The result is extremely realistic, even if you view the render at large size, in closeup ... and it's dead easy to achieve!

The sky was a custom Bryce render ... but while it was taking about 20 minutes to come up with something that was fairly blah, I thought to myself ... "You know, Terragen ought to be able to generate something better, and probably faster anyway." Soooo...


Terragen atmospheres -- no landscapes to speak of, because I just tilted the virtual camera to look UP at about 25-30 degrees of elevation, which puts the landscape on the horizon ... just right for use as backdrops in CG composite shots. Terragen skies are very, very easy to do, and fast! These renders took from 30 seconds to three minutes each! Ahem.

And speaking of autumnal moods (well I was, a moment ago!), fall has certainly arrived in this neck of the woods, about two weeks before winter is due to begin, according to the calendar. We took a hike in Belair NP this morning, and I'll share some of the photos here, and again tomorrow. I've always maintained that there's a line where photography and art blur together, and this is it:


Those are uploaded at 2000 pixels wide -- they make lovely wallpaper (you're welcome) and they do look so nice at large size -- please click so see them that way.

Back soon with more!