Showing posts with label body morphs. Show all posts

Tuesday, October 15, 2019

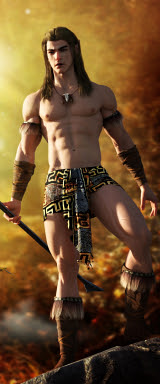
Woodland elf ... enchanted forest, Yaoi daydreams...


A woodland elf ... and I'm getting distinctly Yaoi vibes off this! The character would bear some more exploration, yes??! (nudge, wink)

Just daydreaming today ... still playing with the Ferendir skinmap, exploring ways to get the most out of it in DAZ Studio without -- yet -- seeing if Iray loves or hates it. You can't know till you try it and see what happens. This is "just" a raytrace, with the render settings cranked way up; and I also played with the tattoos packaged with Ferendir. The face and body morphs are my own design, though, using Morphs++. I'd forgotten how much I used to enjoy making new characters -- and this one is a beaut:


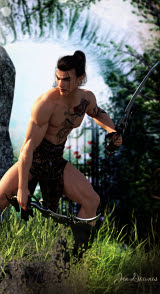
Sooo, because it take a fraction of the time to get a raytrace (rather than waiting all day for Iray), let's go again -- same character, new scenario, telling a story, or at least hinting at one:


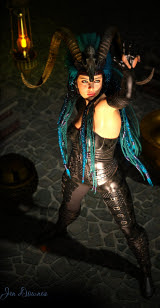
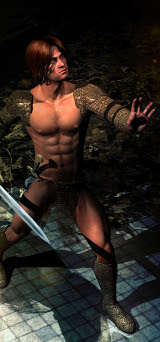
Treasure -- a hunt for the stuff, by the looks of this! A ruin, a lantern, something sparkling with jewels. And take a look at that skinmap. This is marvelously responsive, and with a slight adjustment in the lighting it can look either very pale or deeper colored, almost Hispanic. Me like. I also really like this new face morph:


So, what you have here is Michael 4, custom face and body done in Morphs++, Ferendir skinmap, plus the facial tattoos, M4 Displacement to achieve the vascular mapping, Neftis's Danyel hair set to black, one of DM's columns used as a plinth, and the lantern from DM's Pyrago. In the top render, I used the Euros skirt with lots of surface mapping, plus two of Merlin's trees sized to be bushes, and the menhir from DM's Elven Rock. The backdrops are just that: backdrops. If I'd done this as sets (which I could have), they'd have been rendering for three times as long. Backdrops save a ton of time.

That's it for me, for today. Must sleep! Also, thunder is rumbling and it's probably wise to turn the computers off. Lots more to play with -- the only new toys I got around to today were the tattoos, the lamp and the backdrops! The toy box is overflowing with goodies! (Boom goes the thunder ... it really is time to log out and turn off...)

Monday, July 8, 2019

First look: new character and hair. Hello, beautiful!


Just one image today ... but it is a humdinger. A new character and hair -- and I'm running tests to see how it renders. A treat, is how it renders! This is Rex, and if I tell you the truth, this was the character that made me bite the bullet and get involved with Studio 4-point-whatever and Iray, because this is a Genesis 8 character and it can only be done in Iray, which demands Studio 4.9+ ... so!

In fact, DAZ has been having a 50% off sale, so I got this  character and another, plus this hair, and a set of the best eyes for Genesis, and (ouch!) the G8 Male Body Morphs, at full price. Yes, I know, I just dropped over a hundred bucks, but at least you came home with a swag of goodies!

There are so many permutations of these characters and hair props, it'll take eons to work through them. You could actually use any one of five different permutations and call it a new character. And, I wonder ... could you take the skinmap from one character, the face morph from another, and the body morph from a third?? The possibilities are endless, even before I start designing my own G8 characters -- which I will be doing as soon as I get the head morphs, to accompany the body morphs. (Alas, they're sold separately and cost A$30 each, so it'll take a wee while.)

Also -- I think I might have Iray performing properly, to wit, this render, above. The thing is, I think I'm cheating. This is, I think, the best render I've had so far ... and I didn't create a camera. I did IBL lighting and rendered the perspective view, and -- 1) the eyes are good; 2) the shadows are good; 3) the shot is beautifully balanced. The missing element is the camera. And yes, I know you can't get DOF working without a camera, but I have to admit, it's a relief to just get a really good render, DOF or not, camera or not!

Speaking of depth of field ... it does work differently in Iray than in 3Delight, and I'm planning to spend a whole afternoon getting it figured out, as soon as this splitting headache stops ... yes, this is Day 5 of the skull-splitter. I live for the day when it ends. Then, I found a really great tutorial on YouTube, and I'll just have that running on the laptop and Studio running on the desktop right beside it ... skip over all the preliminary stuff, because 85% of it theoretical and pertains to 3Delight, which I can drive in my sleep. But close to the end it gets to the Iray DOF stuff, and that's where it gets interesting.

So there you have him: Rex in one of his permutations! The catalog images look like this:


...that hair is listed as being the Elan wig, but I do have that one, and it doesn't look like this -- or, I haven't found the way to make the prop look like this yet! There's also some displacement mapping on the character in these renders, that isn't in the default load -- need to find that too. But as a first look, first test of the character, I'm very happy indeed.

Incidentally, the hair he's wearing in my render is Shavonne Hair, which was actually designed for Genesis 3, but it turns out that almost anything for any of the Genesis figures does work with G8, so that's a mercy. Means I can buy just about anything, and it'll work. Big grin.

Stay tuned. Soon as I get this headache stopped, I have tonnes of stuff to do. If it doesn't stop soon ... well, the words 'doctor' and 'MRI' have been spoken, so ... ask. Bear with me.

Thursday, June 27, 2019

Yes, we need another hero! Check this out...


Hey ho, it's only money, right? Yep -- a skinmap for Genesis 8, and I've also used the face and body morph in this set of test shots. (These are comparatively quick renders: I let each cook for an hour in IRay, and because it's just one model, one garment, one hair prop, the CPU handled it just fine.)

I'm about 85% of the way there with this character ... it's not absolutely right, but it's close. I confess, the eyes are painted in three out of four of my shots today, because the scleras (the white parts of the eyes) are glaring like searchlights ... they make him look like a Goa'uld! There's no built-in control to tone them down, so I'll have to muck about in the materials pane and dim down the diffuse color, or specular color, or specular values, or reflectivity, or whatever it turns out to be. That should be a comparatively minor fix ...


...and I have to admit, he's kind of pretty just as he is; although I have a feeling I'm also not getting the body shape quite as depicted in the catalog images. This is probably because I don't yet have the Genesis 8 Body Morphs. Now, the product page at DAZ does not say that you need the body morphs in order to load this body shape, but I think maybe it should, and you do, because...

catalog imagage. Dae for Genesis 8
... that body is a fraction different from what I'm getting, and frankly, the only issue that could cause the difference is that I don't have the body morphs. Anyway, that's by the by. I'll have them soon enough, then you can expect the body to load up and be identical. Also --

DAZ catalog image. Dae for Genesis 8
The catalog images show the eyes rendering the way they ought to ... those scleras do not glare like searchlights! So the solution has to be in the materials settings. That's a challenge for tomorrow.

I also bought a pack of (gasp!) IRay shaders for fabrics, so there's a lot to play with. I confess, right now I have only the vaguest idea of how to handle IRay shaders, so there's a lot to learn.Since I don't yet have a tonne of costumes for Genesis, I thought I'd try pasting the shaders onto other stuff and see how it renders up. This will be interesting!

Also, I ran an experiment to see if Terragen would render a figure exported out of DAZ. The answer is, it will ... but it imports only the diffuse map (ie., the image that makes the visual pattern or texture on any surface), and ignores everything else. Which makes a character look weird indeed! You do get a drop-down menu, where Terragen asks for the correct shader for every single surface on the OBJ you just imported. Ooof. In other words, it would take a day or two to organize the simplest image you can imagine. Hmm. Not worth the time it takes.

Quite happy with today's work! More tomorrow...

Sunday, April 22, 2012

Playing with a swag of great new toys


click to see all images at large size...

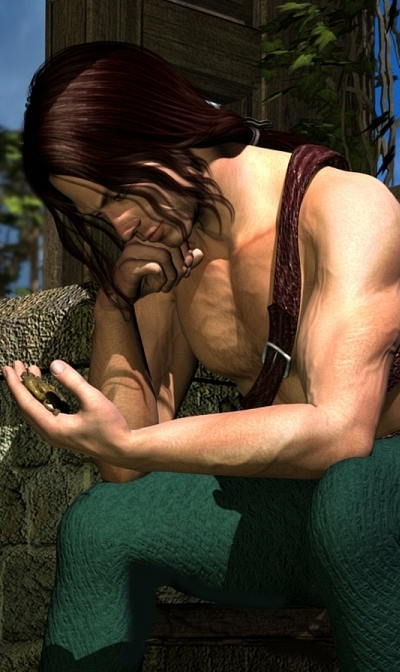
One of the things that puts a major crimp on your artistic license is that you tend to be limited by the skinmap you paste onto your model. Many of them look ... depilated. And it's true, a lot of guys do the hot wax thing. But not all of them -- not all the time. Sometimes, I think it would be soooo nice to be able to depict an actual guy rather than the product of the waxing salon! Uh huh ... so check out the first of today's pics. Call him Francisco. Why? Because he's something like an Italian, or maybe a Spaniard, and I like the name. I designed the face morph, and then slapped on an almost featureless skinmap actually, it's probably the most boring skinmap I've ever seen. And then -- what?

There's a "second skin" bodysuit type of "model" you can get from DAZ. It's been there for years, and I've always known it was there, just never got around to it. (Plenty of square and trianular tuits; just no round ones, you understand.) But last month DAZ was having a sale, and I picked up several new toys, including the Skydeck (parking bay for air cars), and a set of fantasy earrings for Michael 4, which you'll be seeing shortly, and ... Jepes M4 Body Hair.

And it works -- but it's tricky. Verrrrry tricky. Basically, all that body hair is sitting on a skinmap with an alpha channel -- which means the skin itself is transparent. So, when you slap it on the model, Michael 4 vanishes into the ether, leaving his hair behind ... along with his eyeballs and teeth, which looks hilarious, in the way that Chuck Jones cartoons are hilarious. Get over your fits of giggles, boys and girls, and figure out how to do this! 

In fact, if you know anything much about DAZ at all (also Poser, admittedly), you'll know that you can have several models occupying the exact same spacial coordinates. Penny drops with a clanging sound. You load TWO Michael 4 models ... put your boring old skinmap on one of them, and put the hair bodysuit with the transparent skin on the second. Aha! So far so good.

I was concerned that the render time would be a week long ... hair slows it way down ... but it turns out, DAZ treats the hair layer as an ordinary texture map. In fact, the first render did look very flat, almost as if the hair were painted on. So I found my way into the hair layer in the Surfaces tab and played around with the bump and displacement settings --

In fact, I overdrove it a good bit, and had to wind it back again. The result is pretty realistic, up to a very considerable point. The only place where the illusion breaks down is right on the "edge" where you're seeing through the hair to the backgound, or something behind the hairy limb. That's the place where it doesn't look 100% realistic, so --

Hmmm. Didn't I just get a set of skin-painting brushes from Renderosity? And wasn't one of them a body hair brush? Yep. So, the model was rendered with the hair layer, and then painted in Photoshop to add in the final bits of the illusion .. and you really will have to look at this full sized, to see it! I've uploaded it at 1200 pixels high, so you can see the detail. Nice effect!

The second render is another in my Quest For Realistic Daylight adventures. This one just about has it nailed, what with depth of field and shadows and all. I rendered it big, so I could get into the fine details and paint them invisibly ... in fact, there's a lot of overpainting on this. It was done in about 20 layers in Photoshop, based on the original idea/theme:


In this one, above, I ran an experiment with the Depth of Field tools inside DAZ Studio itself. The camera controls are just about the last area of DS that I don't have a death-grip on, and I've promised myself I'll get my head around them. Usually, when you see the DOF-blurred backgrounds in my work, I've pulled the trick in Photoshop. Not so with this one, above. First, I overdrove all the bump mapping in order to make the stone and wood look nicely realistic, then gritted my teeth and dove into the camera controls. 

Well ... I made it work once, but when I tried the same stuff on Take Two (the one where Leon is studying a cloak brooch in the palm of his hand, second from the top today), no joy. So I don't have a full grasp of the system yet. 

I got a bunch of other toys at the same time. One was a lighting set, which I'll use sparingly -- Light Dome Pro. Yes, sure, it does make the job of setting about 30 lights at a time as easy as a click or two, but using these lights in experimental stages the effect I wanted on the Skydeck set just wasn't happening for me. So ... what the hey? I lit this whole thing with spotlights and point lights -- and then painted the hell out of it in Photoshop. Here, get closer to it:


And (gulp) even as I type this, I have this scene rendering in Lux. I've set it to render using the same lighting set as I used in the DAZ render -- all spots and point lights. It's distant lights Lux hates. So in a few hours I'll know if I have a Lux scene here. (Meme: get ram, get ram, get ram get ram...)

You can't tell in the small images Blogger pastes to the page, but it's a dirty night on that Skydeck -- it's raining; you can see the rain in the haloes cast by the lights. This was done with Photoshop brushes, of course...


So, in fact, how much painting goes into this kind of work? Well, actually, a lot ... but you don't see it:


In this one, which I call Absent Friends, the fist thing I did was paint the textures for the fabric and leather, before slapping them on the models, and then rendering it all up. Then, the skin tones are overpainted to get a couple of effects, and a lot of the shadows are hand-painted. Good thing I enjoy painting in Photoshop!

A little while ago someone was asking what brushes I use. The truth is, I have scores of brush sets, and some of them can have scores of individual brushes zipped into the .abr file. In the renders you see here, today, I've used mostly Photoshop's own brushes (default and caligraphy) to paint the shadows and a lot of the lighting effects; then I used the FS Wild Weather brushes for the rain, and Ron's Bokeh Lights for the lens flare effects, and something called Channing Body Hair for the edge work on the Francisco character, and the Gypsy Brows brushes for his eyebrows:


...the effects are very subtle. Believe me, you'd tell in a heartbeat if they weren't there. The skinmap I used on this character is one of those (and there are loads of them) where the eyebrows are so insubstantial, you wish you had an alternative. So I indulged myself in the Brows Brushes by a designed called Gypsy, and experimented to see what results I could get. It's not point-and-click, but you can do some very nice things with these brushes --

One thing I'm about to do is ... I wanna paint my own skinmaps, so I'll get exactly what I need. Having brushes for body hair, brows, and also skin texture details, like pores, really helps with this. 

So, if you're trying to follow in these tracks, you'll need Michael 4 (duh), and some kind of skinmap that gets you into the ballpark; the eyes are one of the photographic eyeball sets, The Eyes Have It. The hair is the Jepes M4 Body Hair "prop" ... you'll work it out. The brows are done with the brushes I was just mentioning, like the hair along the edges of the limbs and so forth. The toupee is an old favorite, Mon Chevalier by Neftis, set to a lovely dark golden brown, and with the morphs tweaked ad infinitum. That's my own face and body morph though ... you're on your own there, guys. In the Absent Friends image, that's also a character of my own (Leon), wearing the Midnight Prince hair and Michael 4's own High Rez skinmap, but with another bump map applied to it to enhance the details. The location is comprised of two of DM's sets -- The Gate and Gadomar. Gadmoar is the building in the background. The sky is a photograph of my own, just a backdrop, nothing too clever. The sword and knife are from the High Fantasy prop set; the bottle and cup are from DM's Anardhouse, but I changed all the textures. The costume is actually the Euros set (top, kirtle, pants, boots), though you could be forgiven for not recognizing it: bits turned on and off, all textures changed. The harness straps in particular are neat: that's a liquid chocolate diffuse map (!) and a huge bump map made from a swatch of rhinoceros hide! All the props, sets and brushes, you can get from DAZ and Renderosity. The character morphs are my own, and I did some work with my own texture and bump maps here and there...

Now, I wonder how that render is going in Lux? Time to gird the loins, and go find out!

Jade, April 23

Thursday, November 25, 2010

Warrior Maiden


Happy Thanksgiving to all my American visitors! Just touching base with you here, actually ... am pretty sick at the moment, and haven't had the time to do much of anything for a couple of days. This here is Beryl. One of three twin sisters, Beryl, Bertha and Beulah. Warrior maidens ... at least in the mind of some fourteen year old male who has the idea that 1) voluptuous women bounce off to battle mostly naked, and 2) voluptuous women remain maidens for long enough to bounce off to battle done up any way at all.

Just one piece today, because it took several centuries to get this render. It's raytraced, and each render takes forever, even with a fast machine. Then you discover that the lights are too bright, or not bright enough, or in the wrong places, etc., and 25 mins. through yet another render you cancel out of it and start again.

This one is a real Boris girl. I'll do some more renders featuring Beryl -- probably tomorrow, now I've got the whole thing set up.

More tomorrow. Must go and take a pill now. Or something.

Jade, 26 November

Monday, November 22, 2010

Creating character body morphs in DAZ Studio 3


As promised, here's the companion feature -- or continuation of the feature -- where we created a new, unique Michael 4 character, starting with the "doll" right out of the box. In the last segment we created the face from scratch. In this one, we're going to work on the body, and we'll wind up with the stunning creature you see striking a pose above! In fact, this one is such a stunner I went on and did a male nude glamour shoot with him, which will be posted to the Exotic blog in about an hour. Stay tuned.

Okay, so let's get started! First, return to the file where you were working on the face and back the camera off so you can see the whole body...

This is the doll, just as it loads. The only thing it's had done to it is, the JM Alexander skinmap (hairy ... default) is loaded, and I put a pair of Speedoes on him for the sake of modesty. Also, on this blog I won't be talking about how to load up and configure the dangly bits. That would be inappropriate for a blog where the faint of heart are known to tread, albeit infrequentlly

The first thing to notice is that when you select the M4 model, the Morphs++ menu opens up on the right side of your screen. These morphs are the familiar slider bar controls that give you absolute control over virtually everything.

Let's be silly before we get clever. Lets' grab the "whole body" slider controls and drag them as far as they'll go, see what happens:

Instant Incredible Hulk. How did a shaved gorilla get in here? Thank gods for the UNDO icon! So when you've seen how far you can push everything, undo the whole thing and get back to the M4 doll. Now, start with the full-body morphs and adjust them delicately to get a nice balance of body morphology...

NOTE: all the screencaps in this tutorial are uploaded at 1:1 size, so you can click to open them and see exactly where I dragged the controls. You can read the percentages off the images, if you wanted to absolutely duplicate this bod!

Now, this is a bit more like it. He looks like an athlete, really toned. Now you can get into the minor adjustments. This is the point where the visual changes can be rather subtle. You might have to look twice to see the difference, but in the one below I've been working on the arms and shoulders...

This is closer to what I had in mind when I started, so it's time to turn him around and organize the kind of bubble butt that makes it into the magazines:


So far, so good. I "turned off" the Speedoes so you can see the effect. You have the morphs to change the size and shape of the glutes, the flex and tension on them. I also changed the width of the hips and the amount of "love handles" he's carrying. This is starting to look really good, so -- "turn on" the Speedoes and turn him back around:

Starting to look very nice indeed. Starting to get that "bombshell model" look about him ... so, on a whim I decided to change the skinmap. It's still JM Alexander, but I switched to the "shaved" option. Models are always depilated:

At this point, it's also worth rendering one and seeing what the overall effect is. I don't have any lights set in this render. I have gone into the Surfaces tab and turned the "lighting model" to MATTE on both the M4 and the Speedoes. If you don't turn the skinmap's lighting model to MATTE, almost all of them get white blotches. And when the skinmap's lighting model has been changed this way, you also have to change the lighting model on the costume, or it'll shine like patent leather, which looks unrealistic.

Now, when you set the lighting models to MATTE, and you don't have any lights set up on the character, your first render will probably look dull, even lifeless. Don't worry about it -- this will come back to life when you set up your lights.

And now it's time to get "up close and personal." I won't be working below the belt in this feature, for obvious reasons, but unless you're happy with the generic chest, it's time to work on that, and you will find that you have control of everything. And I mean, everything.

The results are good enough now to set up some photo lights and render a proper one. Pose the model, put a slightly provocative expression on that angular, unique face we created last time, and here you are...
Set the background to black, render this properly, and save the render. Now you're cooking, and this model is absolutely unique:


So lets' see what we can do with him, in the photographic sense. Add a prop and a couple extra lights, turn him around so we wind up with a render we can display here ... lose the Speedoes (again) and render this again. A quick tweak in GIMP or whatever, and ...

Jade, 23 November

Sunday, October 31, 2010

HAPPY HALLOWEEN 2010 ... because brain-eating 3D zombies need love too


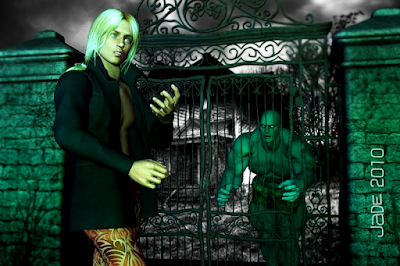
Happy Halloween, boys, girls and everything in betwixt! You might need to click on these pictures to see the seven-foot green brain-muncher in the background, and when you do you'll see a kind of story emerging out of the images.

Gorgeous party animal is looking for a street address in a weeeeeird part of town. Comes to the gate that he's sure is the right place. Doesn't see any sighs of (!) life. Is about to leave...

"Whaddaya mean, he's seven feet tall and green and standing right behind me?"

Bloody Nora, he is!

Better get outta here ...

"Well, hellooooooo beautiful! You wanna party down? Come in here, snookums, the party starts in about half an hour, and we're having brains to eat, and bobbing for shrunken heads, and all that good stuff..."

"Actually, no thank you, very much. I'm supposed to be meeting someone and, like, well, you know how it is."

"Okay, but it's your loss, sweet thang. Maybe next year?"

"Maybe. Bye, now."

"Tootles, snooks, come back soon, y'hear?"

So, uh, Happy Halloween from downunder where it's Halloween already!

Jade, 31 October


***Posted by MK: my connection is intermittent, too slow for this. Seriously, guys, I've got dialup speeds. How are you expected to do anything these days, at 1990 dialup speeds?!!!

Thursday, June 3, 2010

Romance on the high seas -- a bit of 3D swashbuckling!


3D Swashbucklers ... romance on the high seas? It's always interesting to see what construction you can put on a set of images. Here's another episode where, if I thought visitors were motivated enough I'd have a competition: suggest the story that goes with this, and win an art print or something! But here you are ... a scene unfolding, following on from yesterdays' renders of Swashbuckler Bert -- who's not really a swashbuckler yet, though he wants to be. He ran away to sea and the best he could do was Cabin Boy, so it's a good thing the skipper is a handsome hunk with a hear of pure gold!

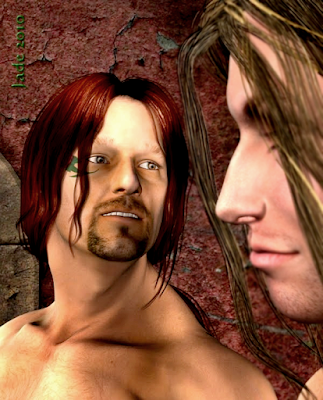
So I thought I'd add he skipper to the scene today. He sure is the handsome hunk! In fact, this is "just" the Remendado character morph, right out of the box, wearing about half of the Leon di Castiglia costume, original textures and all, and the Midnight Prince hair set to auburn, and the hazel set of eyeballs from The Eyes Have It. That's the Remendado skin map, but I admit that I designed the body morphology myself ... which made it darned hard to get the Leo pants to fit!

In fact, this makes for an amusing story: once the body morph is juuuuust right, and you slap the Leon di Castiglia tights onto it, there ain't a morph in the whole Leon pants set that allows you to get them to fit around the crotch. He really is nekkid in the critical region! The next thing I tried was turning "off" the M4 hip region, which usually works ... but not this time, because the Leon pants are low enough in the waist that you can see a big empty space where Michael 4 ought to be! So, then I tried shrinking the M4 model through the pelvic area to see if I could get it to fit the pants -- no joy. Last ditch attempt at a solution: take the material, the fabric, which is applied to the pants ... and apply it to the M4 hip region. Ta da! In one or two shots, it looks like you're seeing an underwear line, but you're actually seeing the M4 hip zone wearing the texture from the Leon pants! Basically, it makes it look like the crotch of the pants fits, which it actually doesn't. Optical illusion = you can have your buff body shape and have your pants fit, too!

The other Michael 4 is wearing the same pants, but he doesn't have the buff bod, so the pants fit. He's wearing the M4 righ-rez skin map, the bright blue Eyes Have It eyes, and the Spartacos hair--

Talking about hair, I was over at Renderosit t'other day, and I was blown away by this:


That's the Teagan character, by a designer called Phoenix1966 ... and the hair is so photorealistic, I'm just speechless. The hair is also part of the model.

I'm searching everywhere for such photorealistic hair for M4, but -- no joy yet. If anyone reading this knows of an M4 hair package that has this realism, please tell me what it is, and where!

Jade, 4 June

***Posted by MK because the internet is AWOL. Intermittent crap.

Wednesday, April 14, 2010

A fantasy of horses...

Just the thumbnails left now ... the rest have vanished
with a deleted image hosting account or whatever. So --


2014 Edit: filling in the blanks here with later images which did indeed explore the very techniques I was talking about in the original post: yes, it's about Photoshop, and CWRW's add-on resources, which are still available through Renderosity. 


Horses in DAZ Studio 3 ... your imagination really is the only limit on what you can do. These renders were done with the Millennium Horse model and the MAT-Mor Manes pack, and the CWRW Pro texture -- Palomino. The background is a heavily-processed dawn image, and I have about five lights set up on the horse to get this effect...

The available morphs don't really allow for this much stretching and twisting and pulling. The 3D object (an OBJ) which is the actual mane model gets kind of buckled or crumpled, so to get this effect took quite a lot of clean-up work in post production ... old fashioned airbrushing to paint out the buckles and crumples in the model.

Which begs the question, if you're going to start airbrushing to get the effects, why not go all the way? If you're thinking 3D horses, or horses in DAZ, or horse artwork, have a look at these (click to enlarge) --


Isn't that absolutely amazing?! The only thing is, this has a lot more to do with Photoshop than with DAZ. These are painting effects applied to 3D modeling rather than the 3D itself. Then again, since it took quite a lot of digital painting to clean up today's renders, as I said before, why not go the whole hog?! There really isn't a reason ... um, is there?! The work of the designer and artist, CWRW, is out of sight. Recommended? How about 6 out of 5 stars?

Anyway -- just a couple of beauty shots today, really, because I got caught up with domestic stuff and ran right out of time. Best laid plans, and so on. I was going to do sooooo much today, and it just, well, didn't happen! Try again tomorrow.

Jade, 14 April

Friday, February 26, 2010

Yaoi 3D meets George of the Jungle ... wow!


Yaoi is an art form that's gaining momentum right now, and it'd gain a hell of a lot more momentum, and do it faster, if it were more widely recognized that Yaoi does not mean underage kids!! It means "young," and "youthful," and -- invariably -- Beautiful. Specifically, beautiful young men. I do this kind of art when I'm (honestly) sick and tired of the avalanches of babes, clothed or un-, that so dominate the www, you just can't get away from them. There's almost nowhere you can go to look at the equivalent young males, so ... DIY. Check.

Something clicked in my imagination yesterday. I was thinking Brendan Fraser as George ... I was also thinking about The Jungle Book (Brendan Scott Lee as Mowgli). And I was remembering waaaay back to Ron Ely as Tarzan. Anybody remember Ron Ely? As in, six-foot-six, and ... this, which I grew up with (explains much, dunnit?) ...


Then I recalled that I had downloaded the Heart of the Forest cyclorama set ... and the rest happened. George as seen with the yaoi art filter on the binoculars!

Y'know, I grew up with George of the Jungle (Brendan Fraser probably did too ... if you were around in the 60s and 70s, George was just part of a Saturday morning). But George Primate didn't turn into a drop-dead gorgeous hunk until 1997, and suddenly he was on the sides of buses! That was the point when I sat up and started taking notice ... a lot of notice! It was also the first time I saw Brendan-- not his first movie, I know, but the first I'd seen myself.

And since 1997, "George of the Jungle" has meant the gym hunk from heaven, with the long, flowing locks and the chiseled physique and ... all that stuff ... until yesterday a whole suite of concepts clicked in my imagination, and after I'd done playing with the cyclorama set to see how it all worked and what was available in it, I could resist adding a figure ... a Yaoi figure ... George.

This is what you're working with in the cyclorama "environments" ... this is not "true" 3D as such. They're 2D "planes" which are set up in ranks and give a fantastic illusion of depth and perspective. If all the trees and plante were true 3D, the computer would soon overload with the number of models in the shot. So these cyclorama sets are a great compromise. You just have to bit a clever with how you set them all up, and where you put the camera. Every time you change the camera position, you get a new view, or scene. Fantastic!

So here you have Michael 4 wearing the Jagger skin map and the Danyel hair, and one of my own faces (same as you've seen on the dancer-assassin several times now ... I cast him over and over because he's one of my favorites).

Yaoi meets George. Or, George meets Yaoi -- whichever way you want to put it. Nice!

Jade, 27 February

***Posted by MK, because I have no viable connection to the www today.