Tuesday, May 17, 2011

Starman ... playing in the planetarium!


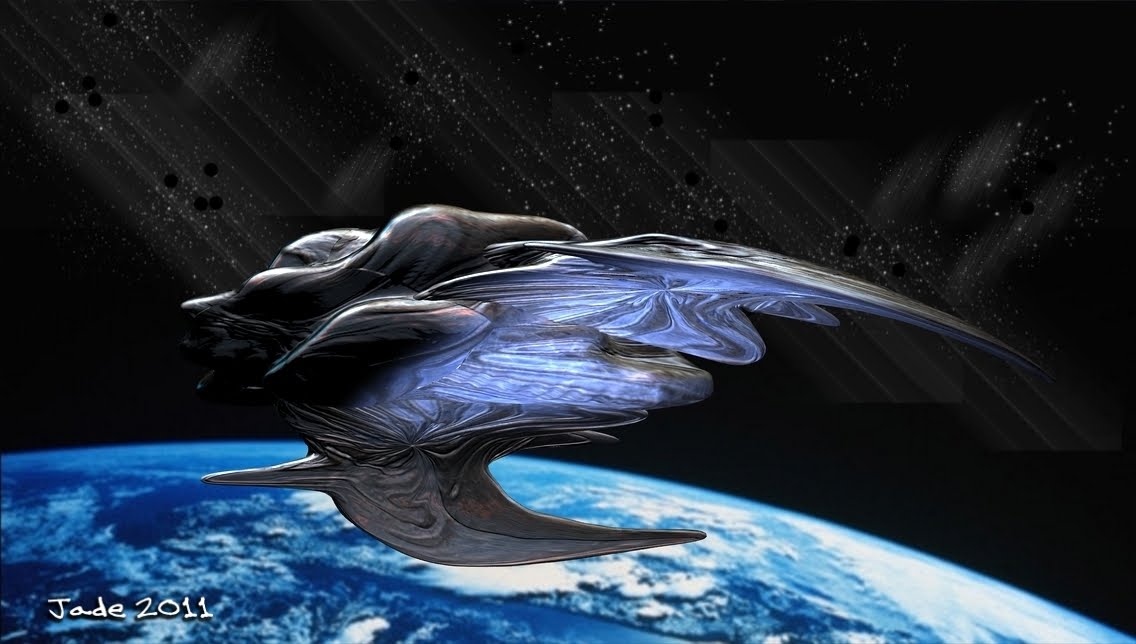
Starman, you understand. Or ... inspired by Thor? Very possibly! I wanted to play in the planetarium I was talking about the other day, but I didn't want to fly spaceships around in it -- and I did want to experiment with the new hairstyle you've been looking at lately, so ... here we are!

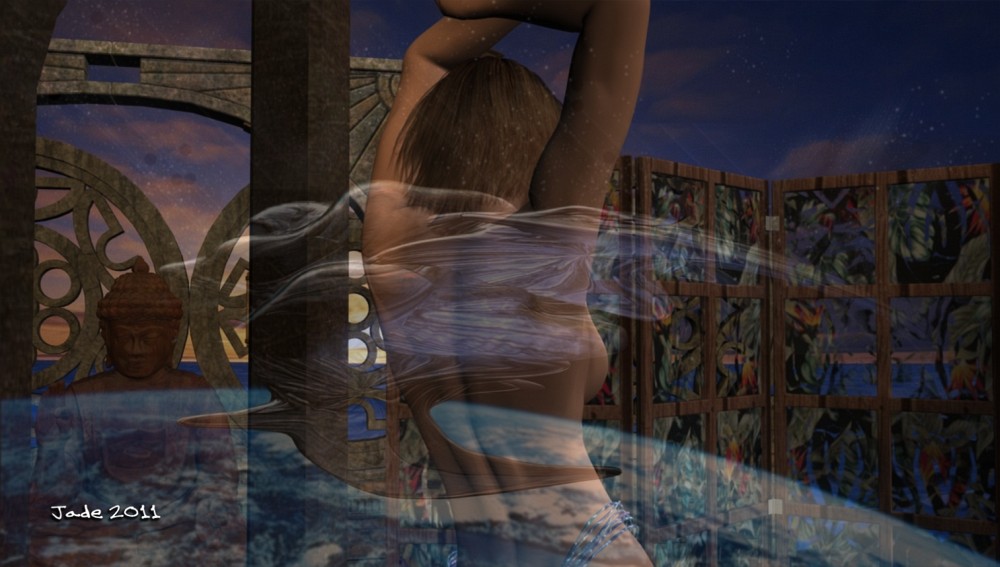
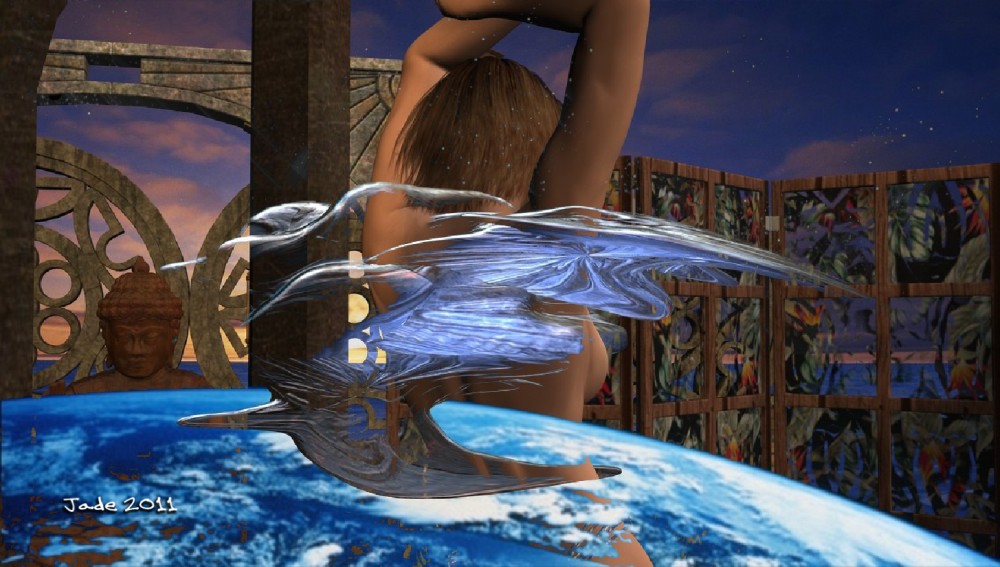
The character is on of mine -- I call him Sebastien; he's a face/body morph I like very much, wearing the HZ Victor skinmap, and this hairdo is the Aether hair, with which you can do amazing things. I'm liking it a lot!

The backdrops are not backdrops. Those are diffuse map changes on the planetarium -- that hemisphere known as Flinks's Sky Globe. And the foreground light effects are merge-mode overlays using a set of images called Design Flux.

Some of you are probably going to hate me for this, but these are really quick images, because I wanted to do something nice and I didn't have a lot of time! In one of them, I've used a couple of Photoshop brush effects. I was going to paint the renders somewhat extensively, and then realized I didn't have time.

Inspired by Thor. As in, THOR -- the movie. Have you seen it? And if you haven't, you need to! It opened overseas before opening in the US, so we saw it a couple of weeks ago, and if it didn't cost about $25 per ticket to see a film in 3D, we'd go back and see it again. However, I also want to see the new Pirates of the Caribbean movie in 3D, sooooo you have to make the choice. Thor, or Captain Jack. Ouch!

Jade, 17 May

***Posted by MK because the internet is AWOL. Intermittent crap. Be warned, guys: our connection is going to be in and out for a week or two, as of this point: Telstra (or whatever) is doing a lot of work on the landlines in this area. And as you know, if you've been looking at the "poster notes" on these journal entries in my looooong adventure through the world of CG, 3D and digital, even at the best of times we can find ourselves with dialup speeds in this area. This is why MK has been making many posts for me, since Day One -- Keegan has the fast connection, not me! (This should change in the near future, when the cables or whatever are updated, and they stop working on them. At least, s'wot Telstra promises.) Credit where it's due: this blog would not have been possible without the support of a pal with decent internet. Because ours sucks. We moved into this area about six months before I got into Studio and blogging about it, and I almost quit right there: DAYS to download something from the DAZ store, at one point. Argh. Thank gods for friends when you need 'em! 

Monday, May 16, 2011

Victoria 4.2 gets a new skinmap at last... good excuse for a glam shoot!


At last, a new skinmap for Victoria 4.2! Not that they don't make them by the hundreds, but you'll understand if I was more interested in getting about sixteen skinmaps for Michael 4 first. Perfectly natural obsession, right? However, I seem to have skinmaps for almost all occasions for M4 now; would like a couple more which would give me a variety of options as per eyebrows and so forth, but the library of skinmaps I have is good enough now that I can look with interest at new skins for Victoria.

This one is called Jenna, and I've had my eye on it for a while. It has a nice natural look about it -- freckles and so forth. It also comes with a variety of makeups, which absolves me of the necessity to get in there and start painting!

The character comes with face morphs too, so I toyed with this while also playing with some of the new brocade textures I got in the same sale...


It's an interesting face, but, as with most models, too young and baby-doll for my tastes! So, the ultimate experiment is to take the skinmap and plunk it onto one of my own character/face designs, and see what happens:


And that's pretty darned good. The Jenna skinmap looks great when dropped onto other face morphs -- and this is the important aspect, to me.

Mind you, this is worth a close-up look:


The effect is nice ... in a "14 year old playing in Mom's clothes" kind of way -- and when you remember that a lot of the top models prancing down the catwalks of Europe at this time are under 15, well, it gives you pause for thought!

Jade, 16 May

***Posted by MK because the internet is AWOL. Intermittent crap. Be warned, guys: our connection is going to be in and out for a week or two, as of this point: Telstra (or whatever) is doing a lot of work on the landlines in this area. And as you know, if you've been looking at the "poster notes" on these journal entries in my looooong adventure through the world of CG, 3D and digital, even at the best of times we can find ourselves with dialup speeds in this area. This is why MK has been making many posts for me, since Day One -- Keegan has the fast connection, not me! (This should change in the near future, when the cables or whatever are updated, and they stop working on them. At least, s'wot Telstra promises.) Credit where it's due: this blog would not have been possible without the support of a pal with decent internet. Because ours sucks. We moved into this area about six months before I got into Studio and blogging about it, and I almost quit right there: DAYS to download something from the DAZ store, at one point. Argh. Thank gods for friends when you need 'em! 

Friday, May 13, 2011

Michael 4 gets a new do ... flying in a planetarium ... and bookcovers as art for their own sake


Renderosity is having a sale right now -- members get a 35% discount coupon, and some things I've been watching for a long time have basically come into my price bracket! So Michael 4 just got a new hairdo -- and this one both looks great and gives you tons of morphs, so you can comb it, tease it,twist it, into a lot of different styles. This one is Aether Hair,and I'm very impressed so far. I'll be experimenting with this a lot more in the next few days, and the style fits the Victoria 4.2 model too, so you'll see more of this. I got several more things I've been wanting for ages, and, below, you'll see the planetarium ... complete with spacecraft. But first --


Here's the new cover for Linda Hines's debut m/m Western -- quite the classic art, too. It's quite a lovely piece of art, in and of itself, and I'm reminded of the days of yore, when you'd trawl the bookstores, drooling over the fantastic paperback covers, particularly the fantasies ... and wind up buying a novel because you fell in love with the cover! I used to do that regularly. Y'know, I still have those novels -- and one of two of them, I never even got around to reading!

Playing in the planetarium was loads of fun, as soon as I figured out how in the [line of deleted expletives] you get it to render properly:


...notice, the background has changed in every shot, because this isn't a static backdrop. The planetarium is a dome, with the textures pasted on the inside, and the "wallpaper" images which make up the diffuse maps are something like double-wide CinemaScope -- very, very wide by ratio to their height. In fact,they're 1:4, if you're mathematically minded. They're pasted to the inside of the dome via a set of what's called UV coordinates ... that has nothing to do with lighting. It's an extension of the x,y,z coordinate idea. u,v coordinates tell an image where to plunk itself on a 3D object, and the software takes these instructions from a text file on a .MTL file extension, which is saved in the same folder with the .OBJ file (which is the model itself) and the .JPG images (duh -- the wallpapers). So there you go ... planetarium demystified. I'm a terror, aren't I? No secret is safe. Was it a secret?!

Anyway, the planetarium imported just fine, and the images whacked into place perfectly, but renders were B-L-A-C-K, and stayed that way till I realized all the surface values had defaulted to black. Eureka! All you need to do is change the diffuse, specular and ambient values (in your Surfaces tab), and render to your heart's content.

If you're fascinated by this, it's called Flinks's Sky (or Sky Dome), and it's from Renderosity. My next experiment is, I'm going to take a crack at digitally painting some skies to fit onto the dome. The effects should be sooooo cool. I'll let you know how I go with this -- with any luck you'll be seeing some beautiful skies which I'll paint at 2000 x 8000 pixels, and we shall see what happens next!

This post should have been up yesterday -- sorry about the delay. Blogger was having an outage all day, as per downunder time ... it would have been all night, in the States, but they were still in Read Only mode when I went to bed last night! Dave tells me the story is, they made some errors when upgrading software, and the system went whacko. Some folk have lost blog posts ... none have vanished off ths blog, thank heavens. I wouldn't even be able to track down what was gone, much less rebuild missing posts, because there are close to 530 posts up now, and I've forgotten most of them!

Jade, 14 May

***Posted by MK because the internet is AWOL. Intermittent crap. Be warned, guys: our connection is going to be in and out for a week or two, as of this point: Telstra (or whatever) is doing a lot of work on the landlines in this area. And as you know, if you've been looking at the "poster notes" on these journal entries in my looooong adventure through the world of CG, 3D and digital, even at the best of times we can find ourselves with dialup speeds in this area. This is why MK has been making many posts for me, since Day One -- Keegan has the fast connection, not me! (This should change in the near future, when the cables or whatever are updated, and they stop working on them. At least, s'wot Telstra promises.) Credit where it's due: this blog would not have been possible without the support of a pal with decent internet. Because ours sucks. We moved into this area about six months before I got into Studio and blogging about it, and I almost quit right there: DAYS to download something from the DAZ store, at one point. Argh. Thank gods for friends when you need 'em! 

Wednesday, May 11, 2011

Merge modes ... what the heck are mege modes?!


So...interestingly -- from the artist's point of view -- I was asked to explain a little bit about what "merge modes" are. I was talking about this the other day, when I was posting book cover art, and mentioned doing the composites. So, what in the world are merge modes?

Basically, the term refers to a wide range of options and alternatives that are open to you, when you merge one image into another image. The way the tones, colors, gradients and so forth interact when one image is combined with another is called a "merge mode." On top of this, you then have the opacity or transparency of the merge to play with, and you can combine different merge modes (also known as "inks" in certain programs, such as Macromedia) to get a huge number of effects.

As usual when it comes to art, it's far easier to show, not tell, so I've taken two very different images, pasted one into the other, set a number of different inks, and saved the results, which I'll paste in here. You'll probably have to see these at 1000 pixels wide to get a real idea of what's going on, because Blogger pastes up its on-page images at 400 wide, which is really too small! If you click on each image, I uploaded it at large size, though -- and it's well worth a look, because this is where a lot of the magic of digital art starts to happen...


For the bottom image, which is getting pasted onto, I used the organic starship you saw a couple of days ago:

And for image two, being pasted over it, I used one of the images from a V4 glamour shoot. Okay, so here's where happens when you set a merge mode...


Now, you notice I'm not going into what each mode is called! This wouldn't do you a shred of good, because each program calls them by different names ... also, the names would mean nothing to you, if you don't know what they are, and the only way to learn them is to play with the software and see what happens. By setting this mode or that mode and seeing the result, you figure it out faster and have a lot more fun. Everything else is too much like a textbook!

Okay, so -- which software? Here, I can't really help you, because there are, to my knowledge, four main packages today, and I don't use any one of them to do this work. There's Photoshop, which will absolutely, positively do this work for you -- though I'm not sure if the cheap cut, Photoshop Elements, would have the tools. Pay $1600, and you're certain to get them, but I couldn't even guess at the interface, because the closest I ever came to Photoshop was a brochure!

Then there's Corel Painter, which costs about $700, and this also will definitely do it for you(if it didn't, at that price, I'd sling it back at them and demand a refund). Don't be fooled into paying $30 - $130 for the Corel Photo Paint program. All this does is apply some pretty iffy filters to photo images, to turn them into ersatz artwork. I played with the free evaluation copy for an hour one day, and thought the results were pretty poor. You can do far better by combining the photo image with a texture image by using a transparency on one of them, and then tweaking the contrast, color saturation, and playing with the soften and sharpen tools!

The other two packages are open source and free. There's GIMP, which is the open source shadow of Photoshop, and Paint.net, which I'm told is the open source shadow of Corel Painter. GIMP probably does the merge modes, but how, I have no idea, because I've never (and I blush to confess this) gotten deeply enough into the program to find out! I use GIMP for painting in .abr brushes, which is absolutely indispensable, and for this alone, I love GIMP.

The last one, Paint.net, I've never actually used, but some people speak very highly of it.

Hope that helps, guys! See? I do read comments, and I do answer questions!

Jade, 11 May