Wednesday, July 29, 2015

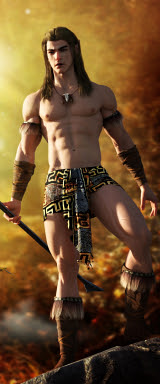
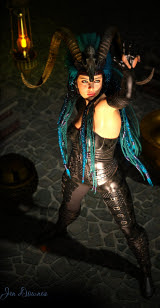
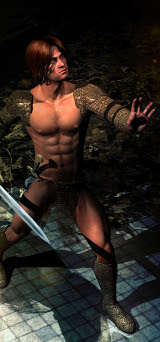
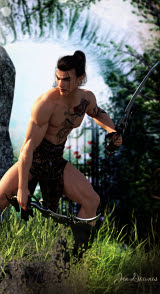
A gallery of pinups!

LuxRender: Li with Katana
LuxRender: the Barbarian Queen pinup
DAZ Studio: reclining male nude
Bryce 7 Pro science fiction: Crash!
Bryce 7 Pro: Morning on the Mountains

Once again -- playing catch-up and posting a whole heap of stuff at once ... images done in 2014 and 2015, while life has been too hectic, and too weird, for me to post here regularly. Gotta say, am rather pleased with the work that's been done lately. There's a complexity to even the simplest of these shots; and a great deal was invested in each one, even though sometimes it might be too subtle for you to actually see it. Like this:

Hand-painting hair in Photoshop, over a DAZ Studio render
 I know, I know, I always swore hand painting hair was one thing I wouldn't get into because, frankly, it can take twice as long as the render time to get handsome results. But ... well ... the thing of it is, as I get more and more into LuxRender, I'm just getting used to the fact you have to hand paint the hair in almost every instance, because the render engine makes a DAZ toupee look like a plastic bag whacked onto the model's head. Ack. And here's the rub: once you get used to the results of hand-painted hair on the LuxRender shots, you don't really like the results you often get in DAZ Studio renders! So, what the hey? I'm painting the hair now ... and getting better at it. Check out the image, above, at full-size, see what I mean: this outtake is 1000 pixels wide, cropped right out of the original render --

Half the trick is rendering HEEE-UUGE. The shot was done at 3000 pixels wide to give me enough wiggle space to get in and paint realistic hair! Not too bad, if I do say so myself. In fact, the digital painting is a lot of fun, and the more you do it, the more you get to like it. Once upon a long time ago, I used to get into whatever paint program only to touch up images, where "artifacts" had appeared in the render or photo. Now, the painting aspect is something I enjoy so much, I look forward to it, and use it to add dimensions on top of the original render. Like this:


In the mountainscape, though it doesn't hit you in the eyeballs, there are fourteen layers of subtle painting to get this effect; though in the crash site image, above, it's just the birds, the waves in the background and the smoke rising off the wreck, everything else is in the original Bryce render. The burned hull of the crashed ship was done by replacing the MAT file on the OBJ with a kind of rusty, nasty "old metal" texture. The water in the foreground was done by having a semi-opaque water layer with a foamy texture/material laid over a "ground plane" with a pebbly-sandy texture, so you can "see the bottom" through the water."

In fact, the results you can get in Bryce sometimes rival those you can get in LuxRender. If only Bryce would do realistic trees, I wouldn't be looking at Vue with such longing! But it doesn't, and won't ... well, not without spending about A$60 per 3D tree model, and only being able to load up two or three of these in a scene before Bryce goes whacko and crashes in every direction...

Regarding realistic tree models that Bryce, or any prog, can and will use ... oooh yes, I found 'em. I know where they are: Turbo Squid: Trees. But, as gorgeous as these models are, they're somewhat prohibitively expensive for a hobbyist. You'd have to get at least half a dozen models to get enough variety for your renders to be credible, so you're looking at 6 x $39 ... then remember that the Aussie Dollar is sitting at 72c right now, and going down like the proverbial lead balloon; so the price tag for this little shopping spree would be around A$325! Eep.

Not just at the moment, guys ... also, I have my doubts as to how Bryce 7 Pro will handle such complex models. It (or at least my copy of it, on my platform) is tremendously crash-prone when scenes get complex, with lots of objects. And ... wellll, if I had three or four hundred bucks going spare, I'd get my hybrid boot drive and install Vue instead!

Right now, though, am quite happy with what I'm doing in Bryce. If you just avoid trees, you get very good shots. In fact, it's only the palm trees on the beach that let the Crash! image down a bit. If you look too closely at them, they don't hold up, and if/when I do start buying complex trees, this is one shot I'll re-render to bring it right up to speed with near-photo quality results.

Speaking of photo quality --

3D render or photograph? 
There's something, just something, that says to the human eye, this is a 3D render ... but all it can be, I think, is that the hand, or skin, on the model, above, ain't as bashed up as we humans tend to get. The render itself (LuxRender, obviously), is flawless -- that's the old Michael 4 holding Merlin's Katana model, which was Photoshop-painted after rendering. The Li-with-Katana shot is actually a re-render of an old, old image which appeared on the blog a loooong time ago; so long ago, in fact, I have no idea where the original shot is! Gotta love LuxRender --

Which is not to sell Bryce 7 Pro too short, because there's so much you can do with textures, it starts to be a real pleasure to work with:

Water effects in Bryce 7 Pro
Lichen on rock - texture effects in Bryce 7 Pro
Bryce 7 Pro -- atmospherics: love that skyline, and it's in the
original render, not overpainted. Nice!
Bryce 7 Pro: water effects -- even wet sand on the shore.
Now, if Bryce would only do realistic trees...!

Hey, wet sand right above the waterline! Now, how did I do that?! It was actually fairly easy. Made a little shape, jogged it into place, flattened it right out and jogged it down till it juuuust sits on the sand there; made it very transparent and reflective, and applied a simple water texture. This is so cool ... am having loads of fun with Bryce lately.

More soon -- and am also looking (gasp!) at Abraxas again. For the longest time, I lost the plot notes that laid out the story to Chapter 26! Then, just the other day, they turned up ... and the imagination is sparked again. With any luck, I'll be able to pick up the threads and go on with this. Fingers crossed!

Tuesday, July 14, 2015

A random chain of images suggests a neat story!

Bryce 7 Pro background; foreground in DAZ Studio;
finished with Photoshop overpainting:
"Archer in the Dawn"
Bryce 7 Pro alien landscape, finished in Photoshop 
LuxRender: portrait in low light
LuxRender: a science fiction pinup
Bryce 7 Pro: Crystal Buddha --
pure art, finished/painted in Photoshop.
Another grab-bag of visual goodies, all over the spectrum from fantasy to sf to pure art ... and as I look at a selection of images like this, part of me wants to daisy-chain them together to make a coherent plot! Am starting to think like a writer, probably because I've actually (don't faint) written a couple of short stories lately! And this is what occurs to me, looking at those images...

Welcome to an alien planet with an evolving culture advanced enough to have developed some very exotic longbow technology. It's a green and lovely forest world, with wide lakes and clear skies ... save for the spaceport area where the offworlders have invited themselves in. The indigenous folk are disgusted by the scorched-earth mess they're making. The spaceport city is under a dome -- the air is so toxic with the fallout from those heavy-lift engines, even the offworlders themselves won't breathe it by choice.

A hundred miles away the locals are faaaar from amused. Their high priestess has access to some very ancient, super-powerful magic/tech from deep in the planet. (Oh, and she's a babe -- that helps, right?)  There's a warrior chieftain who's keen to take the magic and inflict it on the offworlders. (And he's also a babe, which definitely helps, LOL!)

Now the plot really thickens: the offworlders and the locals are the same genetic strand. The local indigenous people are a magickal offshoot of an ancient Buddhist enclave who came out to this planet -- ooooh, three centuries ago, and were abandoned utterly when a virus native to this biosphere looked like it was going to obliterate them ... but one great scientist stayed behind to look for a cure and, discovering the "magic" in the deeps of the planet, stopped the virus.

For twelve generations peace and harmony reigned, before the damn' Earthlings returned to see if the contagion had burned itself out and the planet could be recolonized! Nice of them. Imagine their surprise to find a strapping, healthy population that don't want nuthin' to do with the mother world, because their elders -- being cured by "magickal" means -- are the original people who were abandoned 300 years ago, and still alive to this day, and so furious with the Earthlings for leaving them to die, they'd like to see every spacer from "back there" daubed with strawberry jam and staked out on an anthill!

The elders are talking themselves hoarse (and blue) at the negotiating table ... the young are ready to come out fighting. And thereby hangs to tale!

...hey, that's not bad. I ought to right this stuff down. Hang on -- I just did. Might be able to get an actual story of of this, along the way! Am enjoying writing very much, lately, and every time I see an image, or a pot-luck grab-bag of images like the above, can't help spinning plots...

Speaking of the images --

My favorite (duh) is the warrior chieftain, who was rendered in LuxRender with such fine results, it's mostly the hairdo, toupee, wig, that tips you off that this is a render, not a photo. Let's  take the head out of the shot and have a look at the actual render itself:

Photo ... or 3D render?!
...and one more thing we can do, to blur the line between photo and render is to drop the image into monochrome, and strip in a little bit of film grain:
3D render ... or photo? Same image dropped into
monochrome, with a little film grain added.
I do wish the hair props one can get for Michael 4 were realistic. More and more often these days, I find myself painting the hair ... which is sooo time consuming, even if I was brilliant at it, which, to date, I'm not. Still trying to find my way to full competence there. Practice makes perfect, I  know -- and I don't practice enough! Certainly, painting hair is a chore, and the "rub" is, if you get it 100% right, the result will be invisible. That is to say, people won't see the painting, just the hair.

Makes you run away back to Bryce and render something visually spectacular, where the fruits of your labors are visible, like the domed city from the above SF landscape:

Bryce 7 Pro: SF domes city
Every image, no matter which prog rendered it, lands in Photoshop and, often, Irfanview, for painting and tweaking before it's called "done" and displayed. Sometimes, I like to flip an image left-right, and do unspeakable things to the color pallet, to see what might happen. For the "Archer in the Dawn" piece, I wound up with a blue-green-mauve image I liked almost as much as the warm tones. That's Michael 4 again, obviously; the hair is hand-painted, as is all the vegetation in the foreground, plus the tree and birds. As always, the magic is in the details: it's the little things that make a shot "come alive." Take 'em out, and the actual rendered material is very "flat" indeed.

For the curious: the warrior chieftain is lit with just two lights. One is a very, very soft light simulating the sky behind him, while 90% of the light on the model is coming from the globe in the lamp. In Reality, which is the plugin bridge between LuxRender and DAZ Studio, you can select an object and turn it into a light source. For this piece, I wanted to to a low-light portrait, lit only by the light you can see in the shot. Nice! Same sort of thing in the SF pinup, the high priestess with the magic doohickey that's going to defeat the offworlders: the light source is actually inside the prop ... very nice result all around.

Now, what would the plot have been if I'd picked a different set of random images?!

Tuesday, June 30, 2015

A grab bag of goodies, all over the spectrum

LuxRender: Leaning on a Lamppost
LuxRender: Fallen Angel
Bryce 7 Pro: Forgotten
The first image -- "Leaning on a Lamppost" -- was an experiment to find out how you force LuxRender to honor a transparency/opacity map set in DAZ Studio. Sometimes it does, and sometimes it doesn't, and if your whole picture pivots on getting an effect like this:


...and LuxRender (or perhaps Reality) leaves the opacity map behind, your picture will actually fall apart at the most fundamental level. The answer to this question was -- don't fight it. If LuxRender is leaving the transparency settings behind, just set the whole thing in Reality instead --

And the only problem there was working out what in the world reality calls an opacity or transparency map. Turns out, in Reality it's called the Alpha Map. Aha. Once you know that, you're pretty much off to the races. The only chore left is numerous test renders to find out what percentage you need to set on the Alpha Map to get the effect juuuust right. The test renders can consume a lot of time ... roll on the next version of Reality, which will be seven times faster!

The next one -- "Fallen Angel" -- is a re-working of an old, old idea. I wanted to ee what LuxRender could do with it; and I wanted to see if I could just do it better in good old DAZ Studio itself. So I not only ran it through Reality/Lux, which you see above, I also ran it through Studio 3 again:


This one has different, subtle lighting and depth of field turned on -- you'll need to see it at much larger size to get the most out of it. Hmm. The truth is, occasionally good old DAZ Studio comes up with a render that's very good indeed, and some subjects suit the "artwork" type of render as much as they suit the more photographic treatment. Which is best? Well --

Here's the comparison; I leave it to you to decide:


Sometimes the "depth" of a picture only comes out when you see it at large size -- or if, during the course of working out composition, you add in, and take out, various elements to see what works best. In the third picture -- "Forgotten" -- which was done entirely in Bryce 7 Pro, the original idea was  that this was a forgotten temple, overgrown and decaying, in the foothills of the mountains. It was going to be a mountain range in the background, dwarfing and overshadowing the man-made structure, which was falling into ruin. Then a better idea occurred to me. I took the mountains out and added this into the background:


A futuristic city shrounded in its own smog, where people are so absorbed in their high-tech lives that their own history is forgotten and decaying within sight of the city. This was the picture I wanted, yet it's very different from the one I actually set out to create. The atmospherics in this shot are what make it -- and Bryce 7 Pro lends itself brilliantly to dense, smoggy air and low, brooding skies.

The 3D model for this one is Palenque, which came from the DAZ Marketplace, right here. The model is very fine; the catalog images are not. This, at left, is one of the pictures from the DAZ online catalog, and the designer of the model has made something of a rookie mistake, which has the effect of making his beautiful OBJ look like a toy. Can you pick it?? It's the backdrop. The palm fronds at the right hand side are nicely blurred out, but they're so far out of scale ... if this temple were real, those palm trees better be as tall as skyscrapers in NYC, with fronds the size of airliners ... otherwise, if those fronds are in scale, this temple is the size of a dog kennel. Dang.

Don't let this put you off: the model itself is terrific, it's just the catalog images that let it down. I've used the model several times; in fact, you can get your virtual camera right inside, and I used it as the stage for "The Man in the Hat." (The thing that I really can't believe was that that image was done over three years ago. Dang, where did time go?!)

Still messing about with digital painting (and loving it), an idea occurred to me:


A shot from Hubble Space Telescope?? Did Dave and I just buy a massive Celestron?? We wish... Ahem! Nope. this shot is purely digital and took about five minutes flat. The secret?

It's a cloudy sky, turned upside down to get rid of the obvious gravity and distance effect of the right-way-up shot; then you drop it to grayscale and crank the contrast to make space BLACK. Then you can add some layers and paint in colors, which is pretty much what astrophotogtraphers do, since all deep-space images start life b&w. The big stars are Photoshop brushes; the small stars are just pale dots. Done!

I could get excited about this trick. Next time I need nebulae in the background for a space shot -- say, something for a Hellgate illustration -- I don't need to look at Hubble shots. Cool.

Still fiddling with digital painting, I was running every experiment I could think of in Photoshop, combining and re-re-recombining filters, to get an idea of their aggregate effects. Check this out:


You may have to see this at larger size to see what's been done. I dropped the old Tag Heuer commercial into grayscale, converted it to a sketch, recombined it, recolored it, and painted over the top with a variety of brushes for effect. The result --


-- is pleasantly weird. But even weirder is that the process took LONGER than some of the stuff I've done from scratch! So this is not something you could use to save yourself a lot of time in painting.

Lastly for today -- was playing with the DAZ Studio cartoon render settings:


It's a really neat effect, and too-often overlooked as we all scramble towards ever-more photographic effects. This is Leon and Iphigenia from a scene faaar down the chapter list in the Abraxas story. Yep, it was all plotted, miles into the future, and I did rafts of illustrations. What, you say -- write it?! Yes. Definitely. Starting to think seriously about that. Soon. Promise.

Sunday, June 28, 2015

Lux, Bryce, DAZ and Photoshop shake hands and come out rendering!

LuxRender: Li -- a character you've seen before...
Bryce 7 Pro: shrine at dawn
DAZ Studio foreground, Bryce background:
The Barbarian Queen, The Forgotten Temple
LuxRender: ornaments on a shelf by candlelight 

Nan Hai Pu Tuo Temple at
Sellicks Beach, SA
Photo by Dave
Today I'm in a mood for Oriental subjects, perhaps because Dave and I just visited the Nan Hai Pu Tuo Temple, which is about twenty minutes down the road, south of us (Cactus Canyon Road, at Sellicks Beach, in fact. Google it!). Here at left, I'm borrowing Dave's phone pic, which he uploaded to his facebook yesterday. Yes, I took oodles of high-rez images at the same time, and they'll be on our travel blog in a few days, but in the meantime ... Dave's little phone does nice work! The statue is about 40 feet high (!), and is not Buddha. It's the Chinese goddess of mercy, Guanyin, or Quan Yin. The temple is already amazing, and still under construction with four or five years to go before the whole thing is finished. So --

Yes, I'm in a mood for the Oriental, and when I was choosing the art for today's post, how could I go past the selection above?

You've actually see Li before -- a couple of times -- here, and here. (Does The Dragon and His Boy ring any bells??) But you've never seen Li in LuxRender before, and ... well, what a difference --


The photorealism of LuxRender is just amazing ... and I'm still running Reality 2, while version 4.2 has just come out. You guessed, I still need to get the computer upgrade, so I can't install one more thing at this time. But I recently had an newsletter from the Spanish company behind Reality, which is the bridge between DAZ Studio and Lux, and have decided to hold off on getting the new versions, because they're promising us a version of Reality, soon, that'll be seven times faster than what we're using now. Ye gods! A seven-hour render would be done in an hour, or a day-long render would be done in three-and-a-bit. Wow. Now, what's worth waiting for...


The integrity of a Lux image is tickling the point where you're asking yourself, "Is that a photo? Dang, it can't be art, can it? Still --

Lux or no Lux, there's a heck of a lot of painting goes into these images, to make them sing. Three of the four you see above are majorly painted ... the fourth is the "ornaments on a shelf," which is in fact just about the raw render. That one is actually lit by that candle flame! In Reality, you can choose an object and transform it into a light. I selected the candle flame, obviously, and used it to light the whole scene. It's so realistic as a photo, you could almost refuse to believe it's a render, so --


 -- check it out, guys. There's the same Buddha prop, with a stone material set on it rather than a metal. The foreground in this picture was rendered in DAZ Studio 3, using a Bryce image of a forest, mountains and sky as the backdrop; and as is often the case, the magic is in the details:


You would not believe how much painting goes on at this level! Or then again, maybe you would. If you've had a go at this stuff yourself, you'll know exactly what I mean. It can be a bit a annoying, actually, when people assume that just because you use 3D stuff, the computer does everything. Aarrghh! Half the time, I even create the textures and materials before I apply them to the OBJ objects that're going to be rendered. Come back tomorrow to get the best version the PC can give you -- and then the work begins!

More soon. Haven't even scratched the surface of the work that's been done since I was posting regularly. Speaking of which ... I need to post regularly, don't I?!