Sunday, January 31, 2021

Further adventures with Genesis 2 and Victoria 4


Iray Render, Photoshop painting

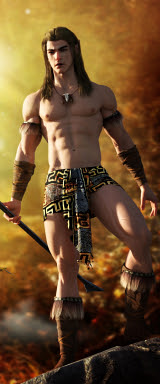
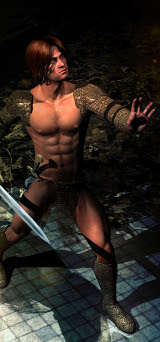
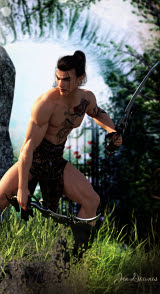
Okay, so having looked at Genesis 3 yesterday, I took a look at Genesis 2 today. Fair to say that you shouldn't actually render the base figure ... which is odd. You can render Michael 4 without a qualm, but Genesis 2 and 3 males load up looking uncomfortably like adolescents; you need to add characters to them, to get anything out of them. (In other words, pay some biiiig money!) I like the look of Michael 5 and 6 -- they fit the Genesis and Genesis 2 base figures respectively; one day, if I'm floating on cash, I might do something with them. They're not running away ... God knows, you can still get everything right back to Michael 3! Anyway, this, above is just the Genesis 2 base figure, which is actually preferable to the version 3, in terms of looking like a man, not a little boy. Then, when you add a character to the base figure -- it comes to life. Here is Michael 5, slapped onto the Genesis base:


...and while we're on the subject, we might as well follow the logic train to the end of the track! So, here is Michael 6, which fits the Genesis 2 base figure:


The weakest link regarding the early figures is the hair. It's no better than it was back in the days when Michael and Victoria 4 were on the cutting edge ... in fact, I don't think the very early toupees for Genesis and Gen 2 were as good as some of the best M4 and V4 toupees. Go figure. Then there's Michael 7 ... which is weirdly not really to my taste ...

...and you see what I mean about the hair being the weakest link, even by the time you get to Mike 7, which fits the Genesis 3 base figure! Soon after this, something went "pop" and 3D hair got very good indeed ... just in time for Genesis 8, Michael 8, and ... here we are:


Michael 8
Now, the next bit of news is that people are starting to talk about -- wait for it! -- Genesis 9. Well, okay. But I still haven't caught up with Genesis 8 yet! I'll have to wait on this. Meanwhile, let's come back down to Earth and look at what we can do in the real world. As I began, I've been exploring the possibilities of the generation 4 figures, largely because most of what I own, as per 3D assets, dates from that era and fits Michal or Victoria 4! So let's see what we can do in Iray...


That's Victoria 4, wearing the Angel skinmap, the Mimi eyes, the Chaos Seed costume with new shaders by Sveva, and a cyclorama in the background. IBL environment lighting, plus one photometric spotlight. The only thing that lets it down (and Genesis mesh would solve this!) is the unrealistic bend in the left elbow. Pretend you don't notice. I set off to design a whole new character this morning, and came up with this. I like this face a lot, so -- expect to see more of her! The eyes were the biggest challenge in this project --

 
Now, I usually opt for eyes from the "Eyes Have It" for M4 and V4 pack, which work marvelously with raytracing. But in Iray they're a disaster ... the sclera (the white of the eye) renders charcoal grey, and so far has resisted every trick I know to correct this. So I tried the Angel eyes, belonging to the skinmap. Worse! Angel renders flat black, iris and sclera alike, and nothing I did could fix this (and I did it all, believe me). In despair, I turned to a skinmap called Mimi for V4, from eons ago, and -- guess what? The eyes just work. Now, I need to get into settings for these eyes, in the surfaces pane, and reverse engineer what's there to fit both the Angel eyes, and The Eyes Have it. But not today -- or tomorrow, in fact. Tomorrow I'm out of here early. Dave's day off, and we're on a road trip. More soon. 

Misadventures with displacement maps and Iray surface parameters


Michael 4 in Iray; Elite Lee skinmap

Today I'm revisiting the fourth generation figure -- good old Michael 4 himself. I'm loath to just abandon the figure, because 80% if all the resources I own are for M4, and all the characters I ever designed over ten years are for M4! So the question is, what can be done with Michael 4 today, in Iray? Turns out, you can do quite a lot with the old figure, though it's also a lot of work. The Genesis figures are pretty much "plug and play." With minor exception, they load up ready to render, while M4 takes a whale of a lot of configuring, to make the old materials and maps work well. This, above, is an HD map, Elite Lee, and it renders well in Iray. But when you use a skinmap that's not HD, you work hard...

Michael 4 in Iray; Ferendir skinmap

This, above, is Sixth Sense's Ferendir, which looks fabulous in a raytrace, but looks very, very flat indeed in Iray; I pulled every trick I know to get a halfway decent result out of it, in Iray! You would not believe, would you, that this, below, is the same skinmap, raytraced --

Raytrace, in Studio 3

...and there's one other thing that Iray will absolutely, positively NOT do for you: displacement mapping. Iray utterly ignores displacement maps, which means the easy way to turn on the vascularity (venous mapping ... to throw into relief the veins in the skin) is off the table. So I did a lot of research, and discovered that Iray will recognize a normal map, which is something; and it allowed me to work with a simple prop and get better results:

Normal mapping...

That's not bad: the normal map brought up the bark very nicely. I'm now asking the question, would a normal map bring up the vascularity in Michael 4? I'd have run the experiment today, but I ran out of time (ie., wasted over an hour) when Studio began to jack around, mis-cue and generally be weird. Right out of the blue, after having no problem with lights for weeks, Iray ceased to recognize the light pumped out by a photometric spotlight! I mean, I ended up with a searchlight about a foot away from the dude's face, the preview was glaring with light, but when you clicked "Render," the Iray engine couldn't see the light. The figure rendered flat black! Say, what?!! So I lit the whole this with IBL lights and then painted it in Photoshop, to make the most of a short foray into Genesis 3, and the result is like a storybook illustration:

Genesis 3 ... such a child!

You can tell "something is wrong" with it ... if this was supposed to be photorealistic, it's more of a painting. And Genesis 3, right out of the box, is such a ... a child. That's a little boy, which is not to my taste at all. I imagine you can make something of him by adding character morphs?? Maybe so, but I've trawled the DAZ store, and I can't find any! Hair and costumes, yes, but as for character morphs and skinmaps specifically for G3? Nope. Go figure. So we'll be leaving G3 pretty much alone...

Tomorrow, I'll see if I can figure out what Studio is doing with the lights (not rendering them); and I'll see if normal mapping will make the venous detail appear in M4 ... and I'll have another go to see if I can get a coherent raytrace, and perhaps we can get back to this kind of work -- which is a raytrace, and you can tell that because M4 has the vascularity on and working ...

Raytrace, in Studio 3


Friday, January 29, 2021

Mix and match costumes, shaders and all


Today's experiments were about mixing and matching bits of different costumes and then making them match up though the use of Iray shaders ... it's actually a lot of fun. You don't see it so much on the Rex character, above, because its just the leather jacket (for Genesis 1) and the jeans (for Genesis 3), and the Varun hair (Genesis 8); but when you get into the female character ... well, I'll admit there's a lot more to work with! Here we go --


That's a mixture of four different costumes, all made to match with shaders ... and then we get to the woman herself. That's G8 Female, right out of the box -- wearing Georgia's makeup and eyes, and the Side-part Hair for Genesis 2. (For these images, I'm not beating my brains out with sets and props; these backgrounds are lifted right out of the packs by Sveva -- you can find them on Renderosity. At this moment, I don't have time to run every experiment in the book with lights and shaders, and mess about with setting whole scenes ... besides which, I haven't (yet) got down to the installations! I still have 250+ things to install. And finally, when you set up a huge scene, you blow out your render times.) I played about with it a little bit ...


A tree by Flink, a bunch of other props, a backdrop out of Terragen, Iray lighting to simulate sunset. It's okay ... but the problem with 3D trees is that the leaves are the size of hubcaps or dinner plates. I'm honestly not that impressed with anyone's 3D tree models. Terragen is fine, till you bring in trees, and then unless you can afford the XFrog tres, which only work in Terragen, you're back to the same problem pf hubcap sized leaves, which rob the tree/scene of realism. And the thing that makes me relictant to spend hundreds of bucks on XFrog trees is that since they only work in Terragen, it locks you into working with Terragen -- which, in turn, is a subscription service, if you want to get away from the limitations of the free version. Its not cheap, and I don't have the bucks, in the long term. So, we'll just use backdrops, for the moment, I think! In any case --


Today's experiments were a big success, with one exception. The Wardrobe Wizard that worked so brilliantly yesterday failed today ... and this is weird, because it failed on the same costumed and figures it worked with before. Restarting the software did NOT work ... restarting the computer might, but I don't have the time. So ... another day, for that. So, there you go --


-- the magic of shaders. I like it! More soon. There are eight thousand more experiments to run. And I must get around to installing all those other goodies...


Thursday, January 28, 2021

Shaders, Iray, Photoshop, and the Genesis 8 female


So -- the Genesis 8 female, with a character (face morph and skinmap) added. This is not Victoria 8; this is Georgia HD, on special the other day at about $11.50 or so, well worth the investment. This is the Bardot dress, which was free with Studio 4.15, but I changed the fabric for a shader acquired from Renderosity last lear -- Sveva's Shimmer and Shine Satin, I believe it is. This is the Shavonne Hair for Genesis 3 and 8. And this, I like.


I'd been trying to order the Body Morphs for Genesis 8 Female too, but DAZ's shopping cart was veru squirrelly. After five attempts and two rounds of emails from their5 Help Desk, I still couldn't order. Weird. I'll play around with what I have for a while, but from what I'm already seeing, I like it!


More experiments ... this is the old Reparation set, a cenotaph, wearing the Requiescat materials ... and I'd been wondering how (or even if)  it would render in Iray. Very nice indeed. I'm stumbling around in Studio and Iray, relearning a lot of what I seem to have forgotten in a year, and learning a great deal I never knew. Lots of questions remain to be answered, but I'm getting there. Slowly, LOL.


After spending weeks trying to find the tools in Affinity Photo to do things I used to do so easily in Photoshop Elements 9, back in 2010 -- and in Micrographx Picture Publisher, in 1997! -- I discovered that the tools are not actually there. (Boo, hiss, to Serif for taking the tools away that were in their early programs! Why would they do this?) The only solution to the problem was to shell out more cash and buy Photoshop Elements 2021, and then learn a new interface. Safe to say the oars are back in the water; if I had a single grumble with Elements 2021, it's that the interface seems to have been designed for children. It looks juvenile, tinker-toy, while the elements 2009 interface was adult, businesslike and professional. Go figure. I'll get used to it.  So --


-- again, piling in the experiments. Here's about forty things I used to use every day, all rolled into one, a digital abstract based on a picnic we took at Sellicks, on the clifftop, a week or two ago. The big questions were, Can I use my .abr brushes with this version? Yes? How do you install them? There's two or three ways; I might have done it the hard way, but it got done quickly. How to you access them, select them and paint with them? That was more of a challenge, and I only stumbled over the answer, with Dave's help. (If you're going through this, just ask, I'll go into this in detail). So --


This outtake from "First Snows of Winter" shows .abr brushwork (Ron's Magical Snow), and there's also a bunch of painting done on the mane ... and the mane is a CWRW addon, which needs to be manipulated ten different ways to work and look good -- meaning, you better know where the tools are, and how to use them! I think I'm just about caught up! Couple more questions to answer in Studio 4.15 ... how do you get soft(er) shadows on photometric lights??? ... and how do you use dForce for dynamic clothing, hair and props? With those questions asked, I do believe I'll be back where I was years ago, but using the Genesis 8 models and rendering at light speed. Am starting to smile now!