Monday, February 25, 2013

Let there be Lux! Chino revisited...


click to see all images at larger size

I've been wanting to get back to LuxRender for weeks now, and this was my chance. The weather has been too hot to do much ... well, much that didn't involve sitting infront of a cooling device! Go far from a cooler, and you walk into heat and humidity. So this was a great time to experiment with Lux, see if I can get back to where I was a loooong time ago.

The first thing I learned when I started it up was that I had forgotten just about everything. So I set off again with simple subjects. A couple of props sitting on a table, with a simple background:


...so far, so good. There's a bit of "burnout" on the skull there, but I'm not too bothered about it, because I know it's a pretty simple fix, messing about in the Reality materials. I did this, and the next two experiments, at small(ish) size for quickness. The bigger the image (not to mention the more complex), the longer it takes to render. This little one, above, was about 40 minutes, and told me enough for me to get a grip. It's actually worth comparing the LuxRender render (!) with the raytrace:


So, if you were wondering why you'd bother getting into Lux, here's your reason! The LuxRender image has a quality very close to a photograph. In fact, when you get very, very good at this, the renders are impossible to tell apart from photos --

For those of you who could really get into this, you need to visit the Lux homepage, and take a look through the galleries of user images. It's www.luxrender.net, and the link to the galleries is at the bottom of the page, not the top. Bear with me while I learn this. There's a LOT to figure out, but I'm getting there...

The next thing was a more complex image -- an exterior, in sunlight. The top image, here, has been Photoshopped a leeetle bit to add clouds into the sky; the second image is just as she comes:


All right! That's nice, that's very nice. Still simple enough that the render took only about 50 minutes, but not to bad at all. So the next thing was to go back to a couple of old projects and re-render them; and I wanted to add a figure. The 3D human figure might not look a hundred times more complex than a whole garden set, but it is. So this one was always going to be more of a challenge both for self and the software:


This one was still rendered small (if you call 1000 pixels wide small. Three computers ago, I considered this a pretty good size to be working at ... because the 'puter would "barf," as Dave so delicately puts it, if I asked much more of it), and it took about 90 minutes to get to a really good render. 

Sooooo, time to get ambitious!

I pulled up the old file for the leader image for The Legend of Chino Vollias, and worked with that. First step: delete all the lights. ALL of them. Second step: import a Reality mesh light, and render it small, so I could check to see it was working, and working properly, before I set it to render full size. Because rendered at 2500 pixels high, it was a 24 hour render. I left it going overnight, stopped it this morning, when it got to 1500 "samples per pixel." (I've learned many things -- one of them is, the smaller the image, the more samples per pixel they need to look good. The render, right above, was 2000 S/p, as Lux terms it. The big one which leads off this post, was only 1500 S/p, and looks extremely good. I kept an eye on it between 1200 and 1500, and not much was resolving after the 1200 point. So -- time to call it good and start painting.

There's a lot of Photoshop post work on this, I admit. Lux didn't render the whole thing looking like this ... but it could have. It will yield a raw render that looks like this, if you have almost unlimited time to fiddle with the lights and materials. Right now, I don't have that kind of time, so -- Photoshop to the rescue.

So -- how good is LuxRender?! I'm just getting my feet re-wet with this, and there's so much to learn. It's going to be fun!

Jade, February 26, 2013

Thursday, February 21, 2013

Playing with fire


click to see all images at large size ... top image is wallpaper size

"The Fire Juggler" is almost entirely a painting. Not much is left of the 3D render that forms the foundation of the project. Please do see it at large size ... you can really appreciate the painting if you can see the details. The inspiration comes from several directions, and I got to thinking, "What about a fantasy world where magic really works, and people with these skills are so commonplace that if you can conjure fire and juggle with it, you might just be able to earn yourself a living performing in the marketplace. What an idea! Imagine that you have a caravan of performers moving from place to place, town to town, full of exotic skills that are almost ignored, because so many people can do this kind of thing. So I couldn't resist this image.

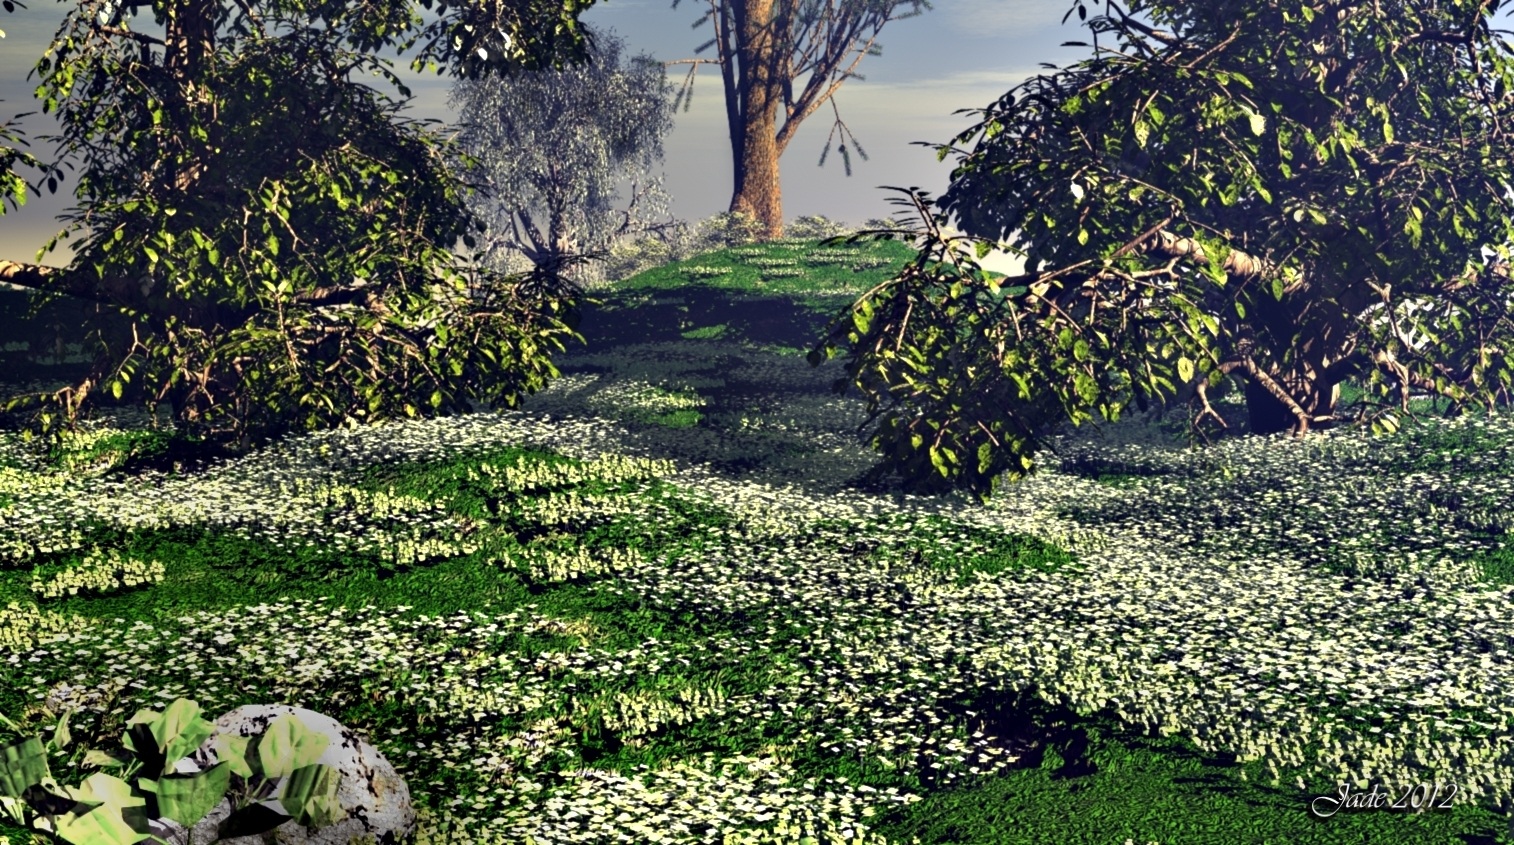
The landscape is another crack at Bryce which turned into a hybrid. The background is all Bryce, up to the tall grasses. The foreground is all DAZ Studio, because the routine of importing and positioning little plants in Bryce is more than patience can cope with! Here's the bit where Bryce turns into DAZ:


...but I will admit, the result is very nice. Cool flowers -- from one of the Environment props sets. Must do more like this. I know I keep grumbling about the end product not being a photo-realistic landscape, but if you appreciate it as art, it still has a lot going for it. 

Right now, I have a render percolating in Lux ... the hardest thing about this is jogging my memory! I had LuxRender just about "nutted out" before we moved house, and now I can't remember the first thing about it. I knew I should have written it down!

For the artistically inclined: Michael 4 was posed with a lot of point lights -- no spotlights, just point lights. One in each palm to create the glow off the fire, and a couple of others here and there to give a bit of depth -- for instance, the blue light off his left shoulder, which gives the impression of blue backlighting from the marketplace. The raytrace and the deep shadow map render were enormously different, and each had a lot to recommend it; so I did one of each, at 3000 pixels wide, and shipped both into Photoshop. Then each of them was duplicated, and all the layers recombined at different merge/blend settings. When the color and tone were right, painting started ... highlights, shadows, hair, eyes, eyebrows, mouth, skintones ... not to mention the fire! The flames were done with .abr brushes: blat on the fire, then copy the layer twice ... walk the color into a deep tone and a highlight tone in subsequent layers, and apply a different merge/blend mode to each. The background was blocked in from a digital sketch based on a shot of a renaissance fair in Hungary! Michael 4 is wearing the Akasta hair, but you'd never know it, because 80% of what you're seeing here was hand-painted. M4 is wearing the SAV Eros skinmap, but that's one of my face/body morphs. In fact, you've seen it before, but it was wearing a different skinmap -- and what a difference it makes, when you change out a skinmap! The last time you saw this face, it belonged to John, from Umbriel. The other thing I changed for M4 was the bump mapping on the torso. You see realistic veins. This bump map was hand painted for a project a long time ago (to be honest, I can't even remember what it was!), and I keep going back to it, when I want to get the effect of a guy who's been working hard.  

Glad to say, I had a lot of fun with this one .. it's sitting right on the line where "rendered" meets "painted," and it was painted this way because getting a really good render was going to be the job from hell. The lights were low ... the raytrace was too dark, the deep shadow map was too grainy, and each test render (where you fiddle with the lights yet again) was a twenty minute wait! In the end I thought, "Nuts to this, it's going to be a painting." Nice!

Jade, February 21, 2013 

Tuesday, February 19, 2013

Sunset light in Bryce 7 Pro


Sunset light ... Bryce 7 Pro. I could just as easily have titled this piece "My Kingdom for a Bryce Materials Lab tutorial my brain can wrap itself around!" Or, "When will someone model realistic trees for Bryce?"

Parts of this image are really neat...


...and as artwork, it's actually rather nice indeed. But if you were hoping for something photographic -- well, hmmm. So I guess it's a question of "horses for courses." Use Bryce for images where it works really well, something like this:


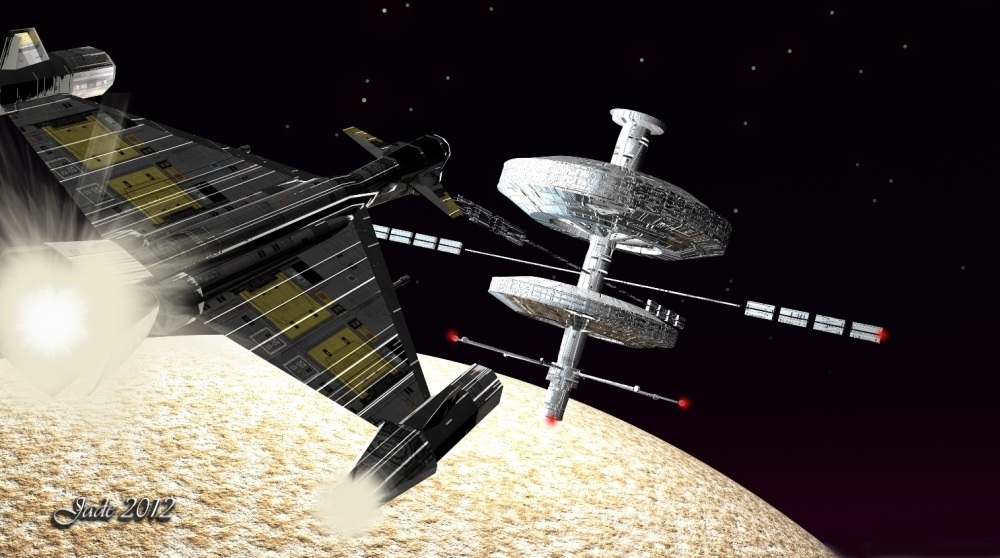
And use it for SF images, like this:


...and save up for a copy of Vue, with enough plug-in modules to make it interesting! The really odd thing is that Bryce was developed as a landscape generator, and in fact, landscapes are the thing it's least effective at. Or, perhaps it showed enormous promise in its day (up to 10 years ago), but today, with Vue offering vistas like this:

...well, I guess Bryce must take its place among the second or third tier programs -- because there are others that are awesome, like Terragen, and so forth. Oh, I know they're out there! And I also know (and confess) that the Bryce Materials Lab continues to defeat me! But I really do lust for the ability to generate really, really realistic landscapes. I feel a definite attack of Vue coming on. Mind you, it's coming on slowly, because I'll drop between $300 and $500 to get it all together, and I'm not quite so overcome with lust that I'll rush off and do it today!

Soon, though. 

Jade, February 20, 2013

Saturday, February 16, 2013

A little CG science fiction: Landing Approach ... updated (with the "oopsie" fixed!)


click to see all images at large size:
first and third are configured as wallpapers

UPDATED next day -- was anyone sharp-eyed enough to catch the "oopsie" ?? You'd have to have a monitor that was set very, very bright to notice it, but ... I used the wrong image when I was preparing the uploads. There was an "artifact" in the painting that had no business being there. It didn't show on monitors set darker or more contrasty, but it was there! So: re-uploaded, fixed. Now, back to the original post...


Yes, your eyes do not deceive you -- that's Neil Travers. And that's still the "Brad" skinmap dropped onto my face morph ... I ran the experiment to see how the Mitchell skinmap would work out. Nope. It changes the face a great deal, especially around the mouth. So it looks like the Brad skinmap, from H3D, is going to be the one. The only work needed on it, in fact, in the post-painting, is to take some of the ruddy color out of the face, and make the eyebrows a leeetle bit more firm, so I actually did a tiny little bit of painting direct onto the skinmap itself, to lessen the work needed each time we render Neil. Result ... very nice!

This is another piece that was worked up in layers, and is a hybrid between Bryce, DAZ Studio and Photoshop. The whole project started with the city, which gave me the inspiration for the rest:


I call this one "Landing Approach," and I'd guess the city down there is something like Hydralis, or perhaps even Sark. I'd need to refer that question to Mel Keegan, see which of the major cities that play such a large part in the Hellgate books best fits this piece.

If you're into the SF aspect and want to chase up Hellgate, be aware that there is GLBT content in these books -- and there are five volumes (big ones!) to date, with one to go to finish up the series. Just go to Mel Keegan Online and follow your nose. [2023 EDIT: the dot-com web address is defunct as of early this year. For some reason, the system utterly denied access to it, and it could not be renewed. Then some joker bought it as a zombie domain name, and MK would have to buy it back at significant cost. Not going to happen, but the web pages are all still there and still viable. Find MK online in the same place.]

If you're into the artistic aspect and want to know what went into this image: that's Michael 4 wearing a face designed by me, and the GQ Event hair by Neftis, and the Brad skinmap by H3D. The costume is the M4 Classic Trenchcoat (from Renderosity), the M4 Cowboy Jeans and the teeshirt from Stylin' M4 (all from DAZ). The textures have all been changed out to give the costume a new look (let's face it, if you stick to the same textures every time, it looks like the characters never change their clothes). The set is the cockpit of the Vanguard space craft (from DAZ). The background is the Alien City standing set for Bryce, with sky and lighting conditions designed by me; the other spacecraft are OBP models (the Bryce version of OBJ) from the Space Combat Force set. The Bryce part of the image was rendered first at high quality, which took 82 minutes, and painted in Photoshop -- which took about the same amount of time; then this was used as the backdrop for the DAZ Studio render. This isn't even a raytrace! The difference between the raytrace and the deep shadow map render was noticeable ... this was one of the very, very rare occasions when the raytrace was not as good. So I went with the other, shipped it into Photoshop and started painting again. The final image was rendered at 3000 pixels wide, to allow for fine painting. The raytrace took about four minutes and the deep shadow map render took close to forty seconds. Go figure. Painting in Photoshop took about an hour after the final render was complete.

The finished image, and the background as a whole, have been uploaded at 1920 wide, so it ought to be perfect for a wallpaper. I've just set it as the wallpaper on both my 24" widescreen and my 15" laptop, and it looks great. It looks so good, I'm reaching for the Hellgate books, and will pass away a couple of pleasant hours this evening with them ... it's way too hot to do anything much. By the third or fourth day of a 100 degree plus heatwave, you're just about ready to admit defeat!

On another note completely: wahooo!  We watched Black Caviar run at Flemington, this time yesterday ... yesss!!! As the commentator said, "The legend lives on." You know me and horses, through the art you seen on these pages and posts. Like everyone else, I love this particular horse: http://www.blackcaviar.net.au/. She's back ... she's bigger, and she's faster than ever. What's not to love:


...and lastly, still on the subject of horses, I just discovered something called Cavalia. You have to see this to believe it: http://www.cavalia.net/en. Oh, my. 

Back soon -- after the heatwave, I think...

Jade, February 17, 2013

Thursday, February 14, 2013

Happy Valentine's, 2013!


The image says all! Happy Valentine's Day, 2013 to all.

The e-card is uploaded at 2000 high, if you'd like to see the details, and it should print out nicely, too. He has rather lovely blue eyes ... and I leave it entirely up to you to pick the gender of the lucky recipient of that bunch of flowers! The sunlight looks so nice on this one ... makes you want to grab a book and a long cool drink, go sit in the shade and enjoy the afternoon. Just an old fashioned raytrace in DAZ Studio, nothing fancy -- and then a bunch of Photoshop painting. Actually, I think the painting took longer than posing and rendering the image! The border was done in Photoshop, and the text object was done in Serif.)

Back tomorrow with some SF and ... stuff. 

Jade, February 14 (uh, Valentine's Day!)

Wednesday, February 13, 2013

CG art: Before the Storm


click to see all images at large size...

The other day I was surfing around, looking at the work of folks who're working in Vue, specifically. Their landscapes are awe-inspiring, and Bryce just isn't in the same category. Don't get me wrong -- I do love Bryce, but the results it gives are much better suited to SF work than scenes of, well, Earth. Now, Dave has Vue 10 installed on his computer, but he's strapped for time right now, and not able to do very much with it. Meanwhile, I have the super-powerful system, but it doesn't have Vue, it has Bryce. I got to wondering how much it costs to get a license to run Vue 10 on a second computer, so I can have a bash myself --

You wouldn't believe how hard it is to winkle the info out of the E-on Software site!  They have something called the "floating license" system, for networked computers, and it's more expensive to buy the network license than it is to buy a whole 'nother copy of Vue! I don't think they actually allow for two people on the same desk working in tandem, doing stuff that doesn't involve networking, or network rendering, and what have you.

Short version: if I want to give Vue a go on the powerful system, I'll have to buy a whole new copy -- and I probably will. Eventually. But at risk of sounding like Aragorn, that day is not today. Today (actually yesterday, but who's counting?) I thought, "Fair enough, let's see how far you can drive good ol' DAZ Studio 3 with a landscape."

And you're looking at it. I call it "Before the Storm." Originally, I wanted to make a pure render -- no painting over the image at all. But this soon turned out to be implausible, because the render came up with so many "artifacts" due to overdriven displacement mapping, which is the only way to squeeze this kind of result out of DAZ's very simple method of handling objects. Oh...kay, well, if we're going to be painting, then let's get in there and paint everything else, too. A pound gets you a penny, many of the Vue images I'm looking at from artists around the globe are spritzed up in Photoshop too.

You're seeing three terrain objects: the foreground hill, and the mountain at the right, which is actually two nested terrains with different mapping on both (diffuse, bump and displacement) to get this effect. I added the best of the dead trees from the Gnarly Trees pack, and then imported loads of Flinx's Weeds -- but a lot of the foreground ground cover was actually done by bringing in several dozen shrubs, making them very small and burying 90% of them in the ground. The result is instant ground cover that's very realistic without having to paint anything. The shrubs I used are from PNature (from Renderosity). The two birches on the skyline at left are two iterations of the silver birch from Merlin's Trees pack. The Gnarly Tree has overdriven displacement mapping, to get this effect. No displacement map is supplied with the objects, to I set the bump map as the displacement map too, and pushed it to the max the model will take before it literally comes apart. 

What makes this render "pop" is the lighting. I only have four lights on it: the sun, which is grey-blue (storm light) and way high, with shadows set; two spotlights on the mountain because the terrain is sooooo far away in order to look realistic; and the fourth spotlight is right above the tree, and set to be golden yellow ... it casts shadows from the branches and gives a lovely illusion of a single patch of sunlight -- sun between the lowering clouds -- as the storm comes in.

The sky was done from a digital image I captured during rough weather on the Limestone Coast, this time last year. The picture was darkened, contrast was tweaked, everything color saturated, and then resized so that the bottom third was blank, which pushed the interesting part of the sky up, making it appear above the line of the hill here. Brighter clouds and mist were painted over in Photoshop, and one of the things that worked really well was a scarlet cast painted into the sky and given a "saturation" merge mode: the cast doesn't even show in the sky, but the red hits the tree, makes it look like angry evening sun -- a violent sunset just beginning right behind the virtual camera -- on the branches.

The other thing that adds oodles of realism to the mountain is that I put in an atmospheric plane between us and it. You make a primitive, swing it through -90 degrees so it's standing up like a wall, tell it to be blue-green-gray and about 30% opaque, and hit "render." Cool. An atmospheric plane makes anything behind it paler and less contrasty, so the sky image had to be waaaay dark, and very contrasty, to overcome this. But the result is very good, and it's a dead simple technique that gives you the "mountains blued by distance" effect.

The Millennium Horse is wearing the dappled gray texture from the CWRW Pro Textures pack; I fiddled with the morphs to make him look like something a little like an Arabian ... and since I was painting everything in sight, I hand-painted his mane and tail as well, to give a good impression of a fair breeze blowing ahead of the storm. 

Some grasses, plants and flowers were painted in, and then the birds in the sky, which give a sense of distance and perspective. Mist in the foreground, and ... done!

And if I do say so myself, that's not bad at all. This is about as far as you can push DAZ, landscape wise; and I'll be honest, I still struggle with Bryce 7 Pro. It's hit and miss, even now. Here is my best to date:


...and that also is pretty neat. But just stop, take a deep breath, and have a look at this:


Uh huh. Vue Esprit, plus the plugin modules for Botanics, painting in populations of plants and so on, atmospherics, and ... hmmm. Embrace the concept. 

Jade, February 13

Sunday, February 10, 2013

CG and Photoshop fantasy: Murder in the Thieves' Market


(click to see all images at large size)

Murder in the Thieves’ Market ... the idea was simple. The warrior (and it could be Conan!) has received a message from Subotai (and yes, I do know Subotai was a character created for the John Milius movie, starring Big Arnie; but I'll be honest, I really liked what Gerry Lopez brought to the project, being the absolute opposite of everything Conan was). The message says: Meet me an hour after midnight at the market ... but when the warrior gets there, all there is to show of his friend is a smear of blood on the ground, a bloody spear, and a strange cornucopia that’s ... smoking with the residue of dark magic.

So far, so good. The scene was pretty easy to set up (Michael 4, the DAZ Millennium Horse with textures by CWRW. Elements of Powerage’s Supreme Armor; Dragon Lord Horse Armor for the horse; a lamp (it might be from the Pirates of Tortuga prop set — I forget), plus odds and ends ... a lamp, barrel, wagon wheel, incense burners, from various prop sets, wall, ground, spear, cornucopia.

So I had it posed in an hour, then spent an hour switching out all the textures for my own. But ... damn’n’blast, between the deep shadow map and the raytrace, there was no “agreement” about what would render properly and what was going to jack around. And I was out of time...

In the end, I went with the raytrace and then painted virtually every single this in the frame. The jerkin, the skin tones, the shield, the hair ... You name it, it was painted, which was waaay easier than trying to get it to render properly. Heaven only knows what was going on at the software level, but it was Photoshop to the rescue. I’m very happy with the result.

The character is one of mine -- you might recall this: 


...see the whole post here...

That was the Mitchell hair and skinmap by SAV, but I have to admit, the original face/body morphs don't do anything for me, so I designed a character around the skimap -- which is usually the opposite of what you do. You design a character and go looking for a skinmap! (And this is what's landed me in some strife with Neil Travers, from the Hellgate series of books. The face is right, but I can't find a skinmap to fit to everyone's satisfaction! It's been years, and I'm still looking for a perfect match on the skinmap. This is the reason you don't see Neil Travers depicted a whole lot more often. Note to self: try the Mitchell skinmap on Neil. Now, that's not a bad idea...)

So Murder in the Thieves Market was more about painting than rendering:


...and to really illustrate this point, see the warrior, "raw" and painted, side by side here:


And obviously, you'll need to see the above at large size to see the results of painting! I've been asked why I bother putting a caption on an image, and then including the caption, or a close version of it, in the body of the blog post. Method in my madness: Google can't read text that's buried in images. Like everyone else on the tipple-dub-ya, I'm still trying to reach people who would appreciate this blog and follow it, so I want Ma Google to be able to read the whole text, and fish out the keywords, like Phoshop, raytracing, fantasy. CG art, and what have you. At the same time, when a Google Image Search pops up the picture only, the caption is there to catch the attention and interest of the potential visitor and make him or her click through to the site.

And I'm still interested in fiddling around with framing and bordering on images, so as a parting shot I did this:


I guess this would be the prologue to the story -- the scene that drags Conan into the plot. And speaking of the plot --

Of course, Subotai isn't dead. The blood on the ground belongs to the assassin whom he dispatched when rescuing a gorgeous woman from being murdered ... she bade him accompany her to a passing caravan, where she enchanted him, and not in a good way. Turns out, she's a dark sorceress, which Suobtai only discovers when he's brought out of his trance (read: hit on the head with a waterjug) by the story's heroine, a young lady who's avenging  her father, who was killed at the hands of the gorgeous sorceress. This young lady hired the assassin to do the job for her -- but Subotai was too good, too quick. About this time, Conan -- who has been hacking his way through the sorceress' outriders and shape-shifting man-bear guards -- catches up with the caravan and meets Subotai and Triana, the young lady bent on revenge. Triana offers Conan the same deal: dispatch the sorceress for me, and I'll pay you the assassin's fee. Turns out, Conan recognizes the sorceress from an earlier altercation: it's none other than the evil Ursula, who manipulates the spirits of bears, and were-bears, and who has a blood-soaked history. He also knows Triana, though he hasn't seen her since she was knee-high to the waterjug with which she bashed Subotai over the head, to bring him out of the trance ... Triana's father was Conan's great friend. Conan did not even know the man was dead, and now the barbarian is PO'd enough to be out on the vengeance trails.

So beings a story that twists and turns through 140 more pages before the legendary words 'The End' are seen (never to be confused with the dreaded 'To Be Continued'). And if I had enough time, I might even write this one -- it's a fun story!

Alas, there's no time, but what I might do is model the characters and stage some of the scenes, and maybe give you the rest of the tale in a skeleton form ... now, that would be doable!


***

I also want to talk about another subject entirely, nothing to do with the art and story above. I guess it's about the "politics" of the 3D marketplace -- and DAZ specifically. You might or might not know that a lot of people have knocked DAZ all along, for claiming to be "free software," when in fact only the core engine and base characters were free to download. Everything else -- all the models, textures, the works -- you had to pay for, and without them, in fact, there's not a whole lot you can do with DAZ (or any 3D posing program). But at least a person starting out in DAZ was able to get a feel for it, find out if they like it, before they start putting down wads of money, because not only the core engine but also the base models -- Michael, Victoria, and their over-muscled cousins, the Freak and the She-freak, were FREE. No strings. No hidden costs. Just download, play, enjoy, figure out if you like this kind of art before you start paying heaps.

Over several years, the DAZ base models were given away -- possibly (probably!) more than a million times. Think about this: a million freebies, while the parent company made fortunes in all the add-ons that make up the scenes. After paying zip for the software and base models, I must have spent anything up to about two or three thousand bucks on props, costumes, textures, poses ... and I'm a fairly average artist. 

To me, that was the fair way to go: let people start to love the art, then hit them for the big bucks; and this was the way for years and, as I said, millions of free downloads. 

But not anymore. With the advent of DAZ Studio 4 and the Genesis figure, all the previous base models are said -- by DAZ itself -- to be obsolete. So why is there now a pricetag on each of them? And why is the price so high? I could understand charging $5 or $10 for an obsolete item that's been free for years and given away more times than you can imagine. But Michael, Victoria and company are $29.95! (As I type this, there's a sale on -- save 40%, so that $17.97 looks like a good deal. It ain't.)

Is it just me, or is this not kosher? These base models are obsolete, for goshsakes. They ought to be cheaper than before, but how can something that used to be free get any cheaper? I'm just not seeing the sense of this, and I do know that artists now entering the field are being seriously inconvenienced. They're paying an arm and a leg for what none of us paid for, when I got into 3D art, back in August 2009. 

I guess I just want to lodge a protest. 

Consider it lodged. 

Perhaps DAZ will come around and rethink its position in future -- I would hope so. Are the Generation 4 base models obsolete? Well ... yes and no. Genesis is more malleable, more poseable, with fewer flaws and a greater degree of reality in the model itself. But remember that the base model is where an artist starts, not finishes. Nobody who's serious about this uses Michael 4 right "out of the box." The face and body are molded, sculpted; a skinmap is added, and a toupee. The degree of realism that's achieved is entirely up to the artist, and his or her skill level. Don't judge Michael 4 too harshly: he's raw material, like putty, or clay, ready to be molded into ... well, anyone. 

Here they are, (top) Michael 5 and Victoria 5, for Genesis, and also (below) the old Michael 4: 


The combo bundle of the new figures is (wait for it) $124.95. And they only work with DAZ Studio 4. They don't work with Poser, or any prior version of DS. And if you don't lay down the bucks for these figures, you have little to work with in Studio 4. Genesis is like a plastic doll: genderless, ageless, close to featureless. You slap the figure morphs onto it all of a piece, and the doll morphs into the realistic form ... but at what cost?! (And I won't even go into the issue of the Workspace From Hell which is the Studio 4 desktop. I've taken a look. Not for me.) 

So if your pockets are not that deep, you're right back to Studio 3, of which there are gajillions of free copies floating around, just as there are an equal number of free copies of Michael, Victoria and the gang. The program was packed on disks in the ImagineFX magazine, for a start, and copies of are changing hands on eBay, legally, all the time. Studio 3 was also included on the DVD-Rom in the Figures, Characters and Avatars book, which you can still get, and will be able to get, for a long time to come; and that disk, plus many (not all, apparently) of the ImagineFX disks, included the base figures. (I don't have all the IFX issues -- only a half dozen or so. Turns out that I got lucky with the figure inclusions; so if you're looking for the base figures on the IFX disks via eBay and so forth -- make sure you know what's on the disk before buying.)

So getting Studio 3 free isn't the problem. Getting the base figures, so you can do anything with Studio 3, is the challenge. It's almost as if DAZ wants Studio 3 to just go away, vanish, and let the dreaded Studio 4 thrive because there isn't any competition. Charge enough for the obsolete models, and this might happen, in a process of atrophy.

I'm more sorry than I can say that this is happening, because beginning artists are being shut out of what was once a free party. If I'd had to pay $125 up front for base figures, back in '09, I wouldn't have bothered, because the risk factor is too high -- 

Suppose you just can't figure out the interface? Suppose you discover you hate it? Or have no knack, no talent? Or the work gives you a splitting headache? It was fantastic being able to take it for a spin at no cost, and DAZ was rewarded to the tune of a couple of thousand of my dollars, for models, props, costumes, so forth. 

And the part I really have a problem with is that what used to be absolutely free is now $29.95, after millions of beginners (self included!) benefited. Not fair. 

You know me -- I've worked for more than a decade in the world of ebooks; and like any publisher, I can tell you, DAZ has got the pricing mechanism backwards. The product is charged for at full price when it's new. As it gets older, it goes on bigger and bigger discounts. When it's ancient, it costs a peppercorn, or else it's given away free, as part of a bundle to get readers to spend in an era when, in fact, very few people have the bucks to afford luxury goods ... and both ebooks and hobbyist 3D art are pure luxuries.

DAZ, what are you doing???

Is it any surprise that there are loads of "torrent" sites at which you can download the base models? Normally, I abhor torrent sites because they rip off authors, artists, musicians, programmers, filmmakers; and as a rule I say that anyone who downloads off such a site deserves everything s/he gets when they contract a deadly computer virus along with the pirated goods. Torrent sites are said to be loaded with malware and what have you -- what else would you expect from illegal sites? But in the case of the base models, one can only say that his time around there's rather good reason for people to be breaking laws and sharing. My guess is, the torrent sites don't even scratch the surface. My intuition is that Michael and Co. are being shared back and forth between friends, as often as they used to be downloaded free, so in the end, who's winning?

In the meantime, if you're wondering how one makes the connection between Studio 3 and Studio 4 without laying down gobs of money ... well, so long as you're already "in the game," and you have the base models, it's easy. Studio 4 had complete retro-compatibility. You build your scene in 3, save it, open it in 4 and then go on and do whatever it was that Studio 4 offered you, to make you want to go there in the first place. How much of my work is rendered in 4? None. Nada. I sometimes use it as the bridge to get my work over into Reality/LuxRender, but then the rendering is done in Lux, not in DS. 

I really am sad at what's happening, on behalf of artists. And I'm still gobsmacked that DAZ would do this. I just hope/pray this isn't a desperate attempt to rake in some last-ditch revenues, because the company is losing a ton of money since Studio 4 and Genesis came along, and is about to go belly-up. That would be bad. That would be very, very bad indeed...

Rant concluded.

Back soon with a Neil Travers skinmap experiment, and, I think, the warrior's mate who took on the assassin in the Thieves' Market!

Jade, February 11

Monday, February 4, 2013

'The Piper at the Gates of Dawn'


(click to see all images at large sizes)

The forest god ... a pagan image; or a fantasy image, if you prefer. I first painted this in acrylics on illustration board in (ahem!) 1981. Needless to say, the CG version is ten dimensions better, but the inspiration and theme are the same, and I duplicated the pose exactly from the original painting. The original is still in the house somewhere -- packed. Heaven only knows where. But what did show up was an oldoldold A3 size color photocopy of a set of photos (not digital ... your actual, genuine film) of eight of the old paintings before they were either sold or packed. The ancient photocopy is horrible, but there's enough information in it to remind me of the art, and I have a fancy to recreate it digitally. Here's Number One, which I like to call "The Piper at the Gates of Dawn." 

The title is a bit of whimsy derived from that chapter in The Wind in the Willows where the rat, the mole and the otter have been out searching all night for Portly, the otter's young son. They find him just before dawn, quite safe in the care of the god of small animals, and Mole is privileged to catch a fleeting glimpse of the god just as the sun rises -- which is quite visionary, when you consider this was written at the height of the Victorian C of E! 

The piece was rendered at 2000 wide and 3000 high. It took a couple of hours to get it all posed and everything imported. Something like 10 trees, twice that number of little ferns and plants and what have you. I'd have used squirrels and rabbits, if I had the models, but alas, I don't have them yet. I have a couple of birds, so these were added...

The raytrace was a two hour affair, even on "The Mighty Thor," which is still one of the most outrageously powerful computers on the market. It's now just over 13 months since I opened the box under the Christmas tree and did several laps of the room without touching the carpet. (Thank you, husband!) The raytrace took a long time because of all those plants, and the hair on the character. As soon as you add hair and plants, the time taken to calculate the shadows blows out exponentially.

Then it was over into Photoshop for a lot -- and I mean, a lot! -- of painting. I was four hours into the project when the raytrace was finished, and I think I spent four more painting...


The major job was always going to be the hair, which was overpainted in four layers: dark thin strands, light thin strands, both layers given a gaussian blur to make them meld down into the picture; then a few extra dark and light strands left sharp, painted in one layer; lastly, a broad, soft highlight painted over the cap and back of the hair and given a blend mode of “soft light” to bring out the highlights which were otherwise not visible.

The model is obviously Michael 4. The face and body morphs are my own, but the skinmap is Jerome, by Tosca (which I do believe is from the DAZ marketplace ... but I could be dead wrong. It's been a long time). If you don't find it there on a "Jerome for M4" search, go straight to Renderosity. The hair is the Yannis Rasta Dreads, heavily painted (Renderosity again). The head jewels and earrings are actually designed to fit Victoria, but all you have to do is move them a bit and resize them, and they fit Michael. These are from the Destiny jewels set. The bracelets and necklaces are from the M4 Accoutrements pack which also includes watches, a beanie, rings. The decorative item hanging from the horn is an earring from the M4 Earrings pack, with all the textures changed out. The horns themselves are actually the Troglodyte Horns, again with all the textures changed (DAZ). The flowers are two pieces from the Vintage Darlings set (Renderosity) ... the main tree is the Ultimate Woodland prop from DAZ, and the smaller trees are from the Deluxe Trees set -- and for the life of me, I can't remember where I got those. Hiding in there are a couple of the Rhodi Design baby fir trees from Content Paradise. The two birds also came from Content Paradise...

The background was a color sketch done ahead of time and just imported into DAZ as a backdrop:


The foliage around the tree, the very subtle light rays, the birds in the sky, the butterfly, some of the foreground grass, the gleam on the lamp glass -- all this was done with Photoshop .abr brushes. There was a little work to be done on the bark and ivy, but not much, because I overdrove the displacement mapping to really make it come up coarse, rough ... realistic. All other effects were wrangled in DAZ itself, before the raytrace began. 

And after I was finished with the whole thing, I was interested to play around with framing and bordering, in Photoshop. In a post the other day I was mentioned a really neat set of borders that the old Micrografx Picture Publisher had, and which were added to an image with a couple of clicks. I've had a hunt around in Photoshop Elements, and haven't found anything comparable yet ... does anyone know if they're in there somewhere?? So, not finding them, I got creative:


(Incidentally, sorry if the big images take a bit longer to download. I have one group of people asking me for larger images, because you can see so much more in them, and a couple of others asking for smaller images which download faster. Well ... this is the age of broadband and ADSL 2+, and I'm thinking that 99% of people have fast downloads. To the folks who want the really small pictures: apologies, guys, but I gotta go with the majority.)

I'm just tickled pink with the way the hair and jewelry came out! I know a lot of people (most, in fact), don't bother to view the images at large size, so I'm going to hit you with one more, just one, which will show the painting off at a halfway decent size:


Back with more very soon ... actually, with a bit a bit of a rant. Have just learned that DAZ is now charging for the obsolete base models! What--??!! This is deserving of a rant. Tomorrow, or soon. Grrr.

Jade, February 5