Showing posts with label 3D Studio Max. Show all posts

Friday, January 4, 2019

Working with texture, color and light

Displacement map, bump map, reflection, refraction and gloss
values all set on ... well, everything.
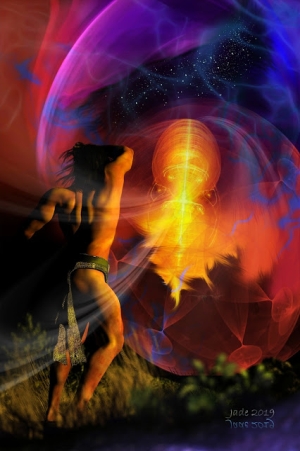
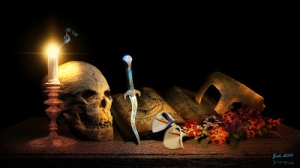
Displacement, bump mapping and reflection are striking in this one...
DOF is turned off to make to make textures visible. 


In the last few days, I find myself fascinated by the textures of things, by the quality of light, the way distance -- actually, the density of particles in the atmosphere, but that strips the romance right out of it, doesn't it? -- strips detail, resolution and color from a vista.

So, working in CG, I find myself playing endlessly with the balance between displacement map values, bump mapping, reflection, refraction, the strength, color and direction of lights, the "drop off" of light over distance. (I learned the theory of all this via the 3D Studio Max Bible, incidentally, years and years ago. No, I never used "Max." It was out of my price bracket,  not to mention that my hardware wouldn't run it! But you could get the third-party manual for a song on eBay or something, and although 90% of the book was devoted to hand-holding exercises, teaching students how to drive the interface, the last 10% of the 700pp large-format book was invested in the theory of texture, light and ... all. So you had 70pp of in-depth, high-density information, the whole theory of the CG art form. This was all I needed. Actually, I always considered it a bit of a waste, printing a massive book teaching students how to drive an interface, because in a year's time the company will bring out the next version of the software ... they'll change the interface so radically, little you learned from a by-the-numbers book will do you a shred of good. On the other hand, master the theory ...! So, uh, I did. And it's infinitely applicable to DAZ, Poser, Bryce, whatever you can afford.)

Fascinated by light, texture and what have you, I couldn't resist painting in Photoshop too:

Digital watercolor: summer hills

Color gradients: none of this is in the source photo.
In fact the photo is a waste of storage space...

Digital watercolor: Near Yankalilla

Color and texture: again, none of this is in the source photo.
Lighting conditions on the day were ghastly. So ... painting!
As often happens, the very day that you're in the right place to get a perfectly framed photo, the sky is dull, but not dull enough to be dramatic. Just enough to make a digital camera record a picture that's so drab, it's just about black and white, so flat and boring, your mouse is hovering over the DELETE button. I tend to delete loads of pictures, and in the past the source photos for digital paintings like these would have been ditched... 

But I always loved the vibrancy and texture of watercolors, and lately -- bored out of my gourd (being disabled for a couple of years has impacted heavily on me) -- I've begun to play with things I never had time to consider before. Now, if I had to work on art board, with brushes and paint, this would never happen ... have you seen the price of art materials these days?! The boards are about $30 each. And since I haven't done this in around thirty years, I'll make a dozen messes before I get back to paintings I'm proud of. Uh -- not this year. Maybe later, if/when I ever find my way back to the cash, AND the pain in my hands and spine subsides to a level where I can actually do the work. In the meantime --

Yes, I work digitally. Everything happens in the computer. These paintings frequently start life as truly garbage snapshots ... full of foreground litter and background microwave relay towers! They're reduced to line sketches, then worked up to digital paintings in a process taking several hours each, and involving loads of, uh, painting, as well as many, many digital processes. But the whole job takes a fraction the time of a real, physical painting, and of course it costs nothing... 

Both those things are important when you don't have a lot of cash, and you're carrying a bundle of physical problems as well as the major disability that'll keep you comprehensively crippled for another year. It's all about the pleasure of being creative and winding up with a lovely picture; not this daft, ongoing game of "My materials are the best in the world, what are you using?" Dang, I hate that. It's like the "My car's faster than your car" game. Ack.

More soon.  

Tuesday, September 28, 2010

Science Fiction in Bryce ... nice!


One of the benefits of getting the hang of Bryce is that I can work with models that are too much for DAZ to handle. Now, it's perfectly true that 3D Studio Max handles them like a dream ... but I never got the hang of 3DS. It's about 1000% more complex than DAZ and Bryce. Actually, triple that, come to think of it. The manual is 1,250 Letter-size pages of close-packed type. It's like a phone book. And I just never had the time to learn it, which is why DAZ and Bryce came as such a welcome surprise: they don't take all that much learning before you're confident in what you can do.

A while ago I splurged and got a star destroyer model ... thirty bucks in a sale. On of the most expensive models I've ever invested in. I promptly discovered that DAZ can't even open it! Too many "polygons." Now, all models are made of polygons, and by the time you get up to modeling things like human faces or the behemoth starship in the shots above -- well, your average computer (and software) will barf before it even opens the model.

The good news is: Bryce is a wireframe environment, and will handle this model eeeeezily. The better news is, I'm living Bryce 7 Pro a lot. So it was an obvious move to render the starship in Bryce. Then, when I saw the final render I thought to myself .... hang on, I can import this into DAZ as a backdrop!

Add the Vanguard spaceship prop and set some lights.

Add Kevin Jarrat at the pilot's controls and set some interior lights.

Render up a storm; finish one of the shots in GIMP, to put the flares on the engine exhausts...

And you have a picture sequence as Captain Kevin Jarrat, Raven 9.4 himself, is on approach to a big ship. Remember the Starfleet carrier, from Scorpio? This could be it.

Woohoo! Expect more -- lots more -- just like it.

Jade, 29 September


***Posted by MK because the internet is AWOL. Intermittent crap. Be warned, guys: our connection is going to be in and out for a week or two, as of this point: Telstra (or whatever) is doing a lot of work on the landlines in this area. And as you know, if you've been looking at the "poster notes" on these journal entries in my looooong adventure through the world of CG, 3D and digital, even at the best of times we can find ourselves with dialup speeds in this area. This is why MK has been making many posts for me, since Day One -- Keegan has the fast connection, not me! (This should change in the near future, when the cables or whatever are updated, and they stop working on them. At least, s'wot Telstra promises.) Credit where it's due: this blog would not have been possible without the support of a pal with decent internet. Because ours sucks. We moved into this area about six months before I got into Studio and blogging about it, and I almost quit right there: DAYS to download something from the DAZ store, at one point. Argh. Thank gods for friends when you need 'em! 

Sunday, June 27, 2010

3D art meets life and death drama: make your own OBJs!

Deep Shadow Map...


Deep Shadow Map

3D art meets nature photography ... and maybe a bit of Indiana Jones type adventure, too! I was messing around with Bryce for a few minutes today: feeling like death warmed over, because I have the 'flu, needing to take a break, get my mind off code and numbers and editing ... brain having something of a meltdown. So to do something absolutely different I opened up Bryce and started playing with terrains.

Now, in Bryce when you click to "create a terrain," you get a default mountain range. But nothing says you have to model a mountain range ... you can model a tableland that's flat as the proverbial bickie, if you like. The easiest way to model a terrain is to use a bitmap image, which tells the program where you want to push the default model UP, and where you want to drive it DOWN. Pure white is way up, top of Everest. Pure black is way down, bottom of the Marianas Trench. So it stands to reason that a good image map for talking to the software is going to be gray, and right around the middle of the "11 zone" grayscale. This way, you generate a terrain that's like low rolling hills. Which could also be used as a close-up of a bootprint or a tire track (!) or it could be scaled to be a pretty decent bit of foreground for your character to stand on...


I came up with this Bryce landscape, above, and I was actually quite pleased with it. The next thing you'd want to do is put characters and trees and stuff into it, but while you can do this in Bryce 5.5 (yeah, yeah, I still use the free version; can we say "Counting our Pennies?) it's nowhere near as efficient at working with figure models (guys, trees, shrubs, snakes...) as DAZ Studio 3.

So the next thing you do, in Bryce, is click to EXPORT AS OBJECT. Tell the program you want an OBJ, and tell it to export all its maps. That part's easy. The interesting thing was, I had no idea how big and detailed I could make the OBJ now, because I haven't done this since I upgraded the computer about two months ago.

So I ran an experiment and told Bryce to create the highest-detail OBJ it could. It did a superb job. But DAZ won't render it! The program just falls over. I bought a fantastic model the other day, a battle cruiser that I'm hoping to able to use in the ANIMATIONS (!) for the upcoming promo for Mel Keegan's HELLGATE series. Saaaaame problem: DAZ won't even open the model. Fortunately, 3D Studio MAX opens it easily and renders it beautifully, so we're going to be bouncing from program to program, doing certain jobs on certain platforms, and then patching the work together later.

For today, though ... I knew 3D Studio MAX would open the huge OBJ Bryce had just made, but I don't have the energy to be bothered. I went back into Bryce and made a new model of the terrain with half the resolution.

Worked like magic. DAZ is happy to open it, whack the maps onto it, the works. So now you get to this image, which is fair:


OBJ as generated by Bryce, imported into DAZ, maps applied ... Bryce sky imported as a backdrop. Three distant lights set, and then rendered in DAZ. Um ... wahoo, it works! Now we can have Michael 4 go running about on a proper bit of ground instead of something that's as flat as a table!


So here's DAZ's male supermodel, Michael 4 himself, wearing Rock Star Hair by Neftis and Billy T.'s M4 Real Jeans, and the cockroach-crusher boots from he Stylin' pack ... I added four of the Deluxe Trees and four shrubs from PNature (all from Renderosity), and then set up a couple of extra lights ...

The scene was still missing something. Rattlesnake. Yep, that was it. The scene needed something to make Michael 4 get up and ACT. Nothing like startling a snake in the bush! I could tell you some stories ... but snakes are beautiful, beautiful creatures -- and almost blind, and very timid. They won't hurt you unless you threaten them. This snake is the DAZ Morphing Python, with the viper fangs turned on, and the texture from the Cold Blooded pack set to rattler. And he's a beauty. Looks like Mike knows to freeze and let him skedaddle...!

Cough drops and hot tea now.

Jade, 28 June

Sunday, November 22, 2009

Yaoi mysticism

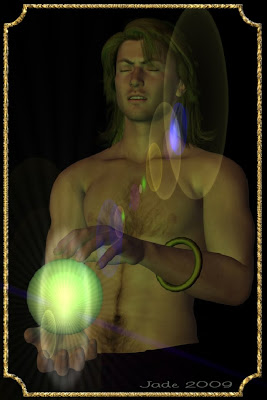
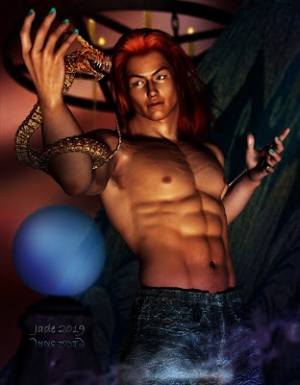
Go ahead and click on him ... he's 1000 pixels high, and at full size you can see the beauty. I'm really delighted with this shot, which was done in DAZ Studio 3, Micrographx and Serif X3. I call this one "Yaoi mysticism," because there's something deliciously delicate about this guy, and sensual, and then you get to the magic.

The next question is, how the [expletive deleted] was this done? And how long did it take?

It took about 20 minutes (!) and here's the cookbook method.

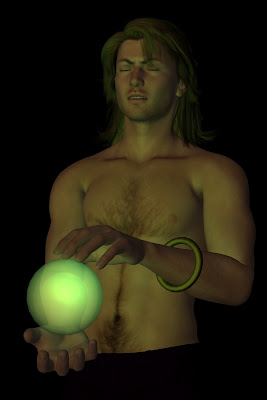
Start DAZ and load in a basic Michael 4; give him long hair with the Mon Chevalier hair style; set the color to dark by using your surfaces tab (the default is golden blond). Put a pair of jeans on him, and set the color to black (surfaces tab again). Set the background to black. Now it starts to get more interesting.

You're going to need two props to make the whole thing the same as the above, but at least one to get the neat crystal ball effect. If you can get hold of a "donut" as an .obj file, you can import this. Or you can go to DAZ (see the banner below) and buy some really amazing jewelry, among which there is sure to be a bangle. The plain gold bangle I've been using for ages is just a "donut" made in 3D Studio Max and exported to the OBJ file format, which can then be imported into DAZ. (I just got Hexagon for making models, but I still have to figure out how it works!)

The important prop is the crystal ball. In DAZ, click on Create > New Primitive > Sphere. Then use the controls to scale it to fit as a crystal ball. Then use the surfaces tab to make the color light blue or green, and set the opacity close to zero, which makes the object go transparent.

Position it between the character's hands; put a frown of deep concentration on his face ... so far, so good. The real magic happens when you set up the lights.

This shot was done with one distant light set to dim gold and two spotlights set to dim green. One spotlight was jiggled around till it was actually "inside" the crystal ball. The other was set just outside the glass. Both were VERY dim, and set to "point at" the character's head. Render an image right here, and then adjust the brightness and color of the lights till it looks something like this:
The next thing you want to do is add the razzle-dazzle, and you do this in your photo studio ... if you have Photoshop, bully for you! The rest of us don't have A$1800 to spend on a single prog (and even if I did, I'd use the money to take a holiday in the tropics), so I'm going to tell you how to do this in Micrographx, which costs about forty or fifty bucks (shop around!!), does the same job, does it with a dead-easy interface, works on XP and even Vista. You don't have to have a name like Gates or Murdoch to be able to afford the progs to do this work!

Open your best-so-far render in Micrographx 10. Open the Lens Flare browser (look under "Effects"), and --seriously -- play with the controls till the penny drops about how to use them. You're going to be jiggling flares and rays; you get to change the aspect ratio of the main one, set the length of the ray trail, change the color and brightness and sharpness of everything, decide where in the image the effect is going to be located (x,y controls), and ... lots more elements to play with. Christmas morning came early!

So play with the lens flare till you get exactly what you want, and then save (duh), and start to think about the border. You might not want a border ... I think it enhances the shot. This one was done in Serif X3. Import your best-so-far image to a new publication, and then draw a rectangle the size you want the border to be; set the "fill" at none; use the nodes on the drawn image to set the corner style. Use the Line & Border controls to set the color ... I used golden yellow. Now, click on the FX icon ... add a bevel & emboss to make it look 3D. Now, get into the 2D Bump Map controls ... set the "scale" to small and the "depth" to high, and then choose a pattern from the browser to control how the bump map looks. Play till you get just what you want. Sign the piece; select all objects; lock them together; export as a 200dpi image.

And you're done! If you don't know the software backwards and sideways, you could play happily all afternoon at this. If you do know the software, you can get this 3D painting from concept to "done" in the time it takes your rice to cook in the microwave. I did this last night, while the rice was cooking for dinner.

Yaoi mysticism. Beautiful.


Jade, 23 November

Sunday, November 8, 2009

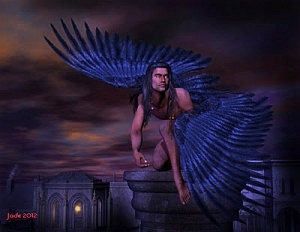
The Spirit of Winter ... another kind of Christmas angel

I was making Christmas cards again yesterday and someone said to me, what about cards that are non-religion-specific? That got me thinking. According to legend, there's dozens of "magickal babes" being born at the winter solstice ... Mithras and Cernunos being just two. If memory isn't playing tricks on me, Horus was also born at mid-winter.

So how about gay-themed solstice cards?? With this thought in mind, I used the above image twice, and change over the greeting on the second one to read, "Merrie Yuletide."

Folks with sharp eyes will recognise this model as the same dude from the Saxon Hero art. I just gave him white-blond hair and changed the pose a bit. I left the suntan on him. He just looks better as a real palomino.

It was also noted, he should have white-blond body hair ... well, maybe not. I tried that. It looks like fungus! Seriously. You can change the color of anything with the DAZ "surfaces" controls, but there's a time when you shouldn't muck about with it, because the result isn't an improvement. To change the color of objects, open the SURFACES pane; scroll down till you have your item selected, and then, uh, fiddle about with the color. Now, the bit where it gets "interesting" is when you run into the Triple Threat: to really, really control what colors things are going to be, you need tweak about 40 parameters in the Diffuse, Specular and Ambient registers ... inside of which there's also strength, gloss, opacity, and a whole lot more, including indexes or refraction, bump maps, and ... so on. Do I understand all this stuff? Not ... really, not yet. I'm still flying by the seat of the pants and learning this. But --

The DAZ book, FIGURES, CHARACTERS AND AVATARS arrived today!! I already whacked the CD-Rom into the computer and had a mess about with some of the content. They give you the Horse, the Dog, the Cat, the Dragon, and a lot of other content. Boy, do I have some gear to play with now.

The book looks good. About half of this stuff, I've already worked out for myself ... and at least some of the stuff I'm desperate to know ain't in the book at all. I dove into the index, and checked for some key things. They seem to have been omitted. The book looks, at first glance, pretty basic. There's room for a 600pp manual something like the 3D STUDIO MAX BIBLE. Still, it's going to be good having a hard-copy of the book... I did download the PDF version of the guide, but it's 500pp of dense-color content, which would cost about A$60 to print out ... y'know, I never did hit the "print" button. I'd rather spent the sixty bucks on more models.

Speaking of which, I was just asked to do a review of the Michael 4 model, and this is one thing I can do, and speak with a lot of authority, because I've been manipulating this guy (sounds fiendish, I know) since August, and I know every square millimeter of his body. Seriously.

My next post will be a couple more Gay Christmas Cards, with Zazzle links; and then I'll review Michael 4, and after that I should be able to review the book.

Jade, 9 November

Friday, September 25, 2009

Jade's First Post


PRIVACY POLICY

This addition is being made to the first-ever post on this blog, to bump us into agreement with Mother Google, because on 17 May, 2010 ... close to Post 300! ... I just added Google ads into the margin. The Google ads are there to hopefully earn a buck or two for the starving artis ... um, duh. Why else would anyone put a Google ad box on a blog?! However, this statement is here specifically to assure you, the visitor, that I (Jade) collect NO information from you whatsoever!!! None. Zip. Zilch. Nada. So even if I were a seven-headed monster in artist's clothing, and wanted to use such information to bring about some nerfarious end ... there's no information to be used, so it's all null and void!! Seriously, people -- all humor aside -- privacy is as important to me as to you. No way in the world would I do anything to damage the privacy of a visitor to this blog, but this message has to be in place to please Mother Google, and here is is. Please consider yourself 100% safe on this blog, and ... enjoy.


And now, with all that said, let's return to The First Post...!


The first thing I want to do, as I start this ... which is actually my first blog; can you believe that? ... is to say a big thank you to Mel Keegan for getting me into 3D artwork. I've been in digital art for ten years, but it's all about photography, digital painting, combinations of the two, and the startling effects which can be generated therefrom! 3D art is very different.

Update, Christrmas Eve, 2023

I've just spent several days sifting through this enormous body of work, deleting all the twelve and fourteen year old links that no longer work, taking out Flasplayer videos that no longer work, deleting references to a blog that has been lost utterly, can't be retrieved ... and marvelling over ho far I've come since I got into this!

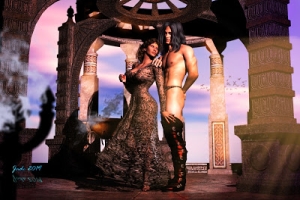
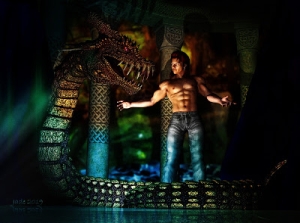
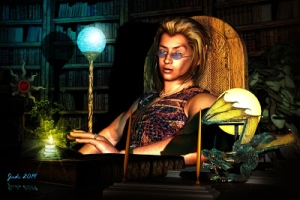
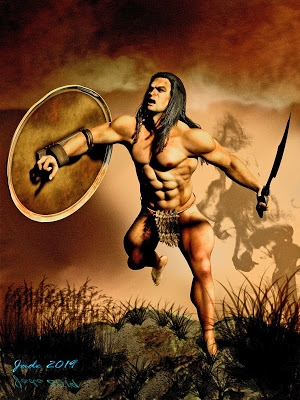
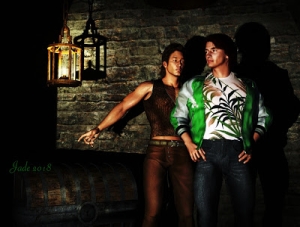
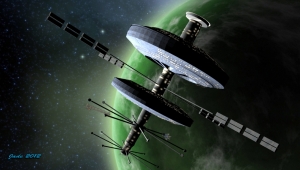
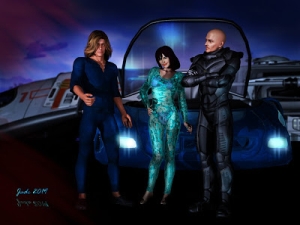
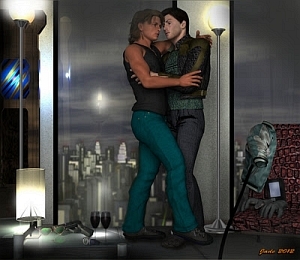
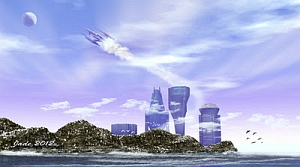
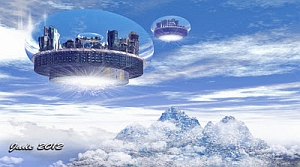
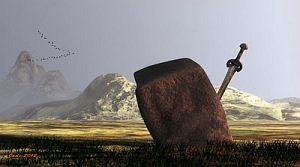
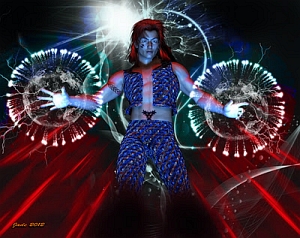
I'm just going to paste in a few images here, to illustrate my point. It's been a fourteen-year journey, from the first steps with everything to learn, to being able to get, and guarantee, satisfying results such as... 


...and please do click on any of those to see them at full size. The work is still a sheer joy, but nowadays it's done in Iray and Photoshop as well as DAZ. The synthesis brings a special magic to the art. Once again, I asked myself, should I take down the early posts, since they're in no way representational of my work as it is these days? And again, when I asked friends, they said that people who are trying to figure out how to do this stuff can learn a heck of a lot more from following the step-by-step approach of a blog that traces the looooong path of a learning experience. So the early posts are going to remain, at least for the time being --

In fact, I started the blog because I wanted an indelible record of the progress (often plodding; always experimental) from "just got my feet wet" to, "just spent 40 hours rendering this in Lux, whoooo!" ... and as I look back over the close-to-1,000 posts, I'm very glad I did this.

But eventually I'll have to come to grips with the question: should I leave the old posts up or take them down, or replace them with new content? Doctor Mike actually nailed it: people who want to actually make a start in CG art or digital painting will get more out of the early posts, because the later ones are so technical, you have two years or more of catching up to do before you can understand what's going on in them.

So we're going to leave the early posts up and running ... by I'm going to gussie them up with updates like this one.

With all that said, then, let's get back to the original blogpost:

Something had prompted Mel to look into 3D art creation software -- there are several packages on the market, from the most user-friendly and affordable (Poser, Hexagon) at one end of the scale to the Pro end (3D Studio Max and so on) at the other. Dame Fortune let Mel in a beeline to DAZ Studio 3, and since it's a hefty app which demands a heck of a lot of RAM and one hell of a video card, it wound up being run on one of the big systems at DreamCraft.


Looking over Mel's shoulder as the first forays were made into this creative realm, I saw what was going on, on the screen ... ooooooh boy. I was hooked. Instantly.

Mind you, creating great images came a week or two later! There's a learning curve to be climbed even in this app, and even though it's the proverbial cake-walk by comparison with the top-end progs like 3D Studio Max, don't let anyone tell you it's an easy climb -- well, not if you're going to know how to handle the lights, surfaces, materials, D-formers and all that stuff, rather than just buying existing models and posing them, and then rendering the shot.

So ... I got into DAZ Studio 3 in a big way in August, and I'm having so much fun with it right now, it's time to share.
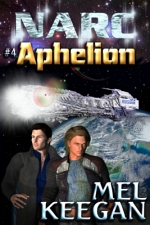
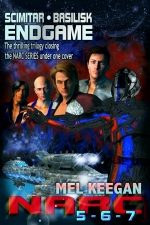
I'm going to try to post every few days; and I'll also tell you what software was used for the post-production, and where to get it, and (!) how the work is done. It's a hell of a lot of fun, and as always, I want to share. So, thanks to Mel Keegan for getting me into this. In future posts, I'm going to be showcasing a bunch of covers I've already done for Mel's 2010 titles, and also for a new writer who's just signed with DreamCraft. Jayne deMarco will soon be quite well known in the GLBT realms, and I've had huge fun doing the covers for her first round of releases. So --

Welcome to Jade's Adventures in 3D!