Friday, December 31, 2010

Green alien beauty in glued-on tinfoil bikini ... Happy New Year!

404 error ... with the cancellation of a feeder account
(Photobucket or Flickr or whatever),
A number of images have ... gone. Can't find the
originals to replace them, so the best I can do is
preserve the original text. Sorry.

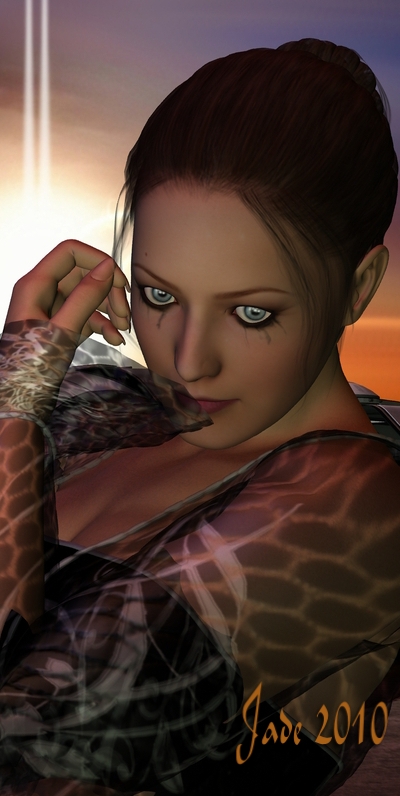
Imagine if Jane Russell were cast in John Carter of Mars, opposite Charlton Heston -- or better yet, Michael Rennie ...

Yes, I know, I lost you on paragraph one. Just me having a Golden Age of Science Fiction fantasy. A massive motion picture, from the works of Edgar Rice Burroughs, made in the twilight of Hollywood's golden age ... you know, Ben Hur, and James Dean, and all those actors and movies your mother -- or maybe your grandmom! raves on about. Of course, it never happened -- the biggest SF movies in the 1950s were Forbidden Planet and The Day the Earth Stood Still, and in fact Forbidden Planet could use a remake. The Day... had quite a good remake a few years ago, with Keanu Reeves. (I did hear something about the rights to Forbidden... having been bought by someone influential, but that was years ago now, and nothing was ever done about it. Now, who was it who bought the remake rights?!)

Anyway --

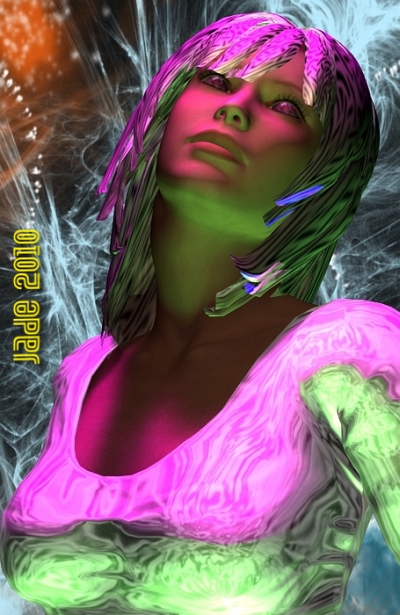
Green Alien Beauty in Tinfoil Bikini attached with Glue. See the close-up at large size, and check out the snake eyes! This is such a cool character. Loads of stories leap into your mind as you look at these images.

They all started with a weird digital painting for the sky ... many of you will be wanting to know how the heck this was done -- either the digital sky, or else how did I turn the model green and have it come out fully realistic? Did I do it by changing parameters int he Surfaces tab? Nope. I converted a skinmap -- it's not even difficult.

I don't have the brain cells to talk you through how to do this today, but I'll come back tomorrow and all will be revealed, so if you're curious, join me then!

New Year's resolutions? Ohhhh, to get my health fixed, somehow. To figure out the nuances of exactly how the Deformers and camera settings work in DAZ, finally, once and for all -- because I keep thinking I've nailed it, and then something goes askew and I'm going, hmmmm. To wrap my head around Bryce properly! To catch up with some jobs that have been hanging fire for way too long, because I haven't been well enough to see them properly, let alone tackle them (hi guys! You all know who you are!) ...

Happy New Year, 2011, people!

Join me tomorrow, and we'll look at how to turn Michael and Victoria any shade of any color you want them to be by converting a skinmap. Any skinmap you fancy. I'll even explain how to make the tinfoil bikini, and we'll see if we can persuade Michael 4 to glue it somewhere strategic!

Jade, 1 January

Thursday, December 30, 2010

Time seems to be unraveling ... 2011? Already!

I just typed "Jade 2010" for the last time ... it's New Year's Eve already here -- they'll be setting off the Sydney fireworks in less than nine hours. The champagne is chilling ... it's about 110 degrees, so dinner is cold cuts and salad ... and 2010 is almost finished.

Think about it: that's the whole of the first decade of the twenty-first century, gone. Already! What happened to it? Ten years seems to have shot by like a flash of lightning ... shazoom, and it's turned into the past.

So I thought, let's do something a little bit special for the art today. In fact, I took two days over it (which is why you didn't see something fresh yesterday). First, paint an alien sky. Then juxtapose figures which seem to contradict...


I might call this series The Empress of Outer Space, if Benie Chandler hadn't written that, about 1965. Don't believe me? Would I tell you porkies?!


What's worse is, I still have a copy, same edition as this. Gazooks. (Confession: I love the "cheesy" old SF novels. They have an inspiring innocence, a naive charm which is absolutely irresistible.)

And meanwhile, I could swear time is unraveling. Somebody needs to get the Doctor on this assignment, because the year is really 1997, and about 80% of the last 20 years has been purloined. By whom? For what? Daleks! Yes, of course, that must be it. Now, what to do about it?

Seriously ... it's New Year's Eve, and here is a lovely series of renders to tickle your imagination: noble lady, about to board a spacecraft, or perhaps farewelling someone who's already boarded, under incredible alien skies (digitally painted in GIMP, yesterday) ... and she weeps salt tears for some parting, some loss that's happened, or soon will, in a distant future. The more things change, the more they stay the same.

Happy New Year to all!

Jade, 31 December

Tuesday, December 28, 2010

New take on an old theme ... Gypsy and Horse ... whoa!


EDIT: 404 error ... with the cancellation of a feeder account (Photobucket or Flickr or whatever), a number of images have ... gone. Can't find the originals to replace them, so the best I can do is preserve the original text. Sorry.

If something about this scene looks a bit familiar ... you've got a good memory! As I run out of times in which I can type "Jade 2010" (I have two more days left in all of time and space when I'll ever type that, short of a typo...) I remember typing "Jade 2009" on the early works appearing on this blog.

More out of curiosity than anything, I was looking back through the archive for December, 2009. Even back then, I had some good ideas, even though the skills to execute them were still to be learned, and the models to build them were still to be bought.

One or two of them are full of potential, and I thought, "Why not rebuild some of them with the skills and models I have today. So here's one of them!

It started with this project...

...on December 6th: http://3d-adventures.blogspot.com/2009/12/3d-male-fantasy-gypsy-rover.html -- and it was a fairly good render even then, Id only been doing this stuff about three months, and I had very few models to work with, so I actually used a photographic backdrop, placed the characters into it, an hand-painted the shadows. Not too bad.

By contrast, the whole scene, a year later, was done in 3D -- including all that grass, on the ground! Now, the grass took a bit if digital trickery. It isn't actually grass. It's a displacement map set on a round plane, with a green-brown diffuse map also applied ... the diffuse map controls the color of the grassy paddock, and the displacement map makes the flat ground plane literally stand up in spikes!

It's a very simple effect, and very effective --

-- you'll have to click on this and see it at full size to see the effect properly, but it's worth a look. This whole thing was done n DAZ, not Bryce ... it was done with two copies of the same bit of "land," which was imported as an OBJ file, and then subsequently fiddled with. In the rolling-hill type foreground, I just flattened out the Y parameter (the up-down parameter). In the background land mass, I increased the Y parameter to make it all taller and more jaggy, like mountain slopes. Then, a nice green texture map on both ... and then a displacement map on the foreground one, to make it stand up in spikes and clumps, like coarse grasses. (Incidentally, the mountainside in the background looks blue with distance because I stood a plane, made from a primitive, in front of it, with about a 10% opacity on it, and a color set to pale blue. You're actually seeing it through a plane. The plane also makes the sky - which is a JPG -- fade out, so you waaaay over-saturate the JPG in your imaging program, so that the "atmospheric" plane applied in the 3D scene just fades it back down to normal. One last little trick: I angled a pale green spotlight on the mountains too, to make them even paler.

Does all of this stuff give photo-realistic results? No, it doesn't. You need a heck of a lot more processor power than I possess right now, to get photo-realism. I have a Quad core, with 4GB of RAM and a 1G video card ... which is nowhere near enough to get into shaders, particle effects, volumetrics and bigger, better render engines. Oooooh yes, I know how it all works, and I cannae do a a skerrick of it at the moment.

However, it's not a completely bad thing, because instead of getting photo-realism you get a very, very attractive kind of art which, in its textures, colors, depth and broodiness, reminds me so much of...
Silver Summer by John Clayton Adams
Shepherd and his Flock by George Turner
Fen Lane by John Constable
The White Horse by John Constable.

When I was a teeny little kid, I used to stare at prints of these paintings and wish I could one day paint that way. 'Twas never to be, but -- seriously -- there's a similar quality which you can squeeze out of the 3D software and the desktop hardware, which reminds you very much of these paintings. So I'm quite happy, till I get some kind of super-computer, and can take the next steps!

Jade, December 29

Monday, December 27, 2010

Escaping the vampire's castle -- with a bit of post production work


EDIT: 404 error ... with the cancellation of a feeder account (Photobucket or Flickr or whatever), a number of images have ... gone. Can't find the originals to replace them, so the best I can do is preserve the original text. Sorry.

Just before Christmas I was asked, "Why do you need to do post production work on a render? Can't you get the render right without having to paint it later?"

And that's a very fair question, simple to ask, not so simple to answer. So here goes.

There's at least four reasons for doing post work, that I can think of, just offhand. The first is that getting the 3D scene 100% right could easily take far more time than you have available. It could take an hour, fiddling with the last detail, and if you're our of time, then being able to paint over the problem in thirty seconds could be a very attractive solution!

Also, you could be having problems with the lights. 3D lights in DAZ are as difficult to wrangle as lights in a real, live studio. Sometimes you just can't control the glare and reflection. Say you're trying to fill in a shadow, but you don't want a hell of a lot of "glare" on the model's face. You might simply not be able to do this effectively, even with "cheat lights." The truth is, professional photographers and movie makers use digital effects in post to do these things. The principle is the same. (In the olden days when we worked in darkrooms, you used to be able to "dodge" and "burn" your photos while they were still under the lamp, exposing onto the paper. You had a circular piece of paper on the end of a wire, and you waved this around between the lamp and the paper ... it stopped light getting onto a part of the paper you wanted to come out lighter. This was called "dodging" the image. There was also a technique that was just the opposite -- you masked part of the area to prevent it from exposing, and you "burned" in the other, un-masked part of the image. So if you're working in GIMP and you see your dodge and burn controls, now you know where their weird names come from!)

A similar reason for doing a bit of post work is to change the color of something. Sometimes, the color something looks before the render, and after, are two very different colors. Now, you might be able to correct this in the surfaces tab -- but only if you can get hold of exactly the part of the model you want to change color. It all depends how the model was built. Sometimes you can't get hold of one of the pieces, and that's the exact one need to change. You could try changing the color of it with the lights ... but there's a good chance that setting colored lights will change the color of other things in the scene, which you don't want. So ... paint it!

The last great reason for post work is...

...sometimes the skinmap you want to use doesn't fit quite right when you pose the model. Now, there's nothing you can do to get the poses and renders you want. The only option left is to zap a bit of airbrushing over the seams later. You might have to click on the pic, above, to see the work that was done, but -- there you are. Easy fix.

So there's plenty of reasons for doing post work -- it's not all about being lazy and not working enough with the 3D software, or not knowing enough to drive the software and make it all come out right. Also, it's worth noting that photographers and movie makers use very similar techniques, so -- go for it.

Jade, 28 December (Proclamation Day)

Thursday, December 23, 2010

Merry Christmas to all ... see you after the holidays!


Merry Christmas to all ... it's Christmas Eve on this side of the dateline, and we're actually celebrating the date already, so --

Have a wonderful time, guys, and I'll be back after the holidays!

Jade, 24 December (which speaks for itself!)

Wednesday, December 22, 2010

Another Michael 4 ... call him Sebastian

Was in the mood to create a character today. You never know what's going to happen when you set out to create a face. Sometimes they work, sometimes they don't -- usually they do, and even when they don't, you always get a face of sorts. When they don't work, though, it usually means that the face only looks good from one angle, because you just didn't get it all to balance out and turn into a real "live" face.

When it works, though, boy, does it work! Here's the new face from different angles:


EDIT: several images are missing ... these turned up. They're only deep shadow maps with some Photoshop overpainting to fix a number of issue with the oooool renders, but ... here you go.

And he is a beauty! This one, I'll be saving and trotting out in various roles. The skinmap is HZ Victor (which you can get from Renderosity); the hair is Neftis's Rock Star. The costume is Journeyer Scout ... but you'd never recognize it. I made the shoulder pads go away and put on a displacement map and opacity map to make the shirt kind of sculpted leather, and then put a gorgeous, exotic pattern into the leggings.

Setting out to create the character I knew I wanted a handsome guy, but not a kid. He had to look like he was a little sad, like he's been around the block a few times. He had to look kind and sensitive, but also have the bearing and the muscles to look like he could whang a bad guy's lights out.

It worked like a charm! The background set is the draw bridge model from the Castle Creator kit, which I actually bought to do Abraxas, when there was any such project. Must think of something else to use this for -- it would go well with the fantasy armor you saw a few days ago. Now, there's a thought...

Seriously, isn't that a gorgeous face? I love those lines, the cheek and jaw combination. This one, I'll be saving as a character pre-set. Incidentally, it's easy to do that. If you've created a face you really love, in your save routine, look for the fly-out, and "save as." DAZ saves it as a .dsb file, and to get this back, you load up the basic Michael 4 doll and MERGE the .dsb file onto it. Dead easy.

Jade, 22 December

Tuesday, December 21, 2010

Solstice ... plus Jarrat and Eve, AG and Johnny. Hunh?!


EDIT: 404 error ... with the cancellation of a feeder account (Photobucket or Flickr or whatever), a number of images have ... gone. Can't find the originals to replace them, so the best I can do is preserve the original text. Sorry.

Just a very quick post today, because this computer is in the middle of having brain surgery performed on it. It went whacko late this morning, and you get that certain sinking feeling, "Oh, don't say I'm going to be out another thousand bucks..." But Dave reckons some judicious brain surgery will sort it out. And I might take it into the shop, in the new year, and see if I can double the RAM -- if the motherboard will take 8Gb, that would cure a lot of maladies.

Anyway, quickly, before the system goes back to being worked on...

Above: Solstice, in honor of the day. It's the solstice of summer here. This one was raytraced -- the render took about six hours! [EDIT: sorry, the image has gone]

Below: Jarrat and Eve Lang, three shots of the two of them in Bally during that time in Death's Head when Stone was combing the planet for him, and Jarrat couldn't remember his own name. Not that you could blame him. You get so beat up, they leave you for dead, and see how you feel! Just Deep Shadow Maps ... cannot raytrace at the moment...

Deep Shadow Map...

Deep Shadow Map...

Deep Shadow Map...

Last words here: I want to thank Aricia for cross-pollinating with me! She asked me to write a segment for her blog (Aricia's Album ... fantastic celebrity gossip blog -- have you been missing it??), and I was glad to oblige. The challenge was, "as an artist, explain how the human face ages." O...kay. That was easy. Any artist could tell you! The question was, "Why?"

Well, apparently here's why: The Panic about Johnny Depp's Face. Uh ... okay. The man's three years short of the Big Five-Oh, therefore he don't look like no hollow-cheeked, hungry-eyed kid. Does he have to? I'm the same age, folks, and to me he looks, uh, great. Turns out there's teenies and weenies who don't agree and -- oh, what the heck, read AG's post! My turn to cross-pollinate. Honestly, it must be a trick of your eyes when you get to the Big-Five-Whatever, because I'm looking at the poor man and going "yummmm..." Correct me if I'm wrong, but isn't this the first time in his life he's had the chance to play the suave, impeccably-groomed, well-dressed international businessman in the three-piece suit type?!

Now, back to the brain suergery...

Jade, 21 December (Solstice of Summer)

Monday, December 20, 2010

Beam me up!


Painting with colored lights today ... digital musing, following the tears of blood I shed on the NARC armor the other day. For love or money, I couldn't get the armor to gloss up. I mean, you're supposed to be rendering "mirror black kevlex titanium," and what are you getting? Black suede long johns. Ack.

It turned out that the solution to the problem was so totally counter-intuitive that I had to stumble over it. I was setting my lighting model to Glossy Metallic, because in my universe that would be the glossiest thing around, right? Not in DAZ, apparently In the virtual world of DAZ, if you set your lighting model to Glossy Metallic, you get -- suede. Chamois. short-pile carpet. Every hint of any kind of glossiness vanishes utterly.

So, if you're struggling to get a surface to go glossy, here's the secret: set the lighting model back to boring old plastic, crank the gloss parameter up to at least 50%, and set the reflectivity up high, and set the reflection color to boring only white.

So, putting all this to the test today ... and being bored with same old, same old, I invented a little android ... you can tell it's an android when you get to the eyes. You can see they're camera lenses. Actually, she's kinda cute, isn't she? I took every texture off everything, and replaced the whole lot with a clack and white "map" that just looks like swirls. Then set the parameters as per above and went to work on the lights.

So you have a very basic Victoria 4, wearing the anime-type hairstyle (Noriko? I forget what it's called. Doesn't look realistic enough to use for regular people, but for this it's perfect), and the Shadow Dancer costume. I used one of the Sabby Eyes -- the "blind red," which has a nice effect in these lighting conditions --

One bright green light between the android's feet. One bright red light directly overhead. One bright blue light piggybacked on the red one. One bronze cheat light in her face, so that you can see the eyes. Three bright green spotlights pointing straight down at the ground plane. And that's basically it ... garish, weird lights and parameters on the costume that turn it to silver metal. It's actually striking, and quite attractive.

Oh -- the backdrop is a GIMP digital abstract, I painted a long time ago, to try out some new .abr files, Photoshop brushes. I'd tell you what the brushes are, if only I could remember. Something like Energy Spheres ... I honestly forget.

Digital musing, spinning off those tears of blood...!

Jade, 20 December

Friday, December 17, 2010

The NARC armor: first look


It's described as "mirror-black kevlex-titanium body armor." You can't shoot through it; you can't hack through it; wearing it, you could walk through a furnace. It weighs ... a lot, which is why it has its own gravity-resist, allowing the user to "dial-down" his apparent mass to maybe 20kg and literally jump over a house ... or dial it down into negative numbers and rise back to the gunship out of which he jumped. The armor goes on in sections, and it "smart seals," with nano which meshes one piece into the next. It's flexible in all the places a human body is flexible -- don't think any kind of standard armor you know. This is the twenty-fourth century, when machines are micro-miniaturized and neutralize their own weight. In many ways, the armor is a machine, and a significant part of it is nano -- this is how you put it on, and get it off.

Do you remember in Death's Head, when Stoney was shot down, and the cartel thugs who captured him couldn't figure out how the heck to get him out of the armor? It doesn't lock or clamp or snap any way you would recognize. Soooo different, and so cool. Trust Mel Keegan to come up with this -- and you know this was designed 20 years ago, for the first book?!

Yep, it's the NARC armor, as worn by the Raven units -- the descant troops. You always knew what it had to look like: fiendish, and also sexy as all get-out.

And I always knew it would be the second toughest design job in the world. The first toughest is the carrier, NARC-Athena, and to do that, I have to learn a whoooole new suite of software. Carrara. I have access to Carrara 6 Pro -- but having it, and being able to use it, are two very different things. So --

First, the armor --

Yes. It's still waiting for a helmet. The helmet comes next -- it's also going to be as tough a design challenge as the rest of the armor combined! It starts with a Formula racing helmet which is imported (into Cararra ... gird your loins and grit your teeth, girl) and then manipulated ... stretched, bent a little bit, punched in, in two places. Then it has a couple of umbilici attached to the control points you see on the armor here, in this shot, below, which shows the whole shebang before the textures were added:


This is not a bad job, for someone who isn't actually a 3D model maker! Each component (or "geometry") is scrounged from other sources and then scaled, sized, added in, with every map changed. There are bits from seven or eight sources in this suit -- and the helmet will be extra. It's been interesting -- it's been infuriating! This is the sixth version of the armor, and the only one to get past me, never mind getting past Mel Keegan. Every version prior to this one was too "organic," and required waaaay too much painting in post to get around the places where it can't be made to work in pure 3D.

But this version is juuuuust about right. It's everything the books describe, just waiting for the helmet, which comes next. I just have to buy a Formula racing helmet model, and they're not cheap, folks, so this could take a little while. Christmas and all, you know.

Next assignment: put Jarrat and Stone, and Cronin and Ramos into the armor. And it's not quite as simple as you might think, or as I might hope. Due to the way it's designed, there are special body morphs which have to be set and re-re-reset for each character. I think it'll take about 15 minutes to cram any individual character into the armor, so my plan is to do it one time and save the whole DAZ file as "Jarrat-in-armor," or "Cronin-in-armor," and so on, and then draw on that one file the next time I want to stage a scene with the characters in the hard-suits. (That's just a standard Michael 4 "doll" wearing the suit right now.)

Looking good so far -- and we get Mel Keegan's stamp of "wonnerful" here. Next: the helmet!

Jade, 18 December

Thursday, December 16, 2010

The Dragon and his Boy


And now for something completely different: the Dragon and his Boy. And the boy is a new character -- actually, still under development. I might slightly redesign him as I go ... is his nose a little large? Difficult to tell, till you go away for a few days and come back, and have another look. There's a little story goes with this -- more of a children's story, actually...

...about a kid from (!) Melbourne or Sydney who's tasked with cleaning up his Aunt's attic, and he finds an old, old box, with a piece of jade -- creamy jade, shaped like a dragon. But when the jade gets into the moonlight it turns -- shamaz!! -- into Shao Lung, a real, live dragon who hasn't seen the light of the moon in 100 years ... and he wants to go home. Meaning, Sichuan Province ... which is somewhere Jimmy Li can't get to on the local bus!

Good thing Shao Lung is a lucky dragon ... suddenly everything Jimmy turns his hand to morphs into gold, and soon he can afford a passport and a plane ticket. But does he really want to take Shao Lung home? Because when he loses the Dragon his luck will turn back to mud. But he's a good lad and, seeing how unhappy Shao Lung is sitting on a sideboard in Melbourne, he takes the dragon back to Sichuan -- as a piece of jade in his check baggage. And there in Sichuan, the piece of jade is stolen by shonky antique merchants before Shao Lung can see the light of the moon again.

But Jimmy's luck is still holding: there's a gorgeous girl, Fang Mei Ling, who can speak English and thinks Jimmy's Australian accent is hilarious, and she hates shonky antique dealers, and knows where they've gone. Big chase to catch them at the regional airport before they can get away ... biiiiig kung fu fight in the late evening, just as the moon is rising, and -- yep. Happy endings all around. Inspector Fang, who's Mei Ling's uncle, arrives in the nick of time to arrest the villains, and Shao Lung turns back into a dragon, and Jimmy ... well, Ah Jimmy's just fallen in love, and Uncle Fang is impressed with his kung fu. How'd Jimmy like to help stop the shonky antiques trade between China and Europe? In fact, Shao Lung insists on it. Some of his relatives are missing...

Nice story, right? I wonder if I could actually write that...

The only other thing I've been messing with lately is the NARC armor, which is slowly coming into shape. It's not right yet, but with any luck I might have a version of it that's right enough to share in a few days. It's incredibly difficult to get this to work. Not just the helmet (which is going to be adapted from a Formula racing helmet, with bits added. But the dimensions of the armor are soooo elusive. I'm up to four versions so far, and it's not right yet, by a mile. Take another crack at it tomorrow, if I feel up to the challenge. Managed to get the mirror-black surface, but the "massive shoulders" of the armor, and the "smart seals" are not so easy.

Working with the M4 body suit gives you a place to start, but the suit utterly refuses to stop adding useless anatomical detail to the torso, which you have to paint out of every single render -- otherwise it comes up looking like bloody Batman! Anatomically correct rubber. Ack. Right now I have the design not-to-bad, but it's too "organic" after all the painting ... and I think the hips are too wide by ratio to the shoulders. *sigh*

Take another crack at it tomorrow, as I said.

Jade, 17 December

Wednesday, December 15, 2010

Michael 4 turned to stone ... and it's a lovely day to fly


EDIT: 404 error ... with the cancellation of a feeder account (Photobucket or Flickr or whatever), a number of images have ... gone. Can't find the originals to replace them, so the best I can do is preserve the original text. Sorry.


Just touching base here, with a couple of interesting images. Nothing major, because my health is no good -- I don't have the brain cells to do anything major. Don't ask. Honestly, you don't wanna know. You'll sleep better if you don't!

In the top shots, DAZ's Michael 4 has had all his skinmaps and textures changed for stone. Turns him into a lovely statue. There's a story goes with this -- could be chilling or romantic, depending on the telling, and I'll get to it another time. Not tonight ... there's a pillow with my name on it, waiting for me right now...!

The bottom shots are more NARC renders, intended for the new website. These shots depict The NARC-Athena's shuttle pilot (also in line of command right behind Petrov), standing with his aircraft on the NARC Air Park, on top of the NARC building, forty levels above the streets of the city of Venice, Darwin's World.

Notice the plane is not standing on landing gear. Riding a repulsion field ... this is the twenty-fourth century. Gable is more than likely waiting for Jarrat and/or Stone, and their next stop will be the carrier, parked in orbit over Venice. That's a Bryce background, everything in these shots is digital, right down to the sky.

And now ... bed, before I hit the keyboard face-first!

Jade, 15 December

Monday, December 13, 2010

A grab bag, including NARC 101 -- and the boys themselves...


Now, here's a grab-bag ... a couple of images which are ore "digital musing," above, and below, one render each from four different series of images. Two "studio" shoots where we see the kind of promo shots that would happen if NARC were a major motion picture, and the studio called the actors in for the stills photographer to do his thing; and two shots from the movie -- NARC 101, usually flown by Curt Gable, until Raven Leaders get airborne to fly forward observation on mission...


The rafts of art for the new NARC website are obviously coming along nicely. Also, I'm just about to get back into Macromedia -- used to be one of the top-end visual effects progs, long, long ago, before Macromedia was bought out by either Adobe or Corel -- can't remember which -- and virtually allowed to slither into non-being. The only part of the Macromedia repertoire that was salvaged was Shockwave, which was eclipsed by Flash in any case. It's safe to say that Macromedia was out-competed by Adobe and/or Corel ... but I laid out over $2,200 for the software -- in 1995, when bucks were worth one hell of a lot more than they are now! Macromedia Director runs on Vista, and I'm about to start doing some serious stuff with it. Multimedia used to be so exciting, back in Ye Olden Days. So let's see what the old software will do with the new generation of digital art...

Jade, 14 December

Sunday, December 12, 2010

The squire becomes the knight: Powerage's 3D fantasy armor


Now, there's something mildly spectacular! If you've been with me for some time, you'll remember this guy -- back in the days of Deep Shadow Mapping:
Deep Shadow Map

The squire who became a man-at-arms:
Deep Shadow Map

And now he presents himself to his elders and superiors once more...

Deep Shadow Map

...to receive his armor -- and we'll just jump into raytracing here, because today I can:


The sales are racing through the 3D models markets like chickenpox. People are offering their wares at up to 80% off -- one images, in a desperate attempt to move virtual stock off the virtual shelves. It can only mean that people are not buying -- and I can confirm this, from the other side of the business. As many visitors will know, DreamCraft publishes books as well as providing web services, graphic art, PDF creation, book design, that sort of thing. Well, it's no surprise and no secret that sales are waaaay down, right across the board, in the world of ebooks and paperbacks, so I'm not at all surprised that you can get terrific 3D models at a fraction of their usual prices. In fact, some of these models are selling for 20c on the dollar ... the designers are "taking a bath" in order to get sales.

This morning, I picked up something like a hundred bucks' worth of props and sets -- for $23. And it's very true that the only reason Renderosity persuaded me to open my wallet and give the moths a breath of air was a sale you just couldn't pass by!

One of the things I got was Powerage's Supreme Armor, and I'm impressed. It's a pleasure to work with -- in fact, all of Powerage's models are absolutely top-notch and trouble free. Soon as I looked at this costume, I remembered the squire who became the man-at-arms ... and I still have the old files. Was able to open them and hang the new costume on the old character -- which is cool, because it has to be six months since I worked with that model. In fact, it's eight. I just looked at the properties on one of the original renders: April 20. Time flies!

Also today, I did another Jarrat and Stone promo shoot. The idea is, NARC is a major motion picture, and the company called the actors into the studio for the shots for the publicity campaign. These were the portrait shots. Whoa. This is the second "promo" series I've done for Jarrat and Stone, and I still need a lot more. I've been thinking about a "glamor" shoot, too... Hmmm. Food for thought.

Jade, 13 December