Monday, November 30, 2009

Christmas came early! (Got new toys again...!)

Is this the ultimate toy-boy ... or Kull the Conqueror's kid brother, who'll split heads (or maybe slap wrists) for suggesting any such thing?? Seriously, DAZ has been having a 50% Off sale on about 3,000 items, and I couldn't help myself. I got the Wood God pack, and the Dark Gods texture pack which adds scope and depth to the Wood God...

Here's how it works: you get Michael 4 FREE. Really. Download Michael and his female counterpart Victoria free, gratis and for nuthin'. Then you're going to start wanting props, clothes, costumes, hairdos, skin maps, textures ... before you know where you are, you're happily crafting away, making artwork like you never even imagined before, and you're paying $5 here and $8 there, for a new item, and a texture to slap on it.

So, you get your Mike or Vickie, and you LEARN how to pose them and set up the lights. Then, you go back to DAZ and you pick out some clothes or costumes and so on. Buy these (they have PayPal, so it's easy) and download them. Install them. Then...

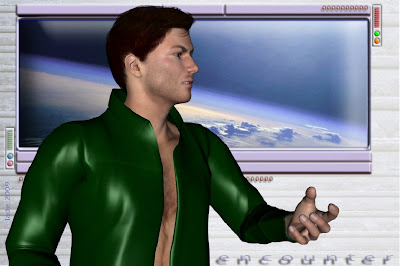
You start a new scene. Load Michael. Then maybe add a skin texture that'd give you something like this:

Notice that these guys have VERY different skin textures. The one on the left is Michael 4's default map. Costs nada, comes already on the model when you load it. Quite pale, just an "Irish tan," which looks very natural. The knockout character on the right is wearing the Jagger skin map. You'd have bought Jagger, downloaded and installed the pack. Then, you select the character you want to wear the map ... open the right menu, and click on what you want, to load it up.

After that, you'd add a hairstyle that you'd bought ... and change the color of it, to get what you want. So now, you've got the guy, the skin texture and the hair.

How about some clothes? You'll have bought these, downloaded them and installed them. You select the character yo want to wear the jeans, or the jacket, or the teeshirt, then open the correct menu and click to load up the costume.

Now, with the Wood God/Dark Gods packs I just got, it's very similar to this, but the pack comes with more variations than you could shake a stick at. There's leggings *and* a loin cloth *and* a kirtle, *and* the belt, and you can turn each of them into brown leather, tan leather, red leather, chain mail ... and then mix and match the lot. There's fur trim, and a Slane headdress, and a mask, and THEN you get to the axes and swords!

In other words, you would not believe the variety you can get out of the one set of toys ... even before you start to mix and match the bits with other packs. I'll do some extra renders in the days ahead, and show you what I mean...

Christmas came early! New toys, new toys! Cool!

Jade, 1 December

Sunday, November 29, 2009

Model, posing


Today I'm in one hell of a hurry ... no time, not likely to have any time later ... so I'll just post a "beauty" shot here, and run out the door! Thank you, DAZ! In fact, this took about 10 minutes ... it's Michael 4, obviously; wearing Mario's Hair set to raven black (surfaces tab), and a stock pose in which all I did was turn the head a bit and close the eyes to make him look less like a zombie. He's wearing the speedoes from the Basic Wear clothing pack, with the color set to something like crimson (surfaces tab!) and where I really spent the time was on the lights.
The background is just a snapshot of a wineglass, with a "whirl" applied, and set to the right size. The lights are what make the picture: I set a distant light and three point lights -- white (and dim) to highlight his face, green before and beneath him, crimson off his left shoulder. Then this was rendered and shipped into Micrographx to have its lens flare effects added -- that's one of the fantastic filters on Microgtaphx Picture Publisher 10.
Then, copy/paste the whole shebang into Serif X3 to have the bounding box and signature added, and ... done! Upload quick, and run out the door. here I go, guys ... back tomorrow!

Saturday, November 28, 2009

Spaceport Hotel Rendezvous

A few weeks ago I was wondering, what constitutes a "gay Christmas card" -- take the jacket off the guy, display a handsome torso, and it's gay? Leave the jacket on, and it's not? The question went into the "too hard basket" and I amused myself pursuing a 3D storyline that has what you'd have to call homoerotic undercurrents, or subtexts. This, here, above, would be the next episode, and ... the story so far:


Our hero arrives at the the spaceport ... looking for some dude. Has he taken a job? Is he here to retrieve some property, extract gambling debts, assassinate someone?


Later that evening, after making inquiries, he finds himself at a club ... dance a little, schmooze a little, trawl for information. He meets some dude, some lowlife from the wrong side of some planet's tracks, and pays a few hundred credits to get the info...


And the steer he gets sends him to the High Five Hotel, where he talks his way into one of the fancy, top-deck suites. The guy he's looking for knows his name, but won't let him in without searching him...


And you can bet your bottom dollar the search found the ankle gun as well as the one in the holster; and the three knives in the boots; and the darts in the seams of the pants, and so on. Little wonder our hero winds up down to his jocks ... maybe he shouldn't have thought of that, and not turned up like a walking armory!


But at least the guy he came here to see is satisfied that the guns, darts knives and so forth have been confiscated, and now he'll agree to talk. Question is, is is ready to do business?


So they're talking ... and from the looks of this, a deal is taking shape. Is our copper-topped hero getting the big cheese to cooperate? Can they talk their way to a deal and maybe no shots will be fired? And take a look at the hunk in the smart green jacket. Looks like he has something on his mind...!


Which pretty much brings you back to today's render. Looks like something's goin' on here. Not sure what, but somebody just said something that changed the color of the deal. There's a definite homoerotic subtext here. Of course, I have no idea what -- zip, zero, nada. I think I have half a story going, and it's been suggested to me that I need to get into web comics. 3D Gay Web Comics specifically.

Hmmmm ... matter of fact, that interests me strangely. Of course, I'd need a story first...!

Jade, 29 November

Friday, November 27, 2009

The ultimate cult heroes get new -- 3D -- faces!

At last ... drum rolls, trumpets do their trumpet thing ... I have an image to show that's been ten years in the making. This is the first actual, genuine 3D image of Mel Keegan's classic, cult heroes, Jarrat and Stone, which is close enough to what we've been seeing and trying to nail down in artwork, since about 2000.

If you're a devotee of this acid-burn of an SF "trip" you'll know that we've been through at least three generations of faces since the books started to come out in DreamCraft. And you'll know that Jade has the pleasure and privilege of being Mel Keegan's cover artist ... the downside to which is that I get the responsibility of taking the descriptions of characters the SF cult of NARC has been in love with since 1994, and rendering their faces and forms into a design that brings out what's been in the author's brain for almost two decades.

And it ain't easy. The characters you see above are the closest we've come yet to nailing it, and even these are not 100%, but they're close enough to be damned convincing, and it's time to show these guys off. The characters are EXACTLY as described in the books. Tall, dark and stunning is Stoney -- Captain Jerry Stone. Mean, moody and magnificent is Captain Kevin Jarrat, and you put these two guys together and you get "Jarrat and Stone."

Now, be warned: these are cutting-edge SF novels where every single boundary to every last envelope is being pushed, and I don't just mean science and technology. Human relationships have also been explored to the max -- which means the mass market would hand out a bit of a warning about "gay content." Jarrat and Stone are together, and you known damn' well what together means. So consider yourselves warned. Having dispensed with all that, there's a whole universe you're missing, if you don't know what the hell Jade's banging on about now. If you're "of age" and looking for a hell of a thrill, click this. On the other hand, if you just like looking a beautiful guys, stay on this blog and browse!

Anyway, I've been reading the NARC books again, and I admit without any arm-twisting, my head is in the NARC universe right now ... aboard the carrier NARC-Athena, out there on the frontier colonies a few centuries from now, fighting the Angel War. I just wish Mel Keegan would do a sixth book!.

Jade, 28 November

Thursday, November 26, 2009

Survival Run


This one is actually a pretty complex shot, so I thought I'd upload a set of "progress steps" which should make it easier to visualize the recipe:

Obviously you start with your figure. (Incidentally, click on the filmstrip at left ... it's actually about 500 pixels wide, so you can easily see what's going on there. Also, the finished pic was uploaded at 1000 wide...) You start with a bare stage. Bring in your model, add whatever hair and clothes (or not!) that you want. Change the color of his eyes maybe, and pose him however you want him posed. By this time you ought to know what the background should be. Forest? City street? Docking bay? Okay...

You can pay a fee and download a digital model (which is the best way to go), or you can paint something yourself (also great, but takes a long time), or you can use a digital; photo (also cool, but do some digital effects on it, or it ends up looking "raw" and "fake"), or you can swipe something off the Internet ... in which case, for goodness' sake do SOMETHING with the image to make it different from the work you swiped!! You can flip it left to right; you can swap the colors; you can leech our or super-saturate the colors; you can blur it way down with a median filter. You can take out objects and paint in (or paste in) other objects. You still end up with a "derivative" image, and the original artist could either object or applaud! But at least you did did something rather than just stealing a picture.

Anyway, however you get the background, now the challenge is to set up the lights on the model (in DAZ) to make it look like the character is part of, and belongs in, the background. So you set up some distant lights and point lights of whatever color is right, and render one. Tweak it all till it looks perfect (middle one in the filmstrip). Then open the render in your paintshop program ... I like and recommend Micrographx. And go to town your your filters -- Light Studio and Lens Flare studio.

Keep going till you get exactly what you want, and ... save it. That's another one done!

Jade, November 27

Wednesday, November 25, 2009

Shaman: Conjurer of Storms

I was inspired. This one has to be a contender for the most beautiful render yet ... full of nuance and texture and layers of meaning. It started as a background ... which I admit, was not a photo of mine. I wish it were! So I did loads of things to it, to turn it into full-on artwork rather than just thieving a picture off the internet. The original pic is small, too. My finished artwork is 2000 pixels wide and has had something done to every single pixel.

To get the background, I used Irfanview and Micrographx. Changed the median filter on it, changed the color balance, changed the orientation, painted out a lot of flaws in the original, softened it way down, and so on and on. Result: artwork. I wish I knew who to credit for the original image, but this was just pasted to a weather service page and no one was credited. If you know the artist, give him or her my compliments: fantastic photo which has been turned into something new, and I'd love to give credit for the original, and a backlink...

Next step: take your inspiration and run with it. I looked at this and I saw a shaman, a conjurer of storms. So ... you import an existing model to save some time. The body form I wanted was the bod with a few nice muscles on it, which was used in God of War. In your DAZ, you set up a new project at the exact dimensions of the background image. My image is 2000 x 1500, so I set the size in the "render settings" at 1000 x 750, then set the backdrop as this image. Save it!!! Then, go you go File > Merge, and bring in a model of your choice. Aries was mine -- and he teleported in complete with the fantasy double-ended sword.

Get rid of the sword (highlight it in the scene object list and hit delete. Duh). Pose the model.

Now the real fun begins, because right at this point the picture's flat as the proverbial bickie. It needs something. But what does it need? It's the lighting. Seriously. The default lights don't set up the shot for you, so you have to set your own lights. I did this with two distant lights (one white and very dim, one pale orange and medium dim).

Suddenly you have an image ... and STILL something is missing. Your picture should look something like the second image at the left here. (If you can't see it clearly, click on the image, because I uploaded the whole thing at 900 high, so you can see it properly.)

It's the shadow zones on his back ... they're just a flat black zone, which looks flat when you have a pic that is otherwise textured everywhere. So ... you set a backlight. In fact, I set two, one green (and parked around his butt and lower back) and the other purple and parked around his right shoulder.

And the result is great. The image looks 3D now, whereas the one without the backlight looks 2D, like a painting ... a hell of a nice painting!

Now, the only thing that's missing is a killer border and your signature. So, do your final render and open the image in Serif X3. Pick a font that suits the mood of the piece, set it up with its color and transparency ... and think about what you want for a border. I used a 15 pixel line border on a transparent-fill rectangle, set a bevel on it, gave it an inner shadow, and then set a 2D pattern map to give it some oomph. But you can do anything you like ... that's the beauty of Serif. You could string Christmas lights around the picture, if you wanted to ... please don't!

I have GOT to get some more props. This character would have looked so great with some tattoos and warpaint and bangles and such...

Jade, 26 November

This piece just went on sale at Zazzle -- as a mousepad!
Order it now, for $12.95

Tuesday, November 24, 2009

Incredible Morphing Men (aka Rubber Dudes, aka Guys of 1000 Faces)

Would you believe it's the same model? The big brother is wearing the GQ Event hair, set to blond, and the skinny younger brother is wearing the Mon Chevalier hair set to the same shade. They're also wearing the same skin map ... but there, the similarities end. I changed their faces just enough to make them visibly different, but alike enough to be cousins. Then I loaded up the Morphs++ -- full body morph. One of the morph matters you can use is "definition" and this is used to put ripped muscles on the model. Another model is "thin" (they even have "emaciated" but that one is just plain weird -- you end up with something looking like a professional catwalk model, and they make you shiver) and you can adjust this till you get what you want.

So there you are ... brothers! They have a Scandinavian look, with that pale complexion and the blond eyebrows. I gave them both bright blue eyes to complete the look. So you really have a family resemblance, because they're both the same model.

There's also an "old" morph that you can use to age the model through about 50 years. In this shot, it looks like their gramps turned up to scold the both of them! The next thing you *could* do is get into the hair and make it thinner with a retreating hairline, and make it white or silver or gray. That's quite easy to do, but ... there is nothing more weird in all the world that loading up the "Aged" morph and dragging it out all the way and seeing your 25 y.o. turn into his own grandad! It's a little bit too creepy for me to spend any more time working on this. If I do an aged character, he'll be designed from the ground up as an aged character, maybe for a story or a book cover. That's be different. This one is just another morph on the older brother (top pic), and it's incredibly creepy top watch it take place!

Jade, 25 November

Monday, November 23, 2009

Yaoi beauty ... daydreaming...

This is actually an incredibly simple image where the magic happens in the textures, which are about ten layers deep. The image itself is "just" a Michael 4 with long dark hair, curled into an interesting pose; the high-rez skin map was added, his eyes were closed ... and I confess, I gave him long, curly eyelashes! You can do with with the Morphs++, which let you change every single aspect of the face and body. (Yes, those too.)

Then the fun started --! After the lovely render was done in DAZ the next question was, how to make the image complex and rich. So I matted it onto a gold plate that looks like the image you see at left. Go ahead and click to enlarge it -- I uploaded it at a decent size and resolution. (Incidentally, if you want to use it in your own work, go ahead: these images are so easy to make, it'd be paranoid and dumb for me to object. But a backlink would be nice ... thank you kindly!)

To make the matte you see here -- get into Serif X3. Pull out a rectangle comfortably larger in both axes than the pic you want to mount on it. Set the border at 0. Go into the FX menu and pick the 2D Pattern Map. This will automatically pull up the 2D Bump Map, and 3D lighting.

It might sound complicated but trust me, it's not! The work bench you'll be seeing (including the elements to make up the final picture) will look like this:

Fiddle around with the settings till you get what you want ... play with the tools, see what they do! (I don't often read instruction manuals, have you noticed?!) Eventually you'll wind up with exactly what you want. Now, select the image of our beautiful daydreamed; go into the FX menu and choose Feather. Set it to to the highest it'll go. Park the image on top of the matte; put a signature on the work. Select all and lock 'em together ... export as an image. You're done!

So the magic in this one isn't the image itself, it's in the textures. Also, have a look at the texture of the background behind the daydreamer. I call it "scarlet maelstrom." It's the exact same background used on the render of the blond with the beautiful butt and the leather jacket ... but I put in a swirl, or a twirl, which turns a picture into a corkscrew, then clicked the gamma way down to make it dark and suitable to be used as a background to a dark picture.

Result: nice!

Jade, 24 November

Sunday, November 22, 2009

Yaoi mysticism

Go ahead and click on him ... he's 1000 pixels high, and at full size you can see the beauty. I'm really delighted with this shot, which was done in DAZ Studio 3, Micrographx and Serif X3. I call this one "Yaoi mysticism," because there's something deliciously delicate about this guy, and sensual, and then you get to the magic.

The next question is, how the [expletive deleted] was this done? And how long did it take?

It took about 20 minutes (!) and here's the cookbook method.

Start DAZ and load in a basic Michael 4; give him long hair with the Mon Chevalier hair style; set the color to dark by using your surfaces tab (the default is golden blond). Put a pair of jeans on him, and set the color to black (surfaces tab again). Set the background to black. Now it starts to get more interesting.

You're going to need two props to make the whole thing the same as the above, but at least one to get the neat crystal ball effect. If you can get hold of a "donut" as an .obj file, you can import this. Or you can go to DAZ (see the banner below) and buy some really amazing jewelry, among which there is sure to be a bangle. The plain gold bangle I've been using for ages is just a "donut" made in 3D Studio Max and exported to the OBJ file format, which can then be imported into DAZ. (I just got Hexagon for making models, but I still have to figure out how it works!)

The important prop is the crystal ball. In DAZ, click on Create > New Primitive > Sphere. Then use the controls to scale it to fit as a crystal ball. Then use the surfaces tab to make the color light blue or green, and set the opacity close to zero, which makes the object go transparent.

Position it between the character's hands; put a frown of deep concentration on his face ... so far, so good. The real magic happens when you set up the lights.

This shot was done with one distant light set to dim gold and two spotlights set to dim green. One spotlight was jiggled around till it was actually "inside" the crystal ball. The other was set just outside the glass. Both were VERY dim, and set to "point at" the character's head. Render an image right here, and then adjust the brightness and color of the lights till it looks something like this:
The next thing you want to do is add the razzle-dazzle, and you do this in your photo studio ... if you have Photoshop, bully for you! The rest of us don't have A$1800 to spend on a single prog (and even if I did, I'd use the money to take a holiday in the tropics), so I'm going to tell you how to do this in Micrographx, which costs about forty or fifty bucks (shop around!!), does the same job, does it with a dead-easy interface, works on XP and even Vista. You don't have to have a name like Gates or Murdoch to be able to afford the progs to do this work!

Open your best-so-far render in Micrographx 10. Open the Lens Flare browser (look under "Effects"), and --seriously -- play with the controls till the penny drops about how to use them. You're going to be jiggling flares and rays; you get to change the aspect ratio of the main one, set the length of the ray trail, change the color and brightness and sharpness of everything, decide where in the image the effect is going to be located (x,y controls), and ... lots more elements to play with. Christmas morning came early!

So play with the lens flare till you get exactly what you want, and then save (duh), and start to think about the border. You might not want a border ... I think it enhances the shot. This one was done in Serif X3. Import your best-so-far image to a new publication, and then draw a rectangle the size you want the border to be; set the "fill" at none; use the nodes on the drawn image to set the corner style. Use the Line & Border controls to set the color ... I used golden yellow. Now, click on the FX icon ... add a bevel & emboss to make it look 3D. Now, get into the 2D Bump Map controls ... set the "scale" to small and the "depth" to high, and then choose a pattern from the browser to control how the bump map looks. Play till you get just what you want. Sign the piece; select all objects; lock them together; export as a 200dpi image.

And you're done! If you don't know the software backwards and sideways, you could play happily all afternoon at this. If you do know the software, you can get this 3D painting from concept to "done" in the time it takes your rice to cook in the microwave. I did this last night, while the rice was cooking for dinner.

Yaoi mysticism. Beautiful.


Jade, 23 November

Saturday, November 21, 2009

Immortal

I call this one "Immortal" because I'm thinking of the McLeod cousins, Connor and Duncan, when I look at the city and the sword ... but there's also elements of Daredevil in there ... the rooftops and the night. I got into the lights again with this one. Here's the detail:
You start off with a pretty ordinary Michael 4 and start adding mix-n-match costume bits. For this one, I used the "morphing" leather jacket; the pants and belt from the SF costume I got last week (see Spaceport), Mario's Hair, and the greatsword from the fantasy weapons set. Then I tweaked everything to change colors, textures ... the shoes went black; the pants got full-length and dark blue; the jacket went tan, with a high collar; the sword's detail was recolored.

Then... background. Hmmm. By this time I was already thinking "Highlander," so I wanted a city at night. I lucked out with a Wikimedia shot ... they're mostly public domain, because there's such a ruckus over copyright, derivative works and so on. (Everybody seems to expect to get paid even if 2 square inches of an image were used by someone else, transformed utterly, and the work was done for fun anyway. It's unrealistic. It's impossible.) Anyway, I lucked out with the Wikimedia shot, and then did EVERYTHING to it in Micrographx to get what I wanted. I doubt the person who stood on a rooftop and shot the image would recognize it (but if you do: great work, man, and thanks for making it available in the same spirit the digital art on this blog is made available).

Now, the shot was set up with "render settings" of an aspect ratio of 5:3, which is the same as Super 16mm. So it looks like a frame out of a movie. The hardest thing was resizing the part of the image I wanted to use, to wind up with the right aspect ratio. I did 2500x1500 pixels ... which is 5:3, if you figure you're dividing both side by 500.

Then came the fun part: the lights. This one was done with three lights -- a dim "distant light," which represents the general backwash of light from the world, then two spotlights -- yep, a blue one and a green one, set to left and right of the character. Then I told DAZ to render at 1200 pixels wide, so the image is big enough to see the character's face.

Here's what he looks like from a slightly different angle, before the backdrop and lights were set up:

So there you go ... mix'n'match costumes and props.

I like this hairstyle, too. It's Mario's Hair, and it looks pretty good on most faces ... not the real psychopaths, though. When you start to design evil villains, curly hair just doesn't seem to look right. But that's not the fault of the Mario's Hair! It actually looks good on the female models too.

Not that I've worked much with the female models ... and one more time I'll tell why: because everyone is done pictures of women and girls! Even the female digital artists are doing females. And when males are depicted, they're cartooned or deformed or freaky. There's a huge space to be filled, and I'm plugging the gap, one render at a time. So if it's female characters and digitals you want ... you don't have far to look, but you won't find very many of them on this blog, sorry. This blog is about beautiful guys.

Jade, 21 November

Friday, November 20, 2009

Beauty

I've done a lot of tough stuff and spectacular stuff lately, and I wanted to do something different ... something gentle and beautiful. If this picture tells a story, it's a love story. You might never believe this, but it's the same face as God of War ... just a different expression and different lighting! (They say the camera never lies ... fact is, it never tells the truth these days!)

The most difficult thing about this picture was the lights ... and that was just a question of setting up two distant lights, one dark bronze, one peach pink, and then rotating the model around till the shadows on the side of the face were just right -- and also the highlight in the eyes.

Just plain beautiful. Tells a love story in one frame, doesn't it? This image is screaming to have a story written for it! Talk about inspiration ... makes me wish I was a writer...

Jade, 21 November

Thursday, November 19, 2009

Deep thought and rainbow hues

"Just a beauty shot" today ... an almost abstract figure ... because I'm so short of time, I have to be out that door and gone in about 90 seconds! This piece was done in DAZ and Micrographx, and it was dead simple, though you might not believe it, to look at it!

The process is this: start with a Michael 4; add a hairstyle you fancy (the model arrives bald or buzzcut); don't worry about the face, because you don't see it in this shot. Pose the model and spin it around using the x,y,x "translate" controls, until you get just what you want. Import an abstracty background ... nothing specific, just make sure it's dark, so the it contrasts the figure. Render this ... open the render in Irfanview -- gamma down, and contrast up. Copy/paste it into Micrographx Picture Publisher 10 and apply two filters to it. One: on the Light Studio, pick "Rainbow" and jiggle the settings till you get exactly the effect you want. Two: in the Paint Studio, choose "glow wind" as the filter ... set it up to take effect on the "R" channel (as in, R-G-B, being red-green-blue), and set the intensity level at "1" ... save it. You're done. Seriously.

The effect is fantastic, and the total project took about five minutes. There are two tough spots in this kind of work: 1) "seeing" the picture in your mind's eye, so that you're not just thrashing around among your filters, looking for inspiration, and 2) knowing the software, so you can get exactly what you want...! Like they say to piano students, "prektiz, prektiz, prektiz!"

Jade, 20 November

Wednesday, November 18, 2009

Riding beneath the ringed planet

And now for something completely different. Lately, I've been playing with fantasy (God of War, Quest for Gold and so on), and SF (Spaceport, Land of Fire and others), and I wanted to mix up the genres, see what happens.

Turns out, you're reminded of something like Firefly ... a space western. Or maybe it's something like John Carter of Mars. I dunno what to call it, but I like it! What I did here was to create an Arabian-Mustang crossbreed (shades of Hidalgo!) with a dappled gray coat, ice blue eyes, black mane and tail ... then add Michael 4, wearing a face designed by me. I added the Mon Chevalier hair -- but I made it white, not blond. And the costume is the belt and pants from the SF clothing set -- see the whole ensemble in the Spaceport render.

To get the background, I took a skyscape, cut out a 600x900 swatch of it ... opened it in Irfanview, turned up the green, turned down the red, to get a lovely exotic coloration. Even so, there ain't no ringed planets in the sky around this neck of the woods! So -- a quick Googler image search turned up a halfway right Hubble image of Saturn. Now ... import both images (sky and planet) into Micrographx Picture Publisher. Import the planet into the sky image ... resize it and skew it 30% counter-clockwise. It's still sitting their on a black mat, of course! What you do is change the "merge mode" till the black background vanishes, then add a feather to the "object" (the planet image) so you don't see the border.

Now ... the image should have been done, but I gotta confess, I still don't know how to set up the lights in DAZ, when you have two BIG models -- guy and horse combined. The default lights are just dark, and when you render the shot, even if the pose and all else are perfect, the shot you get is flat and dim. (I've put in the other renders, and the sky backdrop, so you can see what I mean. Sure, sure, if I knew how to set up the bloody lights, I could have called it done right there! But I don't yet, so ...

I rendered the image, and opened it in Micrographx Picture Publisher 10, and got to work on it in the Light Studio. I changed the lighting model to "omni" and then changed the area of intensity to highlight the rider; tweaked the contrast too; and then went into the Lens Flare Studio to add the, uh, lens flare. And the end result is sheer poetry!

Next thing I have GOT to learn is how to set up the damned lights, so I can generate the whole scene in DAZ. Mind you, doing the post work in Micrographx gives you the chance to get really clever and artistic...


Jade, 19 November

UPDATE: two years later, let's do this project over and see what happens...


On August 3, 2011, I was going through some old posts, and came upon this one. I thought, "That was a great idea, but it needed more skill than I had at the time to make it really go -- and also, more resources.

The original version of the post was done with VERY basic resources. Now, I have a great deal more in terms of 3D models, textures and so on to put into this, and I also have dimensions more skill...

This was the whole point of this blog -- to chart my progress from "close to day one" of starting out in 3D and CG, right through into work that looks like this:


See the new version of the "ringed planet" render here , where you can view it at full-size...

Jade, 3 August 2011

Tuesday, November 17, 2009

God of War

Setting up the lights for this wasn't nearly as difficult as I'd thought it was going to be -- this is the model lit by four spotlights against a flat black background. There's a white light on the chest and face, a red light at his right side, low down; then a gold light at his left hip level; and a dim green light to pick out the weapon's upper blade. And yes, the strategically placed weapon is, uh, strategically placed. Is this a knockout, or what?!

I guess this is the point where 3D composition and art really do merge into one, and my hat's off to DAZ ... the software is amazing. It's only taken me (!) 14 weeks to get to the point where I can achieve an image like this without sweating too much blood over it...! (Sound of sarcasm there -- actually, the learning curve isn't steep, it's just relentless. There is SO much to learn, even to get to the point of being able to knock out art like the above -- and I have to add here, this is where the software starts, not ends.

My next assignment is to learn how the Deform tools work; and how to absolutely control the textures of things; and how to make, and apply, my own materials to the models. And how to make models for myself in Hexagon -- not people, but things ... like a goblet, a coffee cup, a fork, jewelry, odds and ends that would really jazz up a scene.

What can I say? It's going to be all kinds of fun.

Jade, 18 November

Monday, November 16, 2009

Hero

This is actually the first stage in a piece that will take a lot of work. Stage one is to import the model (Michael 4, who else?) and also the fantasy weapon; put the Mon Chevalier hair onto said model ... make it chocolate brown. Import the high-rez skin map onto Michael. Set up the Morphs++ body morphs that let you turn an emaciated little ferret into Conan the Barbarian's bigger, brawnier brother. Then, get the fantasy weapon into your warrior's hands ... also scale it, change the shape of it a little. Oh, and give the warrior blue eyes.

Okay, that's Step One complete! The weapon is in his hands -- which was quite a major job. I learned a lot about moving objects around in space, using the x,y and z coordinate system...

Next stage: set up the lights. And that, guys, is a job for another day! I'll take a crack at it tomorrow, and show you a new render. The step after that will be to get a fantastic pose, and let shadow and the strategic placement of the weapon, uh, complete the, um, costume. This model is "complete." I set it (him?) up with anatomical realism. (You can also turn his dangly bits on and off depending on how you want to set up the shot.) I don't actually have a fantasy costume in the "database" yet, but there are some nice ones in the DAZ library. Ancient Egyptian type thing. I ought to get something like that next. For the moment, I don't believe they had the same hangups, 10,000 B.C., that we have today, so ... here he is: Hero, stage one.

Back tomorrow with more!

Jade, November 17

Sunday, November 15, 2009

Relic Raider!

Couldn't resist this ... new toys (again). I got the fantasy weapons set, which gives you the big double-headed ax, and a whopping sword, and a lot more. Boy, are we mixing and matching now! There's the gold bangle you saw in the pet dragon render; and the pants and belt from the "Spaceport" series of images. The weapons set only cost $14.95 ... how could you resist?!

The background is a tourist shot (not mine, alas ... I can wish) of the archaeological exhibits at Karnossos, which I darkened and re-toned, and blurred a little, to make it useful as a background for the, uh, hunk with the battleaxe.

Have I mentioned lately how much fun this is? I'm about to do a very, very complex render. I can see it in my mind's eye, but it's going to be a whale of a job because of the lighting it'll need, not to mention posing and body-designing. The above render was done fast, without any extra lighting -- in fact (being chronically short of time today) what I did was, leave the model on his default lighting, and change the tone of the background to match! Then the logos and border were zapped on with Serif X3,

Go ahead, click on it -- I uploaded it at 1000 pixels wide, to let you get a good look. Nice!

Jade, 16 November

Saturday, November 14, 2009

My Pet Dragon

And here we have the probable end of the Quest for Gold series ... our warrior is home again, with the treasure ... and it turned out the treasure wasn't a chunk of gold the size of your head, it only looked like that. In fact, it was a dragon egg, and it hatched in his backpack as he was getting out of the barbarian temple via the backdoor, with the pygmies shooting blowgun darts at his retreating butt. And five miles into the jungle, where he'd hidden the SUV, he heard sounds coming out of the backpack, and wondered which chicken had gotten in there ... unpacked it and --!! Omigod, there's a baby dragon in there, and a bunch of busted-up eggshells. (And some baby dragon doo, but we won't go there.) And you know the way baby birds and reptiles "imprint" on the first face they see. Way to go ... you just got yourself a baby dragon. Whatchya gonna call him?

Seriously ... the Millennium Dragon is packed on the disk that comes with the book, FIGURES, CHARACTERS AND AVATARS, from DAZ. I couldn't resist installing it yesterday. It's a great little model -- the texture map they supply as part of the original kit is already great. That's what you're seeing here. You can also pay ten bucks and get an extra-detailed map, but I'm actually quite happy with this one. Also, the model is incredibly posable -- you have about 10 places where his tail kinks, and you can do fantastic things with his wings, his tongue ... every joint of every finger and toe can be posed.

So instead of having this one menace a creepy old castle, I made him hatchling sized, and sat him in the palm of the Michael 4, then used Irfanview to get a really RED version of the old standby background I've been using ... rendered it, and -- there you go. My pet dragon. End of the Quest for Gold saga.

Incidentally, as great as this dragon is ($20, and $10 extra for the texture), DAZ have also done the Millennium Dragon 2, which is out of this world, beyond description ... also fifty bucks. He's on my list of "gotta get goodies," but he's going to have to wait till I'm more, uh, financial. He's like this little guy's big brother, and he's awesome.

Jade, November 15

Friday, November 13, 2009

Quest for gold, take two

Another "beauty shot" from the same set as the "Quest for Gold" image ... because I'm flat-out again and desperate for time. I have no chance of making it through my list of jobs for today ... it's 4:05pm already and I have a good three hours worth of work to do before six ...! The numbers don't work out, do they? So --

A beauty shot. It's the same model as you drooled over in the "Blame Boris" render:

The warrior in the Quest for Gold series of images is just blonder. ... white-blond in fact, rather than golden blond (which is easy to do -- you just change the color of the hair to, uh, white, by going into the surfaces tab, selecting the object you want to edit, and choosing the color. You could also make it purple ... in fact, I've done this, and you'd be amazed how well it works. It looks as if someone with very glossy black or mahogany hair is in a mauve or blue light.

So the model loses the jacket and gets the belt back. Lord only knows what storyline would go along with these images, but I can imagine a few! Almost makes me wish I was a writer.

Am trying to knock together a review of the DAZ manual right now -- also a review of the Michael 4 base model. It might take a few days since I'm snowed under with work. Bear with me guys. Thanks! One of the most pressing projects is the ebook version of ICE, WIND AND FIRE, which is launching this weekend:

...I have the upload to manage and the point-of-sale pages to make up, so -- I better get back to work.

Jade, November 14

Thursday, November 12, 2009

Quest for gold: nekkid warrior outshines the treasure

Just a "beauty shot" today, because I'm seriously out of time and don't have the chance to natter as I usually do. Patience people: I'll natter tomorrow. This one was done for a book cover, as you can tell from the dimensions. The figure is Michael 4 (!) wearing the high-res skin map (which you buy separately from the base model ... in fact, the base model is free!) and not much else. The background is a re-saturation of a digital painting I did in Serif some weeks ago. I basically opened the old digital painting in Irfanview and used "swap color" to make a whole new color scheme; then super-saturated the color; then bumped the gamma way down and hiked the contrast way up ... done. This was then saved and imported into DAZ 3D as the backdrop.

I would LOVE to put some jewelry on the model, but right now I don't have the skills to make the bangles and bracelets and stuff in Hexagon (although I have installed it and am looking at the interface and drooooooling), and I don't want to spend much more on my new hobby this side of Christmas.

Don't worry: all these projects are saved as "scenes" and if I do develop the skills to make models such as jewelry, or else I just bite the bullet and buy them, I can always reopen the scenes, add the bangles and such, and generate a whole 'nother painting later.

Gotta run now.

Jade, 13 November (yep, Friday 13th!)

Wednesday, November 11, 2009

The rider from Lothlorien

Today's render is a thing of beauty ... one of Legolas's people, perhaps ... something that just stirred in the heart of Lothlórien. Isn't this one absolutely gorgeous?

It's the same horse model -- the Millennium horse; I put on the blue roan texture this time, and gave him the ice-blue eyes. The rider is -- as always -- the Michael 4 model, wearing a face designed by me, and hair by Neftis Salon (it's the Mon Chevalier hair) with a color set by me by using the surfaces controls. The background is an abstract painting I did in Serif, finished in Micrographx and Irfanview.

(To answer an of-asked questing ... no, I do NOT use Photoshop. Do you know what Photoshop costs??? Yeah, sure, $200 if you're upgrading. And if you're not?? A$1,879.00. They have GOT to be joking. I could take a family on a week's fly-away vacation to Magnetic Island for that!! So I use a set of three programs which, combined, provide everything Photoshop provides, and they cost, all together, A$74. Irfanview is FREE; Serif X3 is $56 at the moment (X4 just came out, so you can get X3 cheaply -- and believe me, it's 200% more than you'll ever need). And for the paint program, I use Micrographx Picture Publisher 7, for which I paid the legal price (!) of A$18 ... if you're rotten enough to cheat the publishers, you can get it free; you can even get Version 10 fee ... but take a tip from me. Version 7 is quite good enough, and it's not kosher to cheat publishers who're offering you top-notch software at weeny little prices! So no, guys. I don't use Photoshop -- and I don't actually consider it brilliant to pay almost two grand for a set of tools, filters, textures and materials, that you can, frankly, piece together for under $100 ... and then spend two years learning the Interface From Hell...! Apologies to all the Photoshop fans. I'm just not one of you -- I couldn't afford to be in the early days when I might have been attracted by the glitzy name! And then I learned the art, and discovered the extent to which you can use other progs, and put the clan on a plane to the tropics instead of paying this price --!!)

Anyway ... the process for creating today's render was this: set up the horse model with the blue roan texture. Set up a previously-designed Michael 4 with "my" face; add the hair, change the color to Legolas-blond. Merge the Michael 4 file with the horse file. Pose the Michael 4 as the rider. Pull out an old digital painting from a couple of months ago; resize it to a square. Apply the Median Filter at max; then sharpen the image to achieve the "painted" look. Save; import this into DAZ as a backdrop. Render the whole thing. Import the render into Micrographx and use the Darken/Lighten paintbrush to put a dark halo around the outside. Copy/paste this into Serif and add the border and the signature. Export as an image ... done!

It might sound complex, but it isn't. You have the programs open, and all you're ever doing is cutting and pasting between them. The only 3D render is done in DAZ; the only export-as-image is done at the very end, in Serif. Also, these are small-overhead programs. They do NOT overtax or crash your system.

So there you go ... the rider from Lothlorien. And ain't he beaut?

Jade, November 12

Tuesday, November 10, 2009

Bareback rider

Are we having fun yet? Seriously! I am having a grand time with the Millennium Horse model. If you saw yesterday's project, I got the horse and the guy realistically into the same shot. Today's project was to get the boy on the horse. The whole thing revolves around really knowing your bones animation. There's a little icon on the icon bar at the top of the screen. Looks like a dogbone, a chew toy. When you click that, it brings the elements in the image alive -- you can select them and move them around with the mouse.

Turned out to be dead easy to get the rider on the horse; and I had the presence of mind to save a separate project while I was there: delete the horse from the scene and save it as Rider-ONLY ... which means I can then (he he he) merge the pre-posed Rider into any new horse scene, and I'm already halfway there to having a mounted horserider.

There were two toughies about this shot, and one was the bloody lighting. I guess I still have a lot to learn about lighting, because I'm still flying Seat of Pants Airlines, making it up as I go along. I know, I know, I know, I bought the damned book, FIGURES, CHARACTERS AND AVATARS, and I assume it's all in there. I just haven't had time to look. Yet. So I just basically fiddle with the lights and look for patterns ... this is how I learn to do things.

The second thing was a lot easier to do -- as soon as I saw the problem. Have a look at yesterday's render. See the shed off to the left, galvo glaring in the sun? Didn't matter in the previous pic, because it's part of the image. But the way I wanted to frame this one up, you had this bright glaring object right on the edge of the shot, which is (to quote James Hook) bad form. To get rid of it, I didn't want to mess about painting ... out of time! ... so I went back into Serif and put in a mask, which is basically a black oval with a fuzzy edge, witting between the border and the shed. It's actually there, you just don't notice it.

And just in case you think the rider is offset to far to *his* right on the horse ... looks are deceiving. Here's the top view, without the background:


So there you go: bareback rider. And you bet your life, it's fun!

Jade, 11 November

Monday, November 9, 2009

A boy and his horse

Got new toys! Actually, I got the Millennium Horse model yesterday -- it's packed on the CD-ROM which is included in the back of the FIGURES, CHARACTERS AND AVATARS book. The package given on the CD has the model itself, plus the "morphs" (these turn the model into everything from a stallion to a mare, a Shetland to a shire horse, and everything in between), and a pack of "poses" (canter, gallop, rear, graze and so on). It's enough to whet your appetite, so you don't think twice about going to DAZ and spending $9.95 on the textures and maps to turn the plastic model into the real thing.

So this morning I got the Millennium Horse Texture Pack 2, which gives you a range of coats and colors at a very cheap price:

I'm genuinely and pleasantly surprise by the quality of what is actually "just" a starter pack. I mean, it's really good -- producing extremely realistic results, and for ten bucks! Of course, you could go ballistic if you were in the mood, and money was no object, and horses were your major turn-on ... see what you can get for $29.95:


...are you gobsmacked yet? I know I am! The textures above are definitely on my list of "gotta get goodies." They're on a list of about 49 other packs, all of which are $25 - $30 a pop, so the whole thing will take quite some time to work through, and in the meantime I have to pay my compliments to DAZ: the affordable starter pack gives you some really good results, for the princely sum of ten bucks.
Today's render took about 20 minutes, including buying, downloading and installing the texture pack for the horse! The hardest thing about it was getting the lights set up ... the horses really, really need to be lit, or they come up d-a-r-k, which isn't going to look good when you introduce a nice bright background like a paddock. I ended up using three "distant lights," a white one, a gold one and a pale green one, and then juggling the intensities of all to make it look like the lad and the horse are in dappled sunlight. Nice effect.
If anyone's interested, the background is the Karka Pavilion area at Belair National Park ... the red channel was intensified to make the colors more golden to match the characters -- this was done in Irfanview. Still in Irfanview, I blurred down the digital image ... digital pics tend to be incredibly sharp, while digital 3D models have a softness about them. Each is fine on its own ... put 'em together and in collaboration they look fake. So you blur the background to match the characters, then balance the colors in the background image to match the lights you set up on the models. Irfanview is by FAR the easiest way to do this. (The image, incidentally, is from DreamCraft Digital Stock. We're reorganizing, and you'll soon be able to access such royalty-free images for about $2.50, by the thousands ... perfect for the backdrops for 3D art like this.)
So I'm as happy as a clam today. The CD also has the Millennium Dog, Cat and Dragon ... but now I have to get some actual WORK done, so I have to stop playing...!
Jade, 10 November

Sunday, November 8, 2009

The Spirit of Winter ... another kind of Christmas angel

I was making Christmas cards again yesterday and someone said to me, what about cards that are non-religion-specific? That got me thinking. According to legend, there's dozens of "magickal babes" being born at the winter solstice ... Mithras and Cernunos being just two. If memory isn't playing tricks on me, Horus was also born at mid-winter.

So how about gay-themed solstice cards?? With this thought in mind, I used the above image twice, and change over the greeting on the second one to read, "Merrie Yuletide."

Folks with sharp eyes will recognise this model as the same dude from the Saxon Hero art. I just gave him white-blond hair and changed the pose a bit. I left the suntan on him. He just looks better as a real palomino.

It was also noted, he should have white-blond body hair ... well, maybe not. I tried that. It looks like fungus! Seriously. You can change the color of anything with the DAZ "surfaces" controls, but there's a time when you shouldn't muck about with it, because the result isn't an improvement. To change the color of objects, open the SURFACES pane; scroll down till you have your item selected, and then, uh, fiddle about with the color. Now, the bit where it gets "interesting" is when you run into the Triple Threat: to really, really control what colors things are going to be, you need tweak about 40 parameters in the Diffuse, Specular and Ambient registers ... inside of which there's also strength, gloss, opacity, and a whole lot more, including indexes or refraction, bump maps, and ... so on. Do I understand all this stuff? Not ... really, not yet. I'm still flying by the seat of the pants and learning this. But --

The DAZ book, FIGURES, CHARACTERS AND AVATARS arrived today!! I already whacked the CD-Rom into the computer and had a mess about with some of the content. They give you the Horse, the Dog, the Cat, the Dragon, and a lot of other content. Boy, do I have some gear to play with now.

The book looks good. About half of this stuff, I've already worked out for myself ... and at least some of the stuff I'm desperate to know ain't in the book at all. I dove into the index, and checked for some key things. They seem to have been omitted. The book looks, at first glance, pretty basic. There's room for a 600pp manual something like the 3D STUDIO MAX BIBLE. Still, it's going to be good having a hard-copy of the book... I did download the PDF version of the guide, but it's 500pp of dense-color content, which would cost about A$60 to print out ... y'know, I never did hit the "print" button. I'd rather spent the sixty bucks on more models.

Speaking of which, I was just asked to do a review of the Michael 4 model, and this is one thing I can do, and speak with a lot of authority, because I've been manipulating this guy (sounds fiendish, I know) since August, and I know every square millimeter of his body. Seriously.

My next post will be a couple more Gay Christmas Cards, with Zazzle links; and then I'll review Michael 4, and after that I should be able to review the book.

Jade, 9 November