Wednesday, February 9, 2011

The case of the disappearing texture set!


Imagine my surprise ... installed and opened a new model from one of my favorite designers and -- no textures! They packed the templates for painting a set of textures, and forgot the ready-made textures. I think, actually, what they did was pack the templates in error, when the textures were supposed to have been packed! The model is Elven Rock, by DM, from Renderosity. Normally DM is absolutely trouble-free. The models are great and there isn't a hiccup. They were batting a thousand till this little hickey.

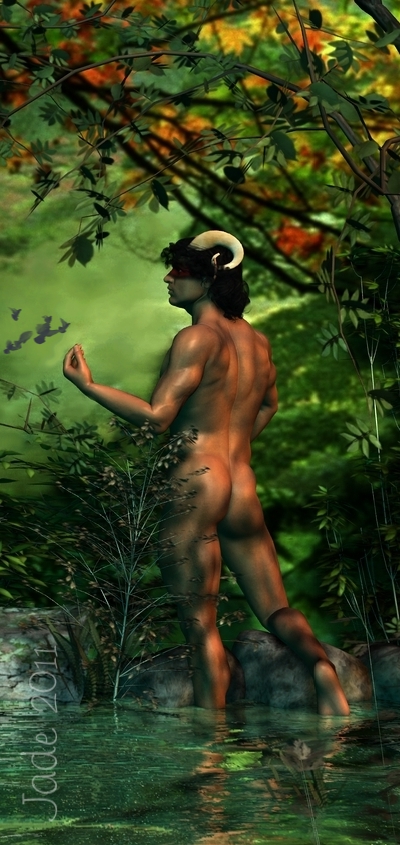
No matter. I've been collecting textures for more than six months now, and making displacement maps to go with them, so I just slapped on a set of my own textures and called it good. And it's a terrific little set. A menhir standing on a big flat rock with some small stones, some plants, some fallen branches. In fact this set will actually break down into its component bits and pieces and add to numerous mix-and-match scenes.

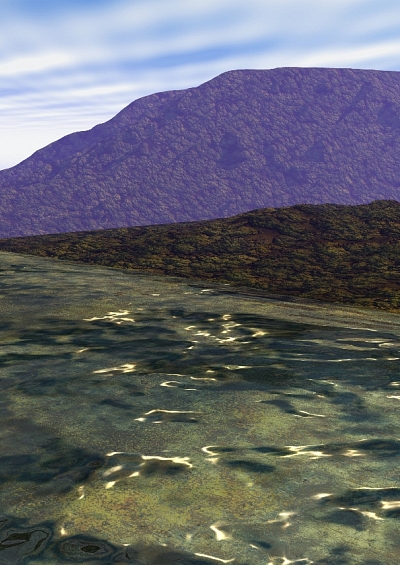
The backdrop is the treeline scene I did the other day, but here I processed it into nighttime. (You do that to an image by flattening the contrast, then taking the gamma way down and un-saturating the colors, then bringing a teeny bit of contrast back up right at the end. You can also add blue to the image, which helps give the illusion of darkness -- but it's a fact that this is just an illusion. Darkness is not actually blue. We just often see it that way because of the way our brains and/or eyes process color.)

The set you see above has the rocks, pebbles and branches form Elven Rock, plus the big ivy thickets from Nike Image's The Path, plus ... well, I want to say the "lamp" from the Pirates of Tortuga set, but the fact is, it's actually a whole honking great street lamp, and what I did was just resize it and bury in in the rock to get rid of the post and footer and make it look like a lantern! I also hand-painted the candle into the lamp housing...


...because the original streetlamp is a gaslamp. There's no candle in it. This is the same lamp I used in the "angel in a bottle" series of renders:


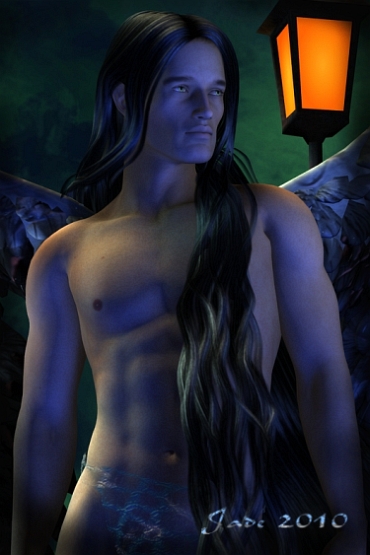
That series of renders is on this blog somewhere, but I've "lost" them! There's almost 500 posts online now, and I confess, I've forgotten half of them. I need to go back and find these, and add a link here. In fact, I need to catalog this blog ... uh huh. Like I'm going to have the time to catalog 500 posts? In which lifetime is this going to happen?!

UPDATE: got it! Angel in a bottle series? No problem. It's called 3D Magicks. Neat!

So anyway, here is the Elven Rock set...


...and it's a great set of "geometries" (meaning, OBJs), but you'll be on your own as per the textures and displacement maps. If you're a newbie, that could be problematical, but you can also cruise this blog (search on the "textures" label) and there's every morsel of info you need about working with textures.

And now, a Jackie Chan movie, which I'm hoping is going to be one of his full-on laugh riots, because that's what I need right now ... gotta see my doctor on the morrow, and I am not looking forward to this. Test results and all that fun stuff.

Jade, 10 February.

***Posted by MK again -- as I've said elsewhere, at the dialup speeds I'm getting, it would take a week to post this. Sigh.

Tuesday, February 8, 2011

Tales of the Riverbank ... water effects ... wow!


(Click to view the above at 800 pixels wide)

Just one image today, folks, because it was ... a bear. The magic is in the water, but the investment of time went into the hand-painted backdrop. The water is what "makes it go," but in fact it wasn't even difficult! But the backdrop was another question. To get a 2D image to reflect in the surface of the water, which is a 3D object (and it does!) it had to be pasted onto a 3D object, and it lost its resolution in some of the pushing and pulling and resizing necessary. Time, for me, is always short, so it was actually easier to do this "the traditional way," and actually hand paint the backdrop after it was in place and rendered. I know this is not the way you do it, or are supposed to do it, but it was the only fix that was going to work in the time window.

The water? No problem. Start with a plane, slap on a texture map which gives it the basic color, and then add a displacement map which changes the shape of the plane. Add a specular color, which tells it what color to gloss up, and crank the reflectivity of the surface, so that it reflects, well, everything. Set the lights ... set the shadows. Render. Whoooo!

For those of you who're "doing DAZ," muddling your way through the learning process like me, here's a note which will be useful. I just discovered a collection of textures which look to be very good, and they're "free for a donation." The water I used in this one is from that collection, and I'll try some more of them in the days to come. They look like they'll be great, and I'll be clicking the creator's donation button. For one thing, he's also made the displacement maps for me, and zipped the whole shebang into a ZIP file. This saves me a job, and as I said above, I never have enough time to spend on artwork. If you're always trawling for textures, try this: Best Free Render Textures.

Otherwise ... the figure, you might recall from the Woodland Creature series of renders. This on, I call "Tales of the Riverbank." Yeah, yeah, like a whole generation of kids I grew up on Hammy Hamster and have fond memories of the voice of Johnny Morris. My gods, that dates me!

Back tomorrow, guys. For now -- dinner!

Jade, 9 February

Monday, February 7, 2011

Bit of this, bit of that ...


Once again, a collection of ends and odds ... but they're nice ones! Haven't been able to look at the screen for long enough to be significant today (migraine type headache when I woke up this morning), so these are a sharing of works in progress and experiments...

TOP: Mick Vidal, Neil Travers and Curtis Marin -- and it's a beauty of a shot. I've uploaded it full size, 1:1, and please do click to see it just as it was rendered. These are three of the central characters from the Hellgate novels -- which are very much on my mind, because the fifth one is coming out soon. Well as soon as Mel Keegan gets the final draft of it into my sticky little hands, and I'm expecting it before long.

MIDDLE: waiting by the sea ... a deceptively simple shot, loaded with textures and surface effects. Took about half an hour to render that simple scene! The set is inside, looking out, of Powerage's Fantasy Structure. It's very "tight" inside, so positioning the camera is a good trick. Also, in this sort of situation you need to remember that in DAZ the camera does actually behave like a camera. You might need to set it on "wide angle" to get it to maneuver comfortably in squeezy spaces.

BOTTOM: an experiment. I've been having shocking luck with rendering trees lately. By the time I get about 5 into any one scene, crrrrraaaasssshhhh!!! So, okay, how do you build a forest if you can't load more than five trees or shrubs into a scene? Well...

A while ago I was on the website of an absolutely fantastic 3D artist, and he had this one image of a deep, deep forest, and as glorious as it was, I could see at once how he'd done it. In layers.
So I ran a QUICK experiment. The proper job would take days, and you'd start with a sketch of what you were trying to achieve in any one layer, and you'd do it in about five layers. I did this in about an hour, just to see if it worked, and if it did, how it worked. Aha. I can do that too. The downside is, this is 3D art that's actually turning itself into 2D art, because by the time you're done with all those layers, and probably doing some Photoshop painting into it as well, one thing you're not going to be able to do is fly the camera around in that shot and shoot your character(s) from ten angles. It's going to wind up as a 2D picture created with 3D software. Which isn't quite what you want to achieve, but ... it's still a really cool picture!

I might vanish tomorrow ... I have the opportunity to try to head for the hills for a few hours, and this would be my first day off in about three weeks! If I don't get up with another monster headache, I'm going to make like the lemon and grab my chance (which might be too abstruse for you. Oscar Wilde: definition of a grapefruit: a lemon that saw it's chance, and took it, or words to that effect).

Like the man said in the movie, "I'll be back."

Jade, 7 February

Saturday, February 5, 2011

Bryce, fantasy, science fiction ... Sunday miscellany


Just a grab-bag today, to show what I've been tinkering with -- the warrior girl with the katana and the Bryce landscape -- plus an extra render of the cyborg character from a few days ago, which was forgotten in the upload. This one was sitting on the desktop, where it shouldn't have been ... easy to overlook.

The small-scale images Blogger pastes into these pages really don't do justice to these pictures, so I'm adding a couple of "detail" shots right here, because I know few people click on a pic to see it at large(r) size...


The warrior girl was a long project, done in Bryce 7 Pro, DAZ and GIMP. The terrain she's kneeling on is, believe it or not, the same terrain that was used in the Bryce landscape here, only rescaled and with fresh mapping! I created this one from scratch, with a hand-painted "terrain map." The textures added for the distance shots are from the Seriously Real set of textures (the Pack 1 & 2 combo, grass, sand and mud). If you're doing Bryce, and like me, you're sweating through trying to learn the Materials Lab and getting nowhere fast even with the instructions (!) you can save a bit of time by buying a pack of pre-set materials. These are $10 from DAZ, and worth twice that much or more. They really make the difference between getting beautiful results and so-so results. One day I'll have that Materials Lab mastered, but it could take a looooong time.

Anyway, I was happy enough with this one mountain to export is as an OBJ, and having done that, you can then import it right into DAZ. In the warrior girl picture it's used at 1% of its original size, and the textures were changed to rock, with a displacement map made from the hand-painted rock map, so it actually looks pretty darned good.

Then it was all about lights (there are four set on this shot -- one dark brown, one dark green, one blue, one white; and two are casting shadows), and textures on the costume, and reflections and gloss on the sword -- which, incidentally, is Merlin's Katana, a beautiful prop from Renderosity. Then the final render was shipped out to be finished in GIMP with the moon showing through a break in the clouds, a flight of birds, and a gleam off the tip of the sword.

So this one was...

Victoria 4.2 wearing the Yaana skinmap and the Mon Chevalier hair, with a third-party texture added on, "Brass." She's wearing the Chaos Seed boots, the bikini bottom from the Horizon Redux set, and the LM Shadow Dancer shirt ... but I dropped all the original textures and replaced them with a hand-painted one of my own, and then added a leather displacement map made from a digital image of some beat up, uh, old leather! I also changed the eyeballs for the light brown eyes from The Eyes Have it. Then, there's a whole bunch of gnarly old trees from the Gnarly Old Trees set, all positioned in, on and behind my bit of terrain. The background is a blurry, evocative bit of digital airbrushing that I did a long time ago for a couple of renders called The Horse and his Boy. (I also used it as the smoggy alien planet backdrop for the Neil Travers renders! Very versatile bit of airbrushing, that.) The .abr Photoshop brushes were Ron's Birds, and Design Fera's Energy Spheres, and Ron's Bokeh Lightsabre.

So ... Sunday miscellany!

Once again I'm having another rough time with my health, so the inspiration to do anything specific, or big and grand, is evading me, but these are nice.

Jade, 6 February

***Posted by MK again -- as I've said elsewhere, at the dialup speeds I'm getting, it would take a week to post this. Sigh.