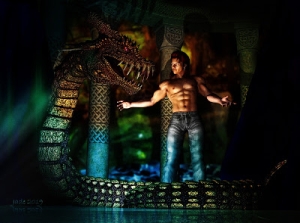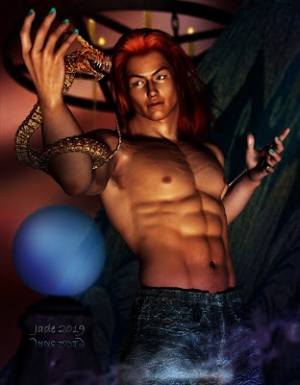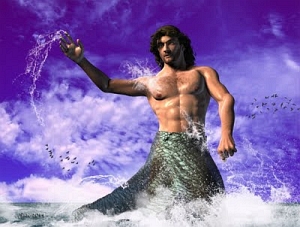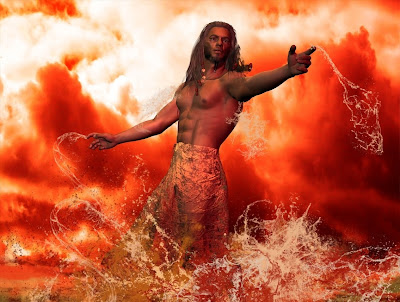
Thanks to the folks who commented and emailed about the Poseidon image from a couple of days ago -- and here, below, is the long post you guys asked for, telling "how to" ... that is, how to go from an idea to the finished painting you see above.
First comes the idea, and you need to have a "snapshot" in your mind's eye. A lot of people actually start sketching at this point, but it's not necessary if you've "seen" the finished image in your imagination, especially if you reckon you can coordinate all the elements to make this go. If you foresee problems, go ahead and sketch! Otherwise jump right in.
I wanted a backdrop that looked like clouds of smoke and steam in a volcano crater, so I started with stormy sky and sized this to what I wanted. The images of Vulcan and Poseidon are 1200 x 900. You can work at any size you like. Small images don't give you enough wiggle room, and large ones can give your computer a hernia, so -- you only need to work out your comfort zone, and you're home. The sky shot I used for the basic background in this piece was taken a few weeks ago, when a bad weather front was coming in. Cropped out of the bottom of the shot were trees and roofs and a jungle gym!(Always have a camera with you, and always be on the lookout for opportunities to grab skies, seas, textures...)

So use your stormy sky as your first layer. or bottom layer, in your Photoshop or GIMP project. Adjust the contras and brightness -- you want it quite contrasty. Then...
Create another layer and bucket fill in to what is going to be a tone halfway between the shadows and highlights of the background you want to to wind up with. In this case, a gold layer will do just fine, since I'm working between reds and dark browns.
Copy the sky into a third layer and colorize it to a fiery red. This is your top layer...
Now, play with the merge modes on the top and middle layers till it looks great. Only you know the effect that's in your mind's eye, but by playing with the color fades and burns and opacities, you'll create 100 effects, and trust me, you'll know what you want when you see it! Now --
Flatten the image to one layer, and paste to new canvas.
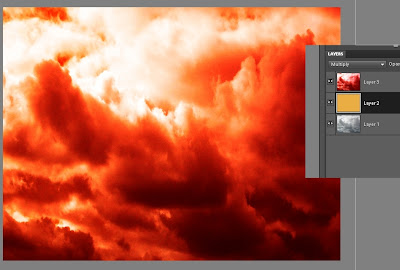
(TIP: Return to old canvas, undo flatten and save the old project as a separate file with all the layers still available. If you do this, you can always return to this stage and rework it if you need to. You're trying to preserve as much of the work as you can at every stage, in case something goes wrong later and you need to go back and paint something again.)
Switch to the NEW canvas to work on from here on. Save OLD project as "Vulcan_0" and save NEW project as "Vulcan_01"
In your new canvas, you have the combo of the stormy sky, the colorized sky and the flat gold layer sandwiched between them. This is the combo create by playing with the merge modes, and then saving the best result as one image.
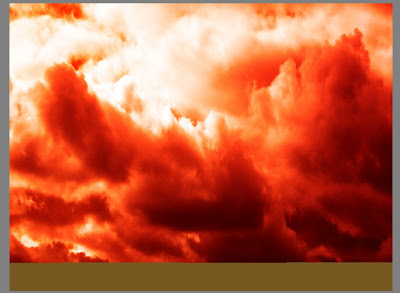
Create a new layer on top of the combo, and paint in the surface of the pool of molten metal as a strip of "median color" to suit the project. This is gold for molten metal. It's just painted with a 200 pixel square brush set on "normal" at 100% opacity. It doesn't look like a crucible, but it will soon!
Create a third layer and now start painting. Use wave brushes to paint in seething lava in base and medium tones. These are the .abr brush sets you can buy -- waves, splashes, water effects, steam, fog, fire, anything like this would give you useful effects. In this one, I used Elements of Nature - Waves (from Renderosity), and Ron's Splashes and Ron's Hydro Explosion (from DAZ).
Paint in three tones, basically: dark, medium and light. Paint till you don't see much of anything of the original gold layer that represented the surface of the molten metal.
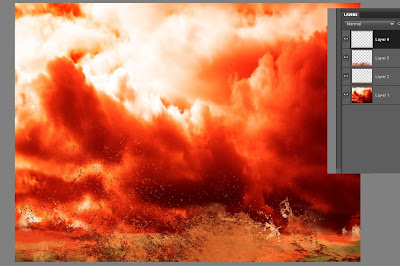
Create as many new layers as you need to control the brushed on affects. You could do one for dark, one for medium and one for the highlights. Or you can combine dark and medium (as I did here), and then do an extra layer for the highlights.
(You can get a lot more mileage out of the .abr brushes in Photoshop than you can in GIMP, because Photoshop allows you to change the angle of the brush ad infinitum. However, Photoshop costs a packet and GIMP is free, so you might prefer to just be clever with the brushes and resources you have at your disposal. I didn't get Photoshop Elements 9 myself till early July, 2011, when GIMP just stopped working for reasons unknown. I would load up a brush, try to paint a stroke with it, and get a crash to the desktop instead. So Dave hunted and kept on hunting till he found PSE9 froma licensed reseller -- for US$60, which is about A$55 right now. I put down the credit card gladly!)
Know when to stop -- your artist's eye will tell you when you've gone far enough! Stop before it turns into a mess, and...
Same as before, flatten this image to one layer and save it. Call it Background.jpg --
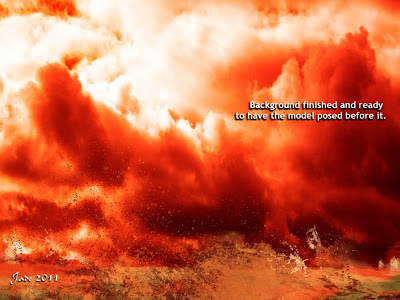
Paste this into a new canvas and save the project as as "Vulcan_02.' Make sure you save the _01 version before you flatten the image, so you can go back and re-work as needed in any layer.
Now you have your background finished, so it's time to switch over to working on the figure!
Set the stage size in DAZ Studio (or Poser etc., whatever you use) to the exact same size as your canvas size from the Photoshop of GIMP project...
Import Michael 4. Work with a plain white background for him at this stage, because there's a few things to do before you bring in the background you just painted, and the simpler the on-screen image is right now, the better...
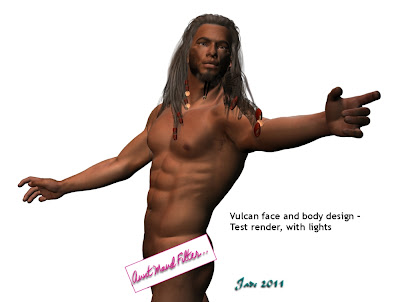
Add skinmap. I'm using the Jackson skinmap.
Design a face or use a third party morph. This face is one of my own face morph designs, which you create using the Morphs++ for Michael 4 package. (Buy this from DAZ, install it, and it pops up automatically. The world of creativity is now at your fingertips!)
Design a body morph or use a third party morph. This one is designed by me -- again, done using the Morphs++ pack.
Save the DAZ (etc.) project often! You have a lot of work invested in this now, and you wouldn't believe the aggravation of losing the whole thing because the PC barfed on a save or a render!!
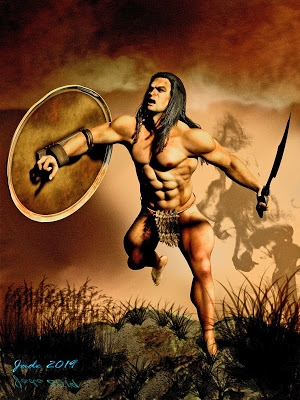
Add a hairdo to suit your character. This one is the Yannis Rasta dreads set to black, and I've been in there and changed the textures on the coins and ribbons. You do this in the Surfaces pane in DAZ ... sorry, I can't help much with Poser because I've never used it! But in DAZ the Surfaces tab is your best bud. Get to know it, and enjoy the freedom to create like you never knew before...!
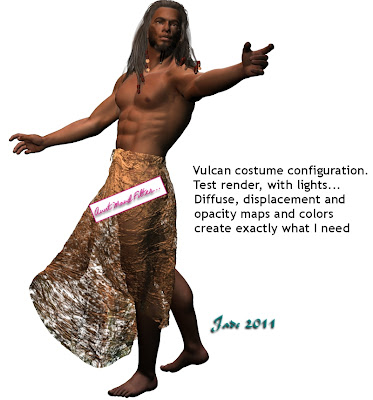
Add a costume. This is the Euros overskirt, from Renderosity. Lots of textures are provided with the model, but with the best will in the world (and not a syllable said against the designer) none of them will suit a project like this. I turned them all OFF as soon as the model was imported. The costume automatically "parents" to the Michael 4 figure, and with colors and textures OFF it reverts to a big lump of white plastic. Now --
Configure the costume -- pose it at the very least. You'll need to work with the "fit" and "movement" morphs provided by the model designer, and swing, bend, twist, pull the costume, till it's doing what you want it to do. Right so far, but it's still white plastic! So...
Add a diffuse map, a texture map, an opacity map, diffuse color, gloss color, to the model. This is not the place to talk about how to use these textures ... this tutorial would go on for days! But elsewhere on the blog I've talked at great length about how to do this. Have a look down the list of tutorials -- you'll soon find what you need! Basically, a diffuse map slaps a digital image of something onto a model. Fire or water or sky, or whatever you like. Then, a displacement map is a pure monochrome image that uses dead black and pure white to decide which bits of the model get pushed up or down. This image uses a digital photo of a fire as the diffuse map, and a monochrome image of scarred metal as the displacement map. There's one more map -- the opacity map. This makes parts of the model disappear altogether. For this image, I used a monochrome image of scummy water as the opacity map! The diffuse and ambient colors are set to white, there's a good bit of gloss on the costume, and the gloss color is set to orange. These colors (diffuse, ambient
and specular, meaning, what color something shines when it glosses up) are set separately from the visible texture map, the displacement map and the opacity map. Combined with the maps, they give you infinite creative control. You can turn a model into leather or silk, at whim...
Now you're ready to pose the figure. Go for it! Get every knuckle joint right where you want it. Flare his nostrils, give him a scowl, whatever you like. Render as you go, make sure everything is looking good. Save it!!
Time to set up the lights now.
The lights need to be tuned according to the color(s) in the background, and you also need to be aware of the direction light is falling from in the background. The light direction will tell you which way shadows need to fall to be convincing. Lighting is a whole 'nother subject, but basically it comes down to the brightness of the light, the direction of the light, the color of it, and whether it casts a shadow (and how hard or soft the shadow is). It's impossible for anyone to tell you how to do this!! Like learning to swim or ride a bike, you have to do it till you can. Have fun with the process -- enjoy.
When the lights look great, it's time to import Background.jpg into DAZ Studio as the, uh, background.
Do a test-render, make sure your lights match the artwork ... do a raytraced one, see if raytracing makes a positive difference. Sometimes the raytraced image is a dimension over the deep shadow map -- sometimes not. Your artist's eye will tell you which to use.
Save the best render (and save the whole project. You're heading back into Photoshop or GIMP now, but you could be back in DAZ to make tweaks later, and if you do need to do this, you'll be so glad you saved the project right now).
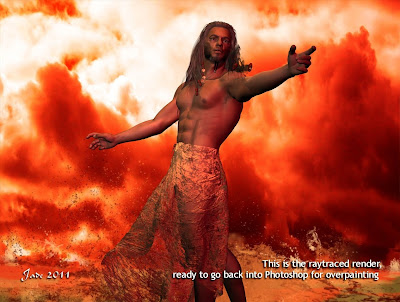
Import this best render into Photoshop as the new base, or bottom layer...
Make a new layer to paint in/on. Use the color picker to borrow colors from the existing painting -- don't try to guess them. What you're paint in now is going to be ON TOP of the character, and so long as it blends perfectly with what's BENEATH him, it's going to look convincing.
In this stage of the image, I'm painting molten metal, and I'm using an .abr brush set called Ron's Hydro Explosion (available from DAZ). You could do worse than watch some video footage of volcanoes seething, or of molten steel in a foundry crucible. Spent a minute or two on YouTube!
Make a new layer whenever you depart from the current kind of brushwork, and always when you're trying something experimental. It's easy to just delete a layer when something didn't work out.
Paint till you're happy with the result, and then flatten the image and save it as a JPEG, ready to share with your friends. You can go on and do more: you can tweak and push and pull the contrast, brightness, shadows, hues, but if you set up your lights properly in DAZ Studio (or whatever) you shouldn't need to. However, a lot of people find it easier to "get close" in the 3D program and then "fix it" in Photoshop. This one is your call. (You might need to do some painting on the figure to get rid of "buckles" in the 3D body caused by posing Michael 4, but if you pose the figure carefully, this might not happen. Be sensitive to the fact his shoulders and elbows can look really weird in some poses. A bit of painting can really help the realism of the finished work.)
So you'll need...
The idea (!)
a sky picture
.abr brushes for water, waves, splashes etc.
Michael 4
skinmap
hair
costume
diffuse, displacement and opacity maps (make your own!)
your artist's eye, plus your 3D model workshop and either Photoshop or GIMP.
And here's where you need to be when finished:

...this took about an hour, plus the amount of time to write this tutorial, obviously. It might take you longer if you're learning the software and process, but you know how familiarity with the work makes everything faster. Enjoy the process -- in all seriousness, if you really love messing about with art, what's not to enjoy?!
Hope this helps!
Jade, 2 August


