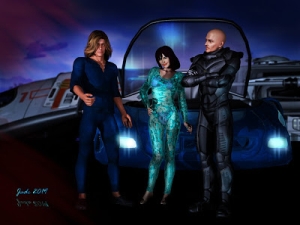
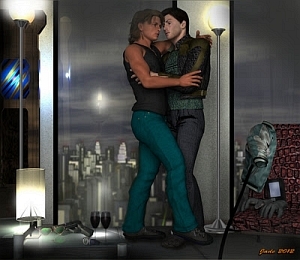
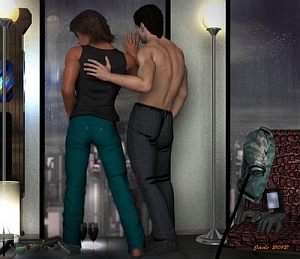
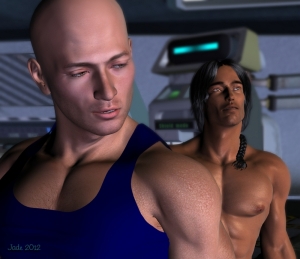
Raytracing ... what in the world is it, what's it all about? In the six months since I started doing this art, I've wanted to run the experiment and see the difference (if any) between the "deep shadow map" that I've been using to generate the shadows on countless hundreds of renders, and the Raytraced shadows. Raytracing is a software rendering "engine" that literally tracks every single ray of light you've got shining on your models, and figures out where they'll all land ... and then calculates in the color and strength of the lights ... and figures out how they'll react when you're bouncing them off surfaces.
No wonder it takes about 10 minutes to render a single image! By contrast, the same image using the Deep Shadow Map system would render in about one minute or less. That system uses at least one "pass" for each light, so if you've set 10 lights, that's 10 rendering passes before you get to the render; and you can also get into the advanced rendering settings and configure it for more than one pass per light.
O...kay. So the big difference is first about time. Don't set your render to Raytrace unless you really are going out for coffee. But then, what's the quality like, when the work is all done?
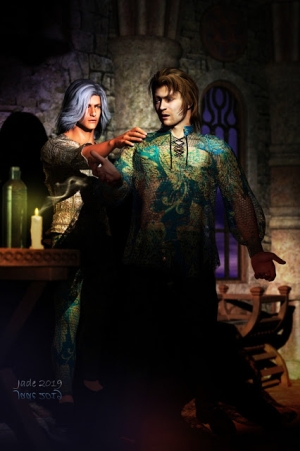
Well, compare these: ( You really need to look at the at large size, so go ahead, click on them -- they were uploaded at 800 pixels wide, so you can see the detail) ...
This one, above, has the Raytraced shadows. This one, below, has Deep Shadow Map:
The difference is amazing -- look at the palomino's tail, also. In fact, there's so much more detail in the Raytraced shadow image that it turns out to be a mixed blessing ... because it shows up bunch of stuff that gets hidden by the lack of detail! (A bit like getting new glasses and noticing your wrinkles and gray hair for the first time. Did I just show my age?)
The only place, to my eye, where this "detail" pic gives away the fact it's 3D is how the fabric folds (or doesn't) around that left elbow. You can fix this, if you have another hour or two to invest in the project. Alas, I don't, so ... it's 3D Art, not photographic realism. What the heck, it's beautiful anyway!
Anyway, if you look closely at the two renders, the Rayrtraced one is so close the photographic levels of realism, that when something is obviously "done digitally," it really sticks out. Now ... you can fix every single little problem in 3D digitals, so your final Raytraced render would end up being so perfect, you could pass it for a photo and nobody would blink. BUT. It takes a lot of work. Instead of getting a new render every day (or a series of them) from me, for instance, you'd wind up with one a week! To fix all the "bugs" you have to fine-tune to a depth you don't see this side of Avatar ... and sometimes this means using Deformers to physically change the model that was delivered by the designer. (Deformers as very distinct from Morphs. You use Morphs all the time; Deformers are very cool, and very complicated.)
So it comes down to ... do you have time for Raytraced renders? Do you have time to spend adjusting the digital details to make them Raytrace-proof? Do you prefer to sweat blood on one perfect image, or get 20 images at 95% perfect, in the same?!
All good questions, and not for me to answer. I think I'll use Raytracing mostly when I do very complex portraits, where it would be so great to see the shadows cast by every eyelash ... that's art! Ars gratia artis, as MGM used to say. (Art for art's sake.)
I want to answer a question in today's post, also. I was asked, "How exactly do you take a photo and turn it into a painting, the way you did with Stampede Trail the other day?"
Fair enough -- good question! It's also dead simple. The only trick is "knowing when to stop" with the process, and that's the same in all kinds of art. Painters who work in oils and watercolors know exactly what I mean. Keep going and going and going, and the painting ends up looking like a flat, boring, muddy mess. Same thing with digital painting ... it's just faster to get the project done. (You can also make HUGE messes even faster ... you'll get intimately acquainted with the UNDO key!)
Here's how you do it:
Start with an image. I used a photo from a 1998 Alaska vacation trip. The location is Stampede Trail, which is not that far from Fairbanks:
The photo is old ... meaning it's a PHOTO, not a digital image. So by the time you see it here it's already been scanned and enhanced. Also resized. But it's still a photo, and we want to wind up with something that looks painted, like this -- and you can't see the effect in this small version!! You need to open them both and compare them at full size to see the effect, so I've uploaded them at full-size here so you can see what I'm talking about...

The only place, to my eye, where this "detail" pic gives away the fact it's 3D is how the fabric folds (or doesn't) around that left elbow. You can fix this, if you have another hour or two to invest in the project. Alas, I don't, so ... it's 3D Art, not photographic realism. What the heck, it's beautiful anyway!
Anyway, if you look closely at the two renders, the Rayrtraced one is so close the photographic levels of realism, that when something is obviously "done digitally," it really sticks out. Now ... you can fix every single little problem in 3D digitals, so your final Raytraced render would end up being so perfect, you could pass it for a photo and nobody would blink. BUT. It takes a lot of work. Instead of getting a new render every day (or a series of them) from me, for instance, you'd wind up with one a week! To fix all the "bugs" you have to fine-tune to a depth you don't see this side of Avatar ... and sometimes this means using Deformers to physically change the model that was delivered by the designer. (Deformers as very distinct from Morphs. You use Morphs all the time; Deformers are very cool, and very complicated.)
So it comes down to ... do you have time for Raytraced renders? Do you have time to spend adjusting the digital details to make them Raytrace-proof? Do you prefer to sweat blood on one perfect image, or get 20 images at 95% perfect, in the same?!
All good questions, and not for me to answer. I think I'll use Raytracing mostly when I do very complex portraits, where it would be so great to see the shadows cast by every eyelash ... that's art! Ars gratia artis, as MGM used to say. (Art for art's sake.)
I want to answer a question in today's post, also. I was asked, "How exactly do you take a photo and turn it into a painting, the way you did with Stampede Trail the other day?"
Fair enough -- good question! It's also dead simple. The only trick is "knowing when to stop" with the process, and that's the same in all kinds of art. Painters who work in oils and watercolors know exactly what I mean. Keep going and going and going, and the painting ends up looking like a flat, boring, muddy mess. Same thing with digital painting ... it's just faster to get the project done. (You can also make HUGE messes even faster ... you'll get intimately acquainted with the UNDO key!)
Here's how you do it:
Start with an image. I used a photo from a 1998 Alaska vacation trip. The location is Stampede Trail, which is not that far from Fairbanks:

The photo is old ... meaning it's a PHOTO, not a digital image. So by the time you see it here it's already been scanned and enhanced. Also resized. But it's still a photo, and we want to wind up with something that looks painted, like this -- and you can't see the effect in this small version!! You need to open them both and compare them at full size to see the effect, so I've uploaded them at full-size here so you can see what I'm talking about...

It's a beautiful effect. So, how's it done? Now, I can't talk you through the process in Photoshop*, because I don't use Photoshop, which I consider to be ridiculously expensive at $1,800. But I can talk you through it in Irfanview, which is free. And the process should be similar or the same in Paintshop, or whatever you're using.
- Open the image you want to turn into a picture.
- Open your effects browser...
- Apply the MEDIAN FILTER in increments, over and over, until the photo has almost (not quite!) turned to colored mush...
- Sharpen the image in small increments, over and over, till you see the painted effect.
- Stop when the effect is "good enough" or what you want or need.
* 2024 Edit: I would eventually switch to Photoshop in around 2014, when I had to buy a new computer, and my trust old 32 bit software ... quit. In later years, I've become rather proficient in Photoshop, and if you're looking at anything from about 2019 onwards, I'm always delighted to talk through how things are done in PS -- there's some landscape tutorials in 2024, for example.
Too much median filter and you won't get the picture back -- it'll turn to mush. Too much sharpening on the way back, and you'll go past the point of having a nice painting, and will "overcook" it and wind up with pixelly rubbish. Deliberately make both the mistakes a few times, and see what happens! You learn better, faster, by seeing the mess and knowing what to avoid. And what the heck, it's digital ... it ain't costing you anything!
Join me tomorrow for a partnership of assassins, a young dancer and a master warrior who're on the same job: regicide in the public interest!
Jade, 7 February
***Posted by MK, because I have no viable connection to the www today.


