


Textures in 3D art are the easiest way to bring things to life -- not just people, but the props and landscapes under and behind them, too. If you're in DAZ Studio 3, all 3D things (people too!) start out as .OBJ files, which are lumps of plastic which can be morphed into all kinds of shapes. What makes them look "real" is the texture(s) you slap onto them. (Click on the pic above to see it at full size ... check out those textures -- even the floor!)
Almost every model you're going to buy from a store like DAZ or Renderosity will come with its own textures. With luck, you'll score 2 or even 3 changes of texture to go along with, say, a shirt or a pair of pants. Then, if you want more (and you always do...) you'll wind up back at the store buying texture packs.
Now, if the packs are made by the designer, they're going to be "made to measure." You'll get fantastic textures made specifically for that one shirt. But ...
Supposing you just want "ordinary" fabrics. And you aren't thrilled about paying another ten or fifteen bucks for six or eight fabric patters. It occurs to you, "I wonder how they make these fabric patterns? I wonder if I could make them?"
And you probably can...
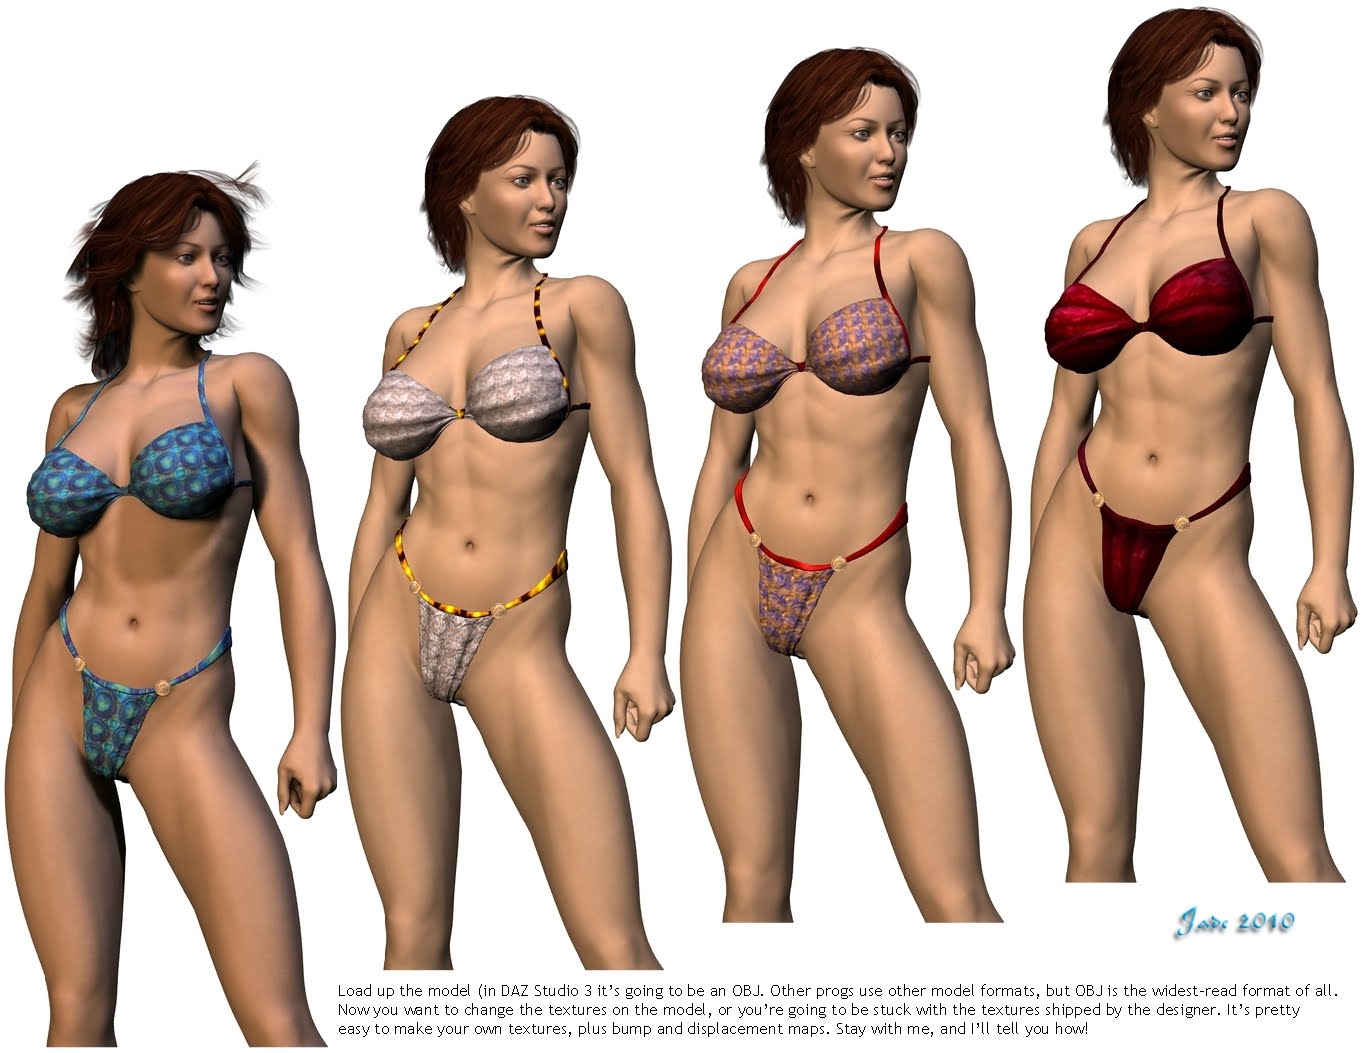 Every fabric pattern in the renders on this page was made by me. And if I hadn't come down sick -- like half of this group! -- it's going around like the plague -- I'd be telling you the whole story today, in fantastic detail, about how to MAKE them as well as use them.
As it is, I'm sneezing by brains out and everything aches, so I'm going to do this over two or three days. I'll make a start today by explaining the process with hints but not too much detail, plus how to to change out textures at whim. I'll add the detail to the story tomorrow!
First of all, you need to have some textures to change to. What you want is to have all your textures to hand ... and so that they don't "tile" when you apply them (that is, come up looking like squares on a bathroom floor), you need to make sure they're "seamless" textures...
 It starts as a singel pattern "module" and these are wallpapered together in something like Photoshop -- or Gimp, which is the free, open source clone of same. You need to wind up with a good-sized square, at least 1000x1000 pixels, so the textures look nice when applied. Too small a square, and you can start to get low-rez appearances.
Here's the trick: how BIG or how SMALL the original pattern appears in the applied fabric, can be adjusted by changing the number of times it appears in your texture square. The more times it shows up in the square, the smaller it'll be when you apply it.
So you can can get a half dozen different effects out of just one seamless background pattern ... and it's going to come out looking something like this:
 So play around and make a bunch of different ones. Store them in their own folder -- on the desktop is handy, because you'll need to be getting back to them when you apply them.
And you apply them by using the Surfaces tab in DAZ Studio 3. In the Surfaces tab, click on the name of the default texture which is used -- this loads along with the OBJ model. Click on the .jpg name of the default texture ... a menu comes up ... click BROWSE. Then, go Desktop > Textures (or whatever you called the folder), and just double-click the one you want to change to.
Shazoom! The texture changes, and it's wall-to-wall, and because it's seamless it looks like fabric. The next thing to think about, though, is how to put some surface texture into this fabric, because right now it looks like a printed plastic bag, right? Not the effect you want? The effect you want is this:

...and if I wasn't about to expire, I'd be telling you how to do it! As I am about to fall face-first into the desk --
Join me tomorrow, and I'll tell you about displacement maps ... what they are, how they work, and (even better) how to MAKE your own!
Jade, 15 April (Anzac Day)


